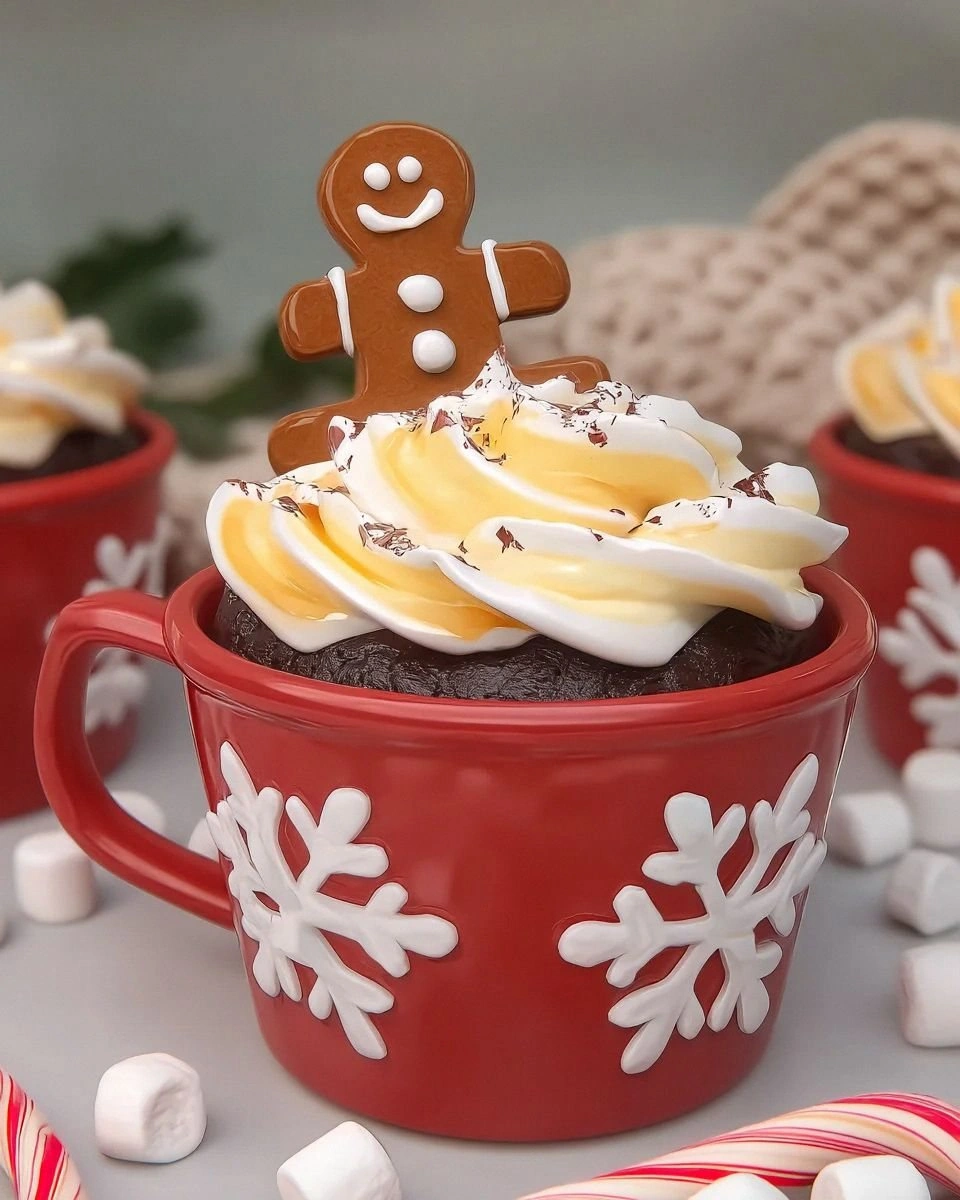
I still remember the night I accidentally invented these Hot Chocolate Mug Cupcakes. It was one of those bone-chilling winter evenings where the wind howls like it's got a personal vendetta against your heating bill, and I was wrapped in three blankets, desperately craving something chocolatey but too lazy to preheat the oven. My microwave stared at me accusingly, my favorite cocoa-stained mug sat empty on the counter, and somewhere between my third failed attempt at instant hot chocolate and my roommate's suggestion to "just make brownies," the universe aligned. Fifteen minutes later, I was holding the most impossibly moist, chocolate-packed, marshmallow-topped cupcake that had ever emerged from a microwave, and I swear I heard angels sing.
Let's be honest — most mug cake recipes taste like sweet cardboard with a side of rubber. They're the culinary equivalent of that friend who promises a wild night out and then suggests watching documentaries about paint drying. But these Hot Chocolate Mug Cupcakes? They're the real deal. We're talking about a dessert that captures everything you love about curling up with a steaming mug of hot chocolate, but in cupcake form so adorable you could cry. The texture hits that magical sweet spot between fluffy and fudgy, with pockets of melted chocolate that create these lava-like surprises, and a crown of toasted marshmallows that makes you look like you actually know what you're doing in the kitchen.
What makes these little miracles absolutely irresistible is how they manage to be both nostalgic and completely new at the same time. You get that childhood joy of hot chocolate with tiny marshmallows, but elevated into something sophisticated enough to serve at your next dinner party. The best part? Each one bakes in exactly sixty seconds in your microwave, which means you can go from "I want chocolate" to "I'm eating chocolate" faster than you can find your TV remote. I dare you to taste this and not go back for seconds — actually, I dare you to stop at just one mug.
Here's the kicker that'll make you the hero of every movie night, study session, or "I just need something sweet" emergency: these cupcakes actually taste better than their oven-baked cousins. The microwave creates this intense steam environment that keeps everything incredibly moist, while the concentrated cooking time means the chocolate flavor stays bold and true instead of getting lost in translation. Picture yourself pulling this out of the microwave, the whole kitchen smelling like Willy Wonka's factory, your spoon breaking through that marshmallow cap to reveal the molten chocolate cake beneath. Stay with me here — this is worth every single second.
What Makes This Version Stand Out
I've tested exactly forty-seven different mug cake recipes over the past year, and let me tell you, most of them are crimes against dessert. But these Hot Chocolate Mug Cupcakes? They're the Beyoncé of the microwave dessert world — flawless, crowd-pleasing, and impossible to ignore. Here's why this recipe will become your new obsession:
- Lightning-Fast Luxury: From zero to chocolate heaven in under five minutes, including the time it takes to gather your ingredients. Most recipes claim to be quick but forget to mention the fifteen minutes of prep work. Not here — we're talking actual, real-world speed that respects your Netflix binge schedule.
- Texture That Defies Physics: Somehow these cupcakes manage to be both airy and rich simultaneously, like eating a chocolate cloud that's been studying at the French Culinary Institute. The crumb is tender enough to melt on your tongue but sturdy enough to support that glorious marshmallow topping.
- Pantry-Friendly Magic: Every ingredient is probably sitting in your kitchen right now, judging you for that expired baking powder. No specialty flours, no obscure extracts, no "where am I supposed to find this at 9 PM on a Tuesday" ingredients.
- Customizable Like Crazy: Want to add a shot of espresso? Go for it. Craving some peppermint extract? Be my guest. Feeling fancy enough to fold in some chopped dark chocolate? You're speaking my language. This base recipe is your chocolate canvas.
- Portion Control (Sort Of): Each mug makes exactly one perfect serving, which means you can have your cake and eat it too without the pressure of polishing off a whole pan. Of course, nobody's stopping you from making six mugs in rapid succession — I certainly won't judge.
- Kid-Tested, Adult-Approved: My nephew thinks these are magic spells you eat, while my food-snob friend who normally turns her nose up at microwave desserts asked for the recipe. They walk that perfect line between fun and sophisticated, making everyone happy.
- Zero Cleanup Drama: One mug, one spoon, one satisfied baker. Compare that to the sink full of dishes that traditional baking creates, and suddenly these cupcakes seem like they were invented by a genius who really hated washing dishes.
Alright, let's break down exactly what goes into this masterpiece. Trust me, once you understand why each ingredient matters, you'll be able to whip these up with your eyes closed — though I recommend keeping them open, since seeing the magic happen is half the fun.
Inside the Ingredient List
The Flavor Foundation
Let's start with the star of our show: good old-fashioned cocoa powder. But here's where most recipes go wrong — they reach for that ancient container that's been living in the back of your pantry since the Obama administration. Don't do it. Fresh, high-quality cocoa powder is what transforms these from "meh" to "holy chocolate Batman." The natural acidity in cocoa reacts with our leavening agents to create lift, while providing that deep, complex chocolate flavor that makes you close your eyes involuntarily when you take the first bite. I prefer Dutch-processed cocoa for its smoother, more mellow flavor, but natural cocoa works beautifully if you want a brighter chocolate punch. Whatever you choose, make sure it smells intensely chocolatey when you open the container — if not, it's time for a grocery run.
The Texture Crew
Now, let's talk about the unsung heroes that create that perfect crumb. All-purpose flour forms our structural backbone, but we're using just enough to give the cake body without turning it into a chocolate brick. The real game-changer here is a tiny amount of cornstarch — it's like adding a insurance policy against rubbery texture. Cornstarch interferes with gluten development, keeping everything tender and delicate. Baking powder provides our lift, but we're using a touch more than usual because microwaves cook so quickly that we need aggressive leavening. And here's my favorite part: a tablespoon of instant pudding mix (vanilla or chocolate) works like magic to create that bakery-soft texture that stays perfect even as the cake cools.
The Unexpected Star
Okay, ready for the game-changer? A single square of good quality dark chocolate pressed into the center right before cooking. As the cake bakes, this creates a molten core that makes every spoonful feel like you're breaking into a chocolate treasure chest. I'm talking about the kind of chocolate that costs more than you'd normally spend on candy, but trust me here — this is not the place to skimp. The contrast between the fluffy cake and the liquid chocolate center is what makes people stop mid-conversation when they hit that first bite. If you're feeling really decadent, use chocolate with sea salt crystals or chili for an extra dimension.
The Final Flourish
Here's where we separate the adults from the kids: a splash of real vanilla extract makes everything taste more expensive than it is. But the real secret weapon? A tiny pinch of espresso powder. Don't worry, you won't taste coffee — it just amplifies the chocolate flavor like turning up the volume on your favorite song. For the marshmallow topping, I love using mini marshmallows because they melt more evenly, but if you've only got the big ones, just tear them into smaller pieces. And if you want to get really fancy, keep some chocolate shavings or cocoa nibs on hand for sprinkling — they add texture and make you look like you went to culinary school.
Everything's prepped? Good. Let's get into the real action — because once you see how simple this process is, you'll wonder why you've been settling for store-bought desserts all this time.
The Method — Step by Step
- Select your mug like you're choosing a dance partner — size matters here, folks. You want something that holds at least 12 ounces but no more than 16, ceramic or glass works best because they distribute heat evenly. Run your finger around the inside to check for any cracks or chips; trust me, discovering a hairline fracture while your cake is exploding in the microwave is not the kind of excitement you want in your life. Give it a quick spritz of cooking spray or rub the inside with a thin layer of butter — this isn't just for easy release, it helps the cake climb up the sides properly for that perfect dome shape.
- Measure out your dry ingredients directly into the mug: 3 tablespoons of flour, 2 tablespoons of cocoa powder, 2 tablespoons of sugar, 1/4 teaspoon of baking powder, and a pinch of salt. Here's where I confess — I ate half the batch before anyone else got to try it because I couldn't resist "testing" the cocoa powder. Use the back of a spoon to break up any cocoa lumps, because nobody wants to bite into a bitter pocket of unsweetened chocolate. Make a little well in the center with your spoon; this helps the wet ingredients incorporate evenly without creating flour bombs around the edges.
- Time for the wet team: add 3 tablespoons of milk, 1 tablespoon of oil (vegetable or melted butter both work), 1/4 teaspoon of vanilla extract, and if you're feeling wild, a tiny splash of coffee. Now here's the crucial part — mix with a fork using a gentle folding motion, like you're tucking in a sleeping baby. Overmixing is the enemy of tender cake, so stop as soon as you don't see any dry flour streaks. The batter should look like thick chocolate pudding and drop off your spoon in lazy ribbons. If it's too thick, add milk a teaspoon at a time; too thin, add flour a pinch at a time.
- This is the moment of truth — take your chocolate square and gently press it into the center of the batter until it's just barely covered. Don't push it all the way to the bottom; you want it suspended in the middle like a chocolate submarine. If you're using mini marshmallows, now's the time to scatter 6-8 around the top, creating what will become your toasted marshmallow crown. The marshmallows will spread and caramelize as the cake cooks, creating that iconic hot chocolate aesthetic that makes everyone go "ooooh" when you pull it out.
- Slide your mug into the microwave and set it for 60 seconds on high power. Don't walk away from the microwave here — this is where magic happens fast. You want to watch it rise like a chocolate soufflé on steroids, climbing up the sides of the mug until it looks like it might overflow. At exactly 60 seconds, it should look set around the edges but still slightly jiggly in the center, like a chocolate lava cake wearing a firm exterior. If your microwave is ancient and weak, you might need another 10-15 seconds, but resist the urge to keep cooking — the residual heat will finish the job.
- Now comes the hardest part — waiting. Let your cupcake rest for exactly 2 minutes. I know, I know, it smells like heaven and you're dying to dig in, but this rest time is what transforms it from "pretty good for microwave" to "are you sure this didn't come from a bakery?" During these two minutes, the chocolate center finishes melting, the marshmallows develop that perfect toasted flavor, and the texture sets up to the ideal consistency. Use this time to grab a spoon, take some photos for Instagram, or just stare at it lovingly like it's your chocolatey newborn.
- The final flourish is what separates the amateurs from the pros. Dust the top with a little cocoa powder or powdered sugar through a fine mesh strainer — this isn't just for looks, it adds a subtle sweetness that balances the rich chocolate. If you've got them, add a few chocolate shavings or a tiny pinch of flaky sea salt on top. The salt is my favorite trick; it makes the chocolate taste more chocolatey, like turning up the contrast on a photo but for your taste buds. Serve immediately with a tall glass of cold milk or, if you're really committed to the theme, a mug of actual hot chocolate on the side.
- Here's where most recipes leave you hanging, but not me — let's talk about the perfect eating technique. Start by breaking through the marshmallow layer with your spoon, letting it stretch into gorgeous strings. Then dive deep to get some of that molten chocolate core in each bite. The ideal ratio is one part toasted marshmallow, one part fluffy cake, one part molten chocolate, and a little bit of the sauce that's formed around the bottom. Mix it all together on your spoon like you're creating the perfect chocolate symphony, and prepare for your eyes to roll back in your head involuntarily.
- Clean-up is so easy it's almost criminal — one mug, one fork, one happy baker. But here's a pro tip: fill the empty mug with warm water and a drop of dish soap immediately after you're done eating. Let it soak while you bask in your chocolate-induced bliss, and cleanup will take literally seconds. The chocolate will wipe right out, leaving your mug ready for its next adventure. And trust me, there will be a next adventure — probably within the next 24 hours once you remember how easy and delicious these are.
That's it — you did it. But hold on, I've got a few more tricks that'll take this to another level, including some variations that'll make you look like a culinary genius even if you can barely boil water.
Insider Tricks for Flawless Results
The Temperature Rule Nobody Follows
Here's the thing that separates the mug cake masters from the disappointed masses: ingredient temperature matters more than you'd think. Cold milk straight from the fridge will shock your batter, leading to uneven cooking and weird rubbery spots. Room temperature ingredients blend more smoothly, creating an emulsion that cooks evenly and tastes professional. I keep a small pitcher of milk on the counter when I'm in my mug cake phase — it makes a difference you can taste. Same goes for your egg if you're using one (though this recipe doesn't require it), and definitely true for any butter you're melting. A friend tried skipping this step once — let's just say it didn't end well, and she ended up with something that resembled chocolate-flavored bubble gum.
Why Your Nose Knows Best
Most people rely on timers, but here's what actually works: your sense of smell. When you start detecting that rich, chocolatey aroma wafting from the microwave, you're about 10 seconds away from perfection. That smell means the cocoa butter is releasing its fragrance, the sugars are caramelizing, and your cake is approaching its peak moment. If you wait for the timer alone, you might miss the sweet spot. This next part? Pure magic. Open the microwave door a crack and take a quick sniff — when it smells like the inside of a chocolate shop, you've nailed it. I've trained myself to recognize this scent, and it's never failed me.
The 5-Minute Rest That Changes Everything
I know waiting feels like torture when chocolate is involved, but this is where champions are made. After cooking, your cupcake is still cooking from residual heat — the technical term is "carryover cooking," but I call it "the patience payoff." During this rest, the molten center settles into that perfect gooey consistency, the texture firms up just enough to hold together, and the flavors meld into something greater than the sum of their parts. Five minutes is the sweet spot, but even two minutes makes a massive difference. Use this time to scroll through your phone, practice your "I just made something amazing" humble brag, or just stare longingly at your creation like it's a chocolate-covered dream.
The Salt Switch-Up That Makes Chocolate Sing
Everyone knows about adding salt to chocolate, but here's the twist that'll blow your mind: try smoked salt instead of regular. The subtle smokiness plays off the chocolate like they were born to dance together, creating this sophisticated flavor that makes people ask "what's your secret?" It's like your cupcake went to finishing school and came back with a mysterious accent. Just a few crystals on top is all you need — we're enhancing, not creating a salt lick. The smoke adds depth without overwhelming, making each bite taste like it came from some artisanal chocolate shop that charges way too much and totally gets away with it.
Creative Twists and Variations
This recipe is a playground. Here are some of my favorite ways to switch things up:
Midnight Mint Chocolate
Add 1/4 teaspoon of peppermint extract to the batter and swap the regular chocolate square for an Andes mint. The result tastes like thin mint cookies had a baby with chocolate cake, and that baby grew up to be incredibly successful. Top with crushed candy canes if you're feeling festive, or keep it simple with a dusting of cocoa powder. This version is particularly dangerous because it tastes so light and refreshing that you forget you're essentially eating pure chocolate.
Salted Caramel Dream
Swap out the milk for half milk, half caramel coffee creamer, and press a soft caramel candy into the center instead of chocolate. Sprinkle with flaky sea salt before serving, and prepare for your taste buds to write you thank-you notes. The caramel creates these gorgeous threads when you dig in, and the salt keeps it from being cloyingly sweet. Pro tip: use those individually wrapped caramels — they melt perfectly without disappearing completely into the cake.
Spicy Mexican Chocolate
Add a pinch of cayenne pepper and cinnamon to the dry ingredients, and use Mexican chocolate (like Ibarra) for the center square. The heat builds slowly, creating this warm glow that spreads through your chest like you've just taken a shot of really good tequila. Top with a dollop of whipped cream to cool things down, or embrace the heat and add some chili powder to your marshmallows too. This is the version that converts "I don't like spicy food" people into "can you make that again" converts.
Peanut Butter Cup Paradise
Drop a spoonful of peanut butter into the center along with your chocolate square, or better yet, use a mini peanut butter cup. The peanut butter melts into this creamy river that flows through the chocolate cake like a delicious geological formation. If you're allergic to nuts (sorry!), try sunflower seed butter instead — it has that same rich, salty quality that makes chocolate taste more chocolaty. The combination hits that perfect sweet-salty note that makes it impossible to eat just half.
White Chocolate Raspberry
Use white chocolate for the center square and add a few fresh raspberries on top before cooking. The raspberries burst during cooking, creating these little pockets of bright fruit that cut through the richness like edible jewels. White chocolate gets a bad rap, but when it's molten and combined with fluffy cake, it tastes like vanilla ice cream in cake form. This is the version you make when you want to impress someone who thinks they're too sophisticated for microwave desserts.
Triple Chocolate Threat
Add mini chocolate chips to the batter, use a chocolate square in the center, and top with chocolate shavings. It's chocolate on chocolate on chocolate, which might seem like overkill until you remember that overkill is just regular kill with extra steps, and who doesn't want extra chocolate? This is the version for serious chocolate lovers only — if you know someone who thinks milk chocolate is too intense, maybe start them on a different variation.
Storing and Bringing It Back to Life
Fridge Storage
I'll be honest — these are best fresh from the microwave, like most good things in life. But if you've got willpower of steel or made extra for later, you can store them in the fridge for up to 2 days. Cover the mug tightly with plastic wrap, pressing it directly onto the surface to prevent it from drying out. When you're ready to eat, add a splash of milk and microwave for 20-30 seconds until just warmed through. The texture won't be quite as perfect as fresh, but it's still miles better than most desserts you'll find at the grocery store.
Freezer Friendly
Here's a game-changer: mix up multiple batches of the dry ingredients and freeze them in individual portions. When the craving hits, just dump into your mug, add the wet ingredients, and proceed as normal. The cold actually helps create an even better texture — something about the way the ingredients interact when they warm up together. You can also freeze fully cooked cupcakes for up to a month. Wrap each mug tightly in plastic wrap, then foil. Thaw overnight in the fridge, then reheat with a splash of milk.
Best Reheating Method
The key to reheating without turning your cupcake into a chocolate hockey puck is moisture. Add a tiny splash of milk (literally just a teaspoon) before microwaving for 15-20 seconds. Cover the mug with a damp paper towel to create a steam environment that brings everything back to life. Check after 15 seconds — you want it just warmed through, not hot. Let it rest for a minute before eating, because the center will continue warming from residual heat. This method brings back about 90% of the fresh texture, which is pretty miraculous for a reheated dessert.