I still remember the day I accidentally knocked a half-empty box of cherry Jell-O into my sugar cookie dough. Flour poofed everywhere, my kitchen looked like a crime scene, and I was ready to trash the whole mess. But something smelled incredible — like summer camp and candy stores had a beautiful, fragrant baby. Ten minutes later, I pulled out the most outrageously colorful cookies I'd ever seen, and my life changed forever.
Since that fateful Tuesday, I've become the neighborhood's unofficial cookie whisperer. Friends text me at midnight begging for "those rainbow crack cookies," and my coworkers have started a rotation system to make sure everyone gets a fair shot at the tin. The secret? We're not just talking about plain sugar cookies with a sad sprinkle on top. We're talking about cookies that burst with real fruit flavor, colors so vibrant they practically glow under kitchen lights, and a texture that manages to be both tender and slightly chewy — like the best edge piece of a brownie married a classic sugar cookie.
Most recipes you'll find online take the lazy route: they dump some vanilla extract into basic cookie dough, maybe toss in a few sad chocolate chips, and call it a day. But here's what actually works — and what I'm about to show you — is using flavored gelatin powders as both your flavor powerhouse and your color source. The result? Cookies that taste like someone managed to bake pure joy into edible form. Picture yourself pulling these out of the oven, the whole kitchen smelling like a fruit orchard mixed with buttery vanilla, and trying to wait the full five minutes before sneaking a bite. Spoiler alert: you won't make it.
Let me walk you through every single step — by the end, you'll wonder how you ever made it any other way.
What Makes This Version Stand Out
Flavor Explosion: Each cookie tastes like its color — the red ones burst with cherry, the orange ones zing with citrus, the purple ones transport you straight back to grape soda on a hot day. It's not subtle, and that's the whole point.
Color That Pops: These cookies don't just look colorful — they look like someone turned the saturation up to eleven. The gelatin powder creates colors so intense, people will swear you used food coloring. Nope, just good old Jell-O doing what it does best.
Foolproof Method: If you can stir and scoop, you can make these. No piping bags, no cookie cutters, no rolling pins collecting dust in your drawer. Just mix, roll in sugar, bake, and watch the magic happen.
Kid Magnet Power: I've never seen a child (or let's be honest, an adult) turn these down. They're like edible confetti that happens to taste incredible. Birthday parties, school events, office potlucks — these disappear faster than free pizza.
Make-Ahead Champion: The dough freezes beautifully for up to three months. Roll it into balls, freeze on a sheet pan, then toss in a bag. When the cookie craving hits at 11 PM, you're ten minutes away from warm, fruity perfection.
Conversation Starter: Everyone asks for the recipe. Everyone. You'll become that friend who always gets asked to bring dessert. Embrace it — just remember to save a few for yourself before they all vanish.
Alright, let's break down exactly what goes into this masterpiece...
Inside the Ingredient List
The Flavor Base
The sugar cookie dry mix is our canvas — it's designed to be mild and sweet, the perfect backdrop for all that fruity flavor we're about to unleash. Think of it as the vanilla ice cream in a sundae: it's not boring, it's strategic. The mix already has the perfect balance of flour, leavening agents, and sugar so we don't have to play chemist in our own kitchen. Skip this and try to build from scratch, and you'll end up with cookies that spread too thin or puff up like sad little cakes. Trust the mix — it's been perfected by people who have way more time on their hands than we do.
Unsalted butter brings the richness that makes these cookies taste like they came from a fancy bakery, not a boxed mix. I specify unsalted because the gelatin powders already have enough sodium to keep things interesting, and we want to control our salt levels like the cookie professionals we are. Make sure it's properly softened — we're talking leave-it-on-the-counter-for-an-hour soft, not I-forgot-to-plan-ahead-so-I'm-microwaving-it soft. The difference shows up in your final texture: properly creamed butter creates little air pockets that make your cookies tender instead of dense hockey pucks.
The Texture Crew
One large egg acts as the glue that holds our colorful dreams together. It's not glamorous work, but without it, you'd have buttery fruit-scented sand. The egg adds moisture and richness, helping create that perfect chewy center while keeping the edges delightfully crisp. Don't try to be healthy and use egg substitute — we're making cookies, not a fitness blog. If you're allergic to eggs, I've had decent luck with a flax egg (1 tablespoon ground flaxseed mixed with 3 tablespoons water), but know that your cookies will be slightly more cake-like.
The Color and Flavor Explosion
Here's where things get wild — we're using six different flavors of gelatin powder to create a cookie rainbow. Cherry or strawberry gives us that classic red that makes people think of summer fruit punch. Orange adds a bright citrus note that tastes like someone distilled sunshine into powder form. Lemon brings the tartness that makes your mouth water just thinking about it. Lime gives us that tropical vacation vibe, while berry blue creates cookies that look like they fell out of a cartoon. And grape? Grape is the nostalgia bomb that takes everyone back to after-school snacks and sticky fingers.
Each powder does double duty: it flavors and colors without any artificial food coloring needed. The colors stay vibrant even after baking, which is some kind of kitchen sorcery I still don't fully understand. If you can't find all six flavors, don't panic — even three colors make a stunning batch. Just don't try to substitute with sugar-free versions; they have different ratios and your cookies will end up tasting like diet sadness.
The Final Flourish
Granulated sugar for rolling might seem optional, but it's what gives these cookies their signature sparkle and slightly crisp exterior. It creates tiny sugar crystals that catch the light and make your cookies look like they're wearing edible glitter. Plus, it adds that satisfying little crunch when you bite through to the tender center. Don't use superfine sugar here — you want the regular stuff with its bigger crystals. And yes, you can mix in some colored sugar if you're feeling extra fancy, but honestly, these cookies are already showstoppers on their own.
Everything's prepped? Good. Let's get into the real action...
The Method — Step by Step
- Start by dividing your sugar cookie dry mix equally into six bowls — we're talking exact portions here, not eyeballing it like you do with pasta water. I use a kitchen scale because I'm that person, but if you don't have one, measure carefully with cups. Each bowl should get about 1/3 cup of the mix. This is the foundation of our color separation, and if you get greedy with one color, you'll end up with a sad, skimpy batch of grape cookies while your cherry cookies overflow the jar. Take the extra thirty seconds to do this right — future you will thank present you when you're not stuck with twenty blue cookies and two sad lime ones.
- Now comes the fun part — add one flavor of gelatin powder to each bowl. Cherry goes in bowl one, orange in bowl two, and so on until you've got six little mountains of flavored potential. Use the whole small box (that's 3 ounces for those keeping score). Don't be shy here — dump it all in. The first time I made these, I tried to be conservative and only used half a box per color. The result? Sad, pale cookies that tasted like someone whispered fruit flavors at them from across the room. We're going for bold or going home.
- Add two tablespoons of softened butter to each bowl. Yes, that's twelve tablespoons total — we're making cookies, not salad. Use a fork to mash the butter into the dry mix until it looks like colorful sand. This step is oddly therapeutic, like making edible zen gardens in miniature. Each bowl will transform from powdery to crumbly, and you'll start to smell the fruit flavors blooming. Cherry will smell like summer camp, orange like a Creamsicle, and grape like every good childhood memory rolled into one.
- Beat your egg in a small bowl, then divide it as evenly as possible among the six mixtures. Here's where it gets messy — use your hands. I know, I know, everyone online uses fancy spatulas, but your hands are the best tool for bringing this dough together. Squish and squeeze until each bowl forms a cohesive, slightly sticky dough. It should feel like Play-Doh that you left out for ten minutes — pliable but not wet. If it's too crumbly, add a teaspoon of water. Too sticky? A sprinkle of flour. Trust your fingers — they know what dough should feel like.
- Scoop out heaping teaspoons of dough and roll them into balls about the size of a large marble. You want them small — they'll spread during baking, and we're going for cute little two-bite cookies, not frisbees. Roll each ball in granulated sugar until it's completely coated. This sugar coating is what creates that gorgeous crackly top that makes people think you're a professional baker with secret training in Paris. Place them on a parchment-lined baking sheet with about two inches between each cookie — they need their personal space.
- Here's the game-changer: chill your dough balls for at least 30 minutes before baking. I stick the whole sheet pan in the fridge and use the time to clean up my disaster zone of a kitchen. This chilling step prevents the cookies from spreading too thin and helps maintain their vibrant colors. The butter firms up, the flavors meld together, and you end up with cookies that are thick and chewy instead of thin and crispy. I've skipped this step in a moment of impatience — trust me, waiting is worth it.
- Preheat your oven to 350°F, and when it's ready, slide in your chilled cookies. Bake for 8-10 minutes, but start checking at 8. You're looking for edges that are just starting to turn golden, centers that are set but still look slightly underbaked, and that magical moment when your kitchen smells like a candy store exploded in the best possible way. The cookies will continue to cook on the hot sheet after you pull them out, so err on the side of underbaking. I've eaten more overcooked cookies than I care to admit because I got distracted by a text message.
- Let them cool on the sheet for five minutes — this is the hardest part. They'll be soft and fragile, like newborn cookies that need a moment to find their strength. Then transfer to a wire rack to cool completely. Or, if you're like me, eat one warm and burn your tongue because patience is for people who don't have fresh cookies calling their name. The flavors intensify as they cool, but there's something magical about that first warm bite when the centers are still gooey and the sugar coating crackles between your teeth.
That's it — you did it. But hold on, I've got a few more tricks that'll take this to another level...
Insider Tricks for Flawless Results
The Temperature Rule Nobody Follows
Your butter should be cool room temperature — think slightly soft but still holding its shape. Too cold and you'll get streaky, uneven cookies. Too warm and your dough will spread into sad, flat puddles. The perfect test? Press your finger into the butter. It should leave an indent but not feel greasy or melty. I set mine out exactly one hour before I plan to start baking, and I've become religious about this timing. Friends who've ignored this advice have ended up with cookies that look like colorful pancakes. Delicious pancakes, but still — we're going for cookie perfection here.
Why Your Nose Knows Best
Don't trust the timer alone — trust your nose. When these cookies are perfectly baked, your kitchen will smell like a fruit stand had a party with a bakery. If you still smell raw dough, give them another minute. If you smell anything approaching burnt sugar, you've gone too far. This might sound like kitchen voodoo, but after your third batch, you'll understand. The scent changes from raw and floury to warm and fruity to caramelized and intense. Each gelatin flavor has its own tell: cherry smells like fruit punch, orange like marmalade, and grape like those popsicles that turned your tongue purple as a kid.
The 5-Minute Rest That Changes Everything
After you pull the cookies from the oven, let them sit undisturbed for exactly five minutes. Not three, not seven — five. This is when the gelatin sets slightly, creating that perfect chewy texture. Try to move them too early and they'll fall apart like colorful cookie confetti. Wait too long and they'll stick to the parchment like they've decided to become permanent kitchen art. I set a timer and walk away, which prevents me from poking them "just to check." A friend tried skipping this step once — let's just say it didn't end well, and she ended up with a sheet pan full of cookie crumbs that still tasted amazing but required a spoon to eat.
The Storage Secret
These cookies stay fresh for an absurdly long time — up to a week in an airtight container — but they taste best within the first three days. The gelatin helps them retain moisture, so they won't go stale like regular sugar cookies. However, the colors do fade slightly over time, so if you're making them for a special occasion, bake them the day before for maximum visual impact. I store different colors in separate containers because I'm that person, but they'll all mingle together just fine if you don't have container OCD like me.
Creative Twists and Variations
This recipe is a playground. Here are some of my favorite ways to switch things up:
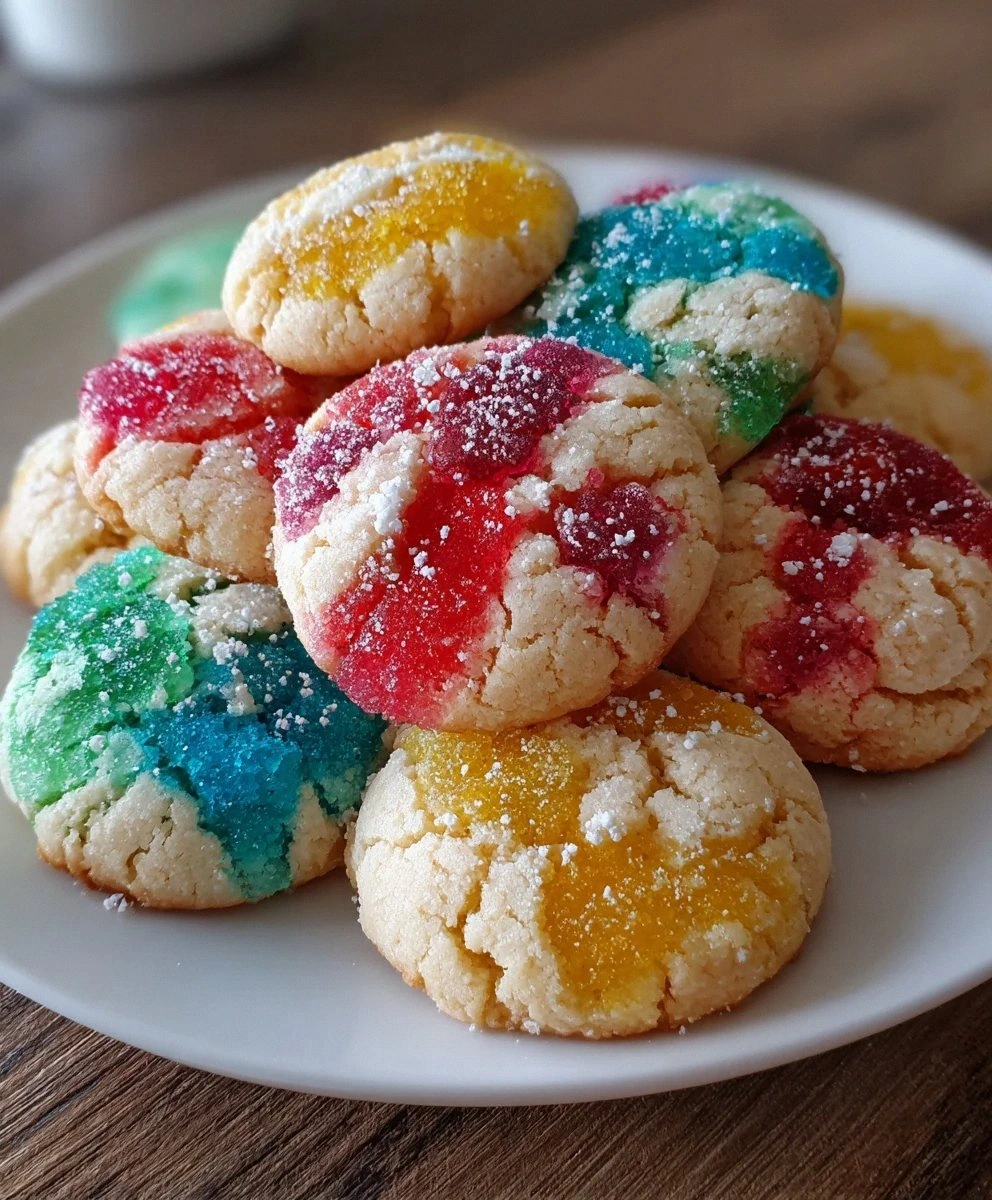
The Tie-Dye Effect
Instead of keeping colors separate, pinch off small pieces from different doughs and gently press them together. Roll into a ball without overmixing — you want distinct color swirls, not brown mush. The result looks like edible tie-dye, and each cookie becomes a unique piece of art. Kids go absolutely bananas for these, and they're surprisingly sophisticated enough for adult gatherings too. The flavor becomes a fruity mystery — you never know if you're getting a cherry-orange burst or a lemon-lime surprise.
The Sandwich Cookie
Make mini versions of these cookies, then sandwich them together with cream cheese frosting spiked with matching gelatin powder. Cherry cookies with cherry frosting? It's like a whoopie pie that fell into a fruit basket. Keep the cookies small — you want two-bite sandwiches, not fruit-flavored hamburgers. These are dangerously good, and I speak from experience when I say it's impossible to eat just one. I brought these to a potluck once and had to physically block people from taking the entire plate home.
The Citrus Burst
Add a teaspoon of fresh citrus zest to match your flavors — lemon zest in the lemon cookies, lime zest in the lime ones. It amplifies the fruit flavor and adds tiny pockets of intense citrus oil that burst when you bite into them. This is especially good with the orange and lemon varieties — it takes them from tasting like fruit candy to tasting like sophisticated fruit desserts. Just don't overdo it — a teaspoon is plenty. I got ambitious once and added a tablespoon of lemon zest. The result was cookies that made your face pucker like you'd bitten into an actual lemon.
The Chocolate Swirl
For the adults in the room, melt some white chocolate and drizzle it over cooled cookies. Then immediately sprinkle with matching gelatin powder — it sticks to the chocolate and creates a flavor-packed topping. The white chocolate adds richness that plays beautifully against the fruity brightness. This is especially good with cherry and orange cookies. The chocolate tempers the sweetness and makes them feel more grown-up, like something you'd serve at a fancy baby shower or bridal brunch.
The Mini Cookie
Roll these into tiny, marble-sized balls and bake for just 6-7 minutes. You end up with bite-sized cookies that are perfect for parties, lunch boxes, or shamelessly popping into your mouth while you pretend to "taste test." They bake faster, so watch them closely. The smaller size also means you get more of that sugar-coated exterior per bite, which is never a bad thing. I make these mini versions for my nephew's kindergarten class — twenty kids, twenty cookies, zero complaints.
The Tropical Mix
Stick to just orange, lemon, and lime for a tropical-themed batch. Add a teaspoon of coconut extract to each dough for a cookies-and-cream tropical vacation vibe. These taste like summer in cookie form, and they're particularly good with a cold glass of milk or a cup of tropical tea. The coconut doesn't overpower the fruit — it just adds a creamy background note that makes everything taste more exotic. My neighbor requests these for her annual luau party, and they've become somewhat legendary in her cul-de-sac.
Storing and Bringing It Back to Life
Fridge Storage
These cookies don't technically need refrigeration, but if you live somewhere humid, the fridge can be your friend. Store them in an airtight container with a sheet of parchment paper between layers — they have a tendency to stick together when cold, and breaking apart a cookie rainbow is tragic. They'll keep for up to two weeks refrigerated, though honestly, they've never lasted more than five days in my house. The cold actually intensifies the fruit flavors, so don't be surprised if they taste even better straight from the fridge.
Freezer Friendly
Both the dough and baked cookies freeze beautifully. For dough, roll into balls, freeze on a sheet pan, then transfer to a freezer bag. They'll keep for three months and can be baked straight from frozen — just add an extra minute or two to the baking time. For baked cookies, layer them in a freezer container with parchment between layers. They thaw in about ten minutes at room temperature, or you can microwave them for 8-10 seconds for that fresh-baked warmth. Pro tip: freeze them in small batches so you're not tempted to eat thirty cookies in one sitting. Not that I'm speaking from experience or anything.
Best Reheating Method
If your cookies have gone slightly stale (though with all that gelatin, it's unlikely), revive them by placing them on a microwave-safe plate with a damp paper towel over them. Microwave for 5-8 seconds — the steam will restore their chewy texture without making them soggy. Don't overdo it or you'll end up with fruit-flavored rubber. You can also warm them in a 300°F oven for 3-4 minutes, which is perfect if you're serving them to company and want that fresh-baked aroma wafting through your kitchen again. Add a tiny splash of water to the baking sheet before reheating — it steams back to perfection.