I still remember the first time I tried to make queso at home. It was a disaster of epic, cheesy proportions. What started as a simple craving for that creamy, melty dip turned into a grainy, separated mess that looked like something out of a horror movie. The mozzarella clumped together in stubborn little balls, refusing to cooperate with the other ingredients. I stood there over the stove, wooden spoon in hand, wondering where it all went wrong. That was three years ago, and I've been on a mission ever since to master the art of queso mozzarella.
Fast forward through countless trials, tribulations, and taste tests (the sacrifices we make for good food!), and I finally cracked the code. The secret isn't in some fancy technique or expensive ingredient – it's in understanding how mozzarella behaves when it's heated, cooled, and combined with the right companions. This queso mozzarella recipe is the result of those years of experimentation, and I dare you to taste this and not go back for seconds. Actually, I dare you to make it for friends and not become the designated queso person for every gathering from here on out.
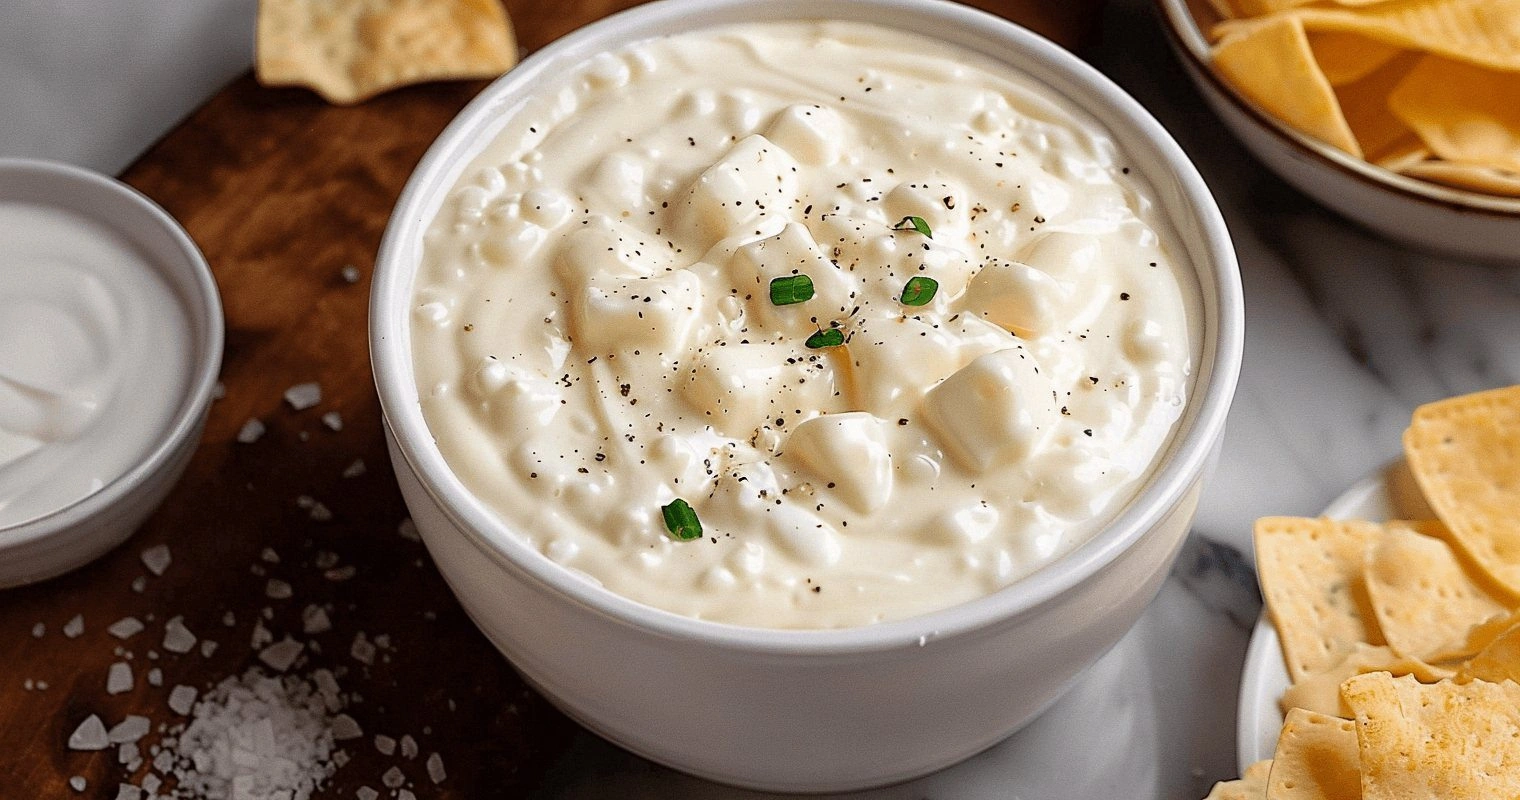
Picture this: you pull a bubbling skillet from the oven, the surface golden and blistered in spots, steam rising in lazy curls. The aroma hits you first – buttery, slightly tangy, with that unmistakable scent of good mozzarella doing what it does best. You spear a tortilla chip and break through that gooey crust, watching as the cheese stretches in impossibly long strands that seem to defy gravity. That first bite? Pure magic. The cheese coats your tongue like liquid velvet, warm and comforting, with just enough bite from fresh jalapeños and a whisper of spice that makes you reach for chip number two before you've even finished chewing the first.
This isn't your average queso recipe. Most versions get this completely wrong – they treat mozzarella like it's cheddar or processed cheese, but mozzarella has its own personality, its own quirks and preferences. When you understand those, when you work with mozzarella instead of against it, you unlock something special. This queso is hands down the best version you'll ever make at home, and I'm not just saying that because I've eaten more of it than I care to admit. Let me walk you through every single step — by the end, you'll wonder how you ever made it any other way.
What Makes This Version Stand Out
Silky Smooth: No more grainy, separated queso disasters. This recipe uses a game-changing technique that keeps the mozzarella emulsified and smooth, even when it cools. The result is a dip that stays luxurious from first bite to last, coating your chips like a cheese sauce born in heaven.
Authentic Flavor: We've borrowed the best elements from traditional Mexican queso fundido and Italian mozzarella mastery. The combination creates something entirely new – a fusion that respects both cultures while creating a flavor profile that's greater than the sum of its parts.
Beginner-Friendly: If you've ever struggled with cheese sauces that break or seize up, you're not alone — and I've got the fix. This method is practically foolproof, with built-in safeguards that prevent the most common queso catastrophes. Even kitchen novices can nail this on the first try.
Customizable Heat: Love it spicy? We've got you covered. Prefer it mild for the kids? Easy adjustment. The beauty of this recipe is that you control the heat level without affecting the texture or fundamental flavor. I'll show you exactly how to dial it up or down.
Crowd-Wowing Presentation: When you bring this to parties, people don't just taste it — they experience it. The way it stretches, the way it bubbles, the way it stays perfectly dippable for hours. I've honestly watched grown adults fight over the last scoop like it was the last lifeboat on the Titanic.
Quality Ingredients Matter: This recipe celebrates good mozzarella instead of trying to mask it. When you start with quality cheese and treat it right, you don't need fancy additives or stabilizers. Just honest ingredients doing what they do best.
Make-Ahead Magic: Here's something most queso recipes won't tell you — this one actually gets better if you make it ahead. The flavors meld and deepen, and with my reheating technique, it's even better the second day. Perfect for party planning!
Alright, let's break down exactly what goes into this masterpiece...
Inside the Ingredient List
The Flavor Base
Fresh mozzarella is the star here, and I cannot stress this enough — don't you dare reach for that pre-shredded stuff in a bag. Fresh mozzarella has a completely different texture and moisture content that makes all the difference. When it's heated gently, it transforms into this impossibly smooth, stretchy wonder that pre-shredded cheese can only dream of becoming. The pre-shredded variety is coated with cellulose to prevent clumping, which ironically prevents it from melting smoothly into our queso. Fresh mozzarella, torn by hand into rough pieces, melts like a dream and creates those Instagram-worthy cheese pulls that'll have your friends asking if you're secretly a professional food stylist.
The supporting cast starts with a sofrito of onions, garlic, and tomatoes. This holy trinity forms the backbone of flavor that elevates this from just melted cheese to something truly special. I like to use sweet onions for their natural sugars that caramelize beautifully, creating depth without overwhelming the delicate mozzarella. Fresh garlic, minced so fine it almost dissolves, adds that aromatic punch that makes people ask "what's in this?" in the best possible way. Roma tomatoes, with their lower moisture content and concentrated flavor, give us that tangy sweetness that balances the richness of the cheese.
Jalapeños bring the heat, but here's where it gets interesting — we're going to char them directly on the burner until the skins blister and blacken. This isn't just for show (though it does look pretty cool). That charring process creates complex, smoky flavors that transform the fresh pepper into something deeper and more sophisticated. The contrast between the bright, fresh heat of raw jalapeño and the mellow, smoky warmth of the charred version is like the difference between a teenager's emotions and a seasoned diplomat's — both have impact, but one is definitely more refined.
The Texture Crew
Heavy cream might seem like overkill when we're already using whole milk mozzarella, but trust me on this one. The cream adds body and richness that prevents the queso from becoming thin or watery as it sits. It's like the difference between a handshake and a proper hug — both are nice, but one is definitely more satisfying. The fat content in the cream also helps stabilize the cheese, keeping everything emulsified and smooth even as the temperature fluctuates throughout your party or dinner.
Cornstarch is our secret weapon, and I know what you're thinking — cornstarch in queso? But hear me out. When mixed with a small amount of liquid, cornstarch creates a slurry that prevents the cheese proteins from seizing up when heated. It's like giving your mozzarella a protective coat of armor before sending it into battle against the heat. Without it, you're playing Russian roulette with your cheese sauce, and trust me, the cheese usually wins that game by turning into a clumpy, grainy mess that no amount of whisking can fix.
Cream cheese might seem out of place in a queso, but it's the glue that holds everything together. Just a small amount stabilizes the entire mixture and adds a subtle tang that complements the mozzarella beautifully. It acts as an emulsifier, preventing the fat and water from separating, which is the downfall of many a cheese sauce. Think of it as the diplomatic mediator between all your ingredients, keeping everyone playing nicely together in the pot.
The Unexpected Star
White American cheese is the curveball that takes this from good to legendary. Before you purists start sharpening your pitchforks, let me explain. American cheese contains sodium citrate, which is basically cheese sauce insurance. It keeps everything smooth and melty, preventing separation even when the queso cools. We're using just enough to stabilize the mixture without overpowering the fresh mozzarella flavor. It's like adding a pinch of sugar to tomato sauce — you can't taste it directly, but you'd miss it if it wasn't there.
The key is using good quality white American from the deli counter, not the plastic-wrapped singles. Ask them to slice it thick so you can cube it yourself. This cheese brings that classic queso flavor that people expect, while the mozzarella adds that artisanal touch that makes them realize this isn't just any queso. It's the best of both worlds — familiar enough to be comforting, different enough to be memorable.
The Final Flourish
Fresh cilantro stems hold more flavor than the leaves and can stand up to heat without turning black and bitter. Chop them finely and add them early in the cooking process so they can infuse their bright, citrusy flavor throughout. Save the delicate leaves for garnish at the end, where they'll stay vibrant and fresh. The stems give you that authentic Mexican flavor that transports you to a cantina somewhere, while the leaves provide that fresh pop that makes the final dish look as good as it tastes.
Lime juice added at the very end brightens everything up and cuts through the richness. But timing is crucial here — add it too early and the acid can cause the cheese to break, but add it right before serving and it lifts the entire dish. It's like adding a spotlight to a stage performance — everything was already good, but now it all just shines a little brighter. Just a teaspoon or two is all you need, but taste as you go because the brightness of limes can vary dramatically.
Everything's prepped? Good. Let's get into the real action...
The Method — Step by Step
- Start by charring your jalapeños directly over a gas burner set to medium-high heat. If you have an electric stove, use a cast iron pan heated until smoking. Place the whole peppers on the burner and let them blister, turning with tongs every minute or so until the skin is blackened and bubbled all over. That sizzle when it hits the pan? Absolute perfection. Don't be shy about getting them really black — this isn't the time for golden brown. You're creating flavor here, and that char is going to add incredible depth to your queso. Once they're properly blistered, pop them into a bowl and cover with plastic wrap for five minutes to steam, making the skins easier to remove.
- While the peppers steam, start your sofrito by heating two tablespoons of butter in a heavy-bottomed saucepan over medium heat. When the butter is melted and just starting to foam, add your diced onions. Here's the key — don't rush this step. Let the onions cook slowly, stirring occasionally, until they're translucent and just starting to turn golden at the edges. This usually takes about 8-10 minutes, and it's worth every second. The slow cooking brings out their natural sweetness, creating a flavor base that will make your queso taste like it came from a restaurant that takes its time with everything.
- While the onions are doing their thing, peel and seed your jalapeños. The skins should slip off easily after steaming, revealing the soft, smoky flesh underneath. Remove the stems and seeds (or leave some seeds if you like it hot), then mince them finely. The smell should hit you immediately — that smoky, slightly sweet aroma that promises good things to come. Add the minced jalapeños to the onions along with the garlic, cooking for another minute until fragrant but not browned. Garlic burns quickly and turns bitter, so keep it moving in the pan.
- This next part? Pure magic. Add your diced tomatoes to the pan, along with a teaspoon of salt. The salt helps draw out the moisture from the tomatoes, creating a sauce-like consistency. Let this mixture cook down for about 5-7 minutes, stirring occasionally, until most of the liquid has evaporated and you're left with a thick, jammy mixture. This is your flavor concentrate — every drop is packed with umami and will infuse your queso with incredible depth. The color should deepen to a rich, dark red, and the mixture should hold its shape when you drag a spoon through it.
- Now comes the moment of truth. Reduce the heat to low and add your heavy cream to the pan. Stir gently to combine with the sofrito, creating a beautiful coral-colored mixture. Here's where most people mess up — they turn up the heat to speed things along, but patience is your friend here. Let the cream warm through until it's just starting to steam, but not boiling. Boiling cream can curdle and create a grainy texture that no amount of cheese can fix. You want it hot enough to melt cheese, but gentle enough to keep everything smooth.
- In a small bowl, mix your cornstarch with two tablespoons of cold water until completely dissolved. This slurry is your insurance policy against a broken queso. Pour it into the warm cream mixture while whisking constantly. You'll notice the mixture thicken slightly — this is good! The cornstarch creates a protective network that will prevent the cheese proteins from seizing up when they hit the heat. Keep whisking for about 30 seconds to make sure it's fully incorporated and there are no lumps.
- And now the fun part — adding the cheese! But wait, there's a specific order that makes all the difference. Start with your cubed white American cheese, adding it a handful at a time and stirring until completely melted before adding more. The American cheese melts first and creates a smooth base for the mozzarella to join. Don't walk away from the stove here — keep stirring gently but constantly. The mixture should stay smooth and glossy, coating your spoon like thick cream. If it starts to bubble too vigorously, reduce the heat further.
- Once the American cheese is fully incorporated and smooth, it's time for the star of the show. Add your torn mozzarella pieces a few at a time, stirring until each addition is melted before adding more. This is where the magic happens — the mozzarella transforms the texture from smooth to luxuriously stretchy. The key is patience and low heat. Too much heat will make the mozzarella rubbery, but gentle warming coaxes it into that perfect melty state. When it's ready, the queso should stretch in long, elastic strands when you lift your spoon.
- Time for the final touches — stir in your chopped cilantro stems and let them infuse for about 30 seconds. Then add your lime juice, starting with just one teaspoon and tasting before adding more. The lime should brighten everything up without making it taste like citrus. Give it a final taste and adjust the salt if needed. The queso should be perfectly balanced — rich and creamy from the cheese, bright and fresh from the lime, with a gentle heat from the jalapeños that builds but doesn't overwhelm.
- Your queso is ready to serve, but here's the pro tip — let it rest for 5 minutes off the heat. This brief rest allows the flavors to meld and the texture to set slightly. It will be temptingly aromatic, but resist the urge to dive in immediately. Transfer to a warm serving dish or keep it in the pan if it's oven-safe. Garnish with fresh cilantro leaves and maybe a few slices of fresh jalapeño for color. Serve with warm tortilla chips, and prepare yourself for the compliments that are about to come your way.
That's it — you did it. But hold on, I've got a few more tricks that'll take this to another level...
Insider Tricks for Flawless Results
The Temperature Rule Nobody Follows
Here's the thing that separates good queso from legendary queso — temperature control. Most people crank up the heat to speed things along, but mozzarella is like that friend who needs gentle coaxing, not tough love. Keep your heat low and steady, around 325°F if you're using an instant-read thermometer. The mixture should steam gently but never boil. Think of it as giving your cheese a warm bath, not throwing it into a hot tub. When you maintain this gentle temperature, the mozzarella melts smoothly without becoming rubbery or stringy. A friend tried skipping this step once — let's just say it didn't end well, and she ended up with something that resembled a cheese-flavored rubber band ball.
Why Your Nose Knows Best
Trust your senses when making this queso — they'll tell you everything you need to know. When the sofrito is ready, your kitchen should smell like a Mexican grandmother's kitchen on Sunday afternoon. The onions should smell sweet and mellow, not sharp or acrid. When you're melting the cheese, it should smell creamy and inviting, never sour or "off." If something smells wrong, it probably is. I've saved many a batch by trusting my nose and adjusting before it's too late. The best part? Your sense of smell gets better with practice, so the more you cook, the more intuitive this becomes.
The 5-Minute Rest That Changes Everything
I'll be honest — I ate half the batch before anyone else got to try it because I couldn't wait for that crucial rest period. But here's why you should resist temptation: those five minutes off the heat allow the queso to thicken slightly and the flavors to distribute evenly throughout. It's like letting a steak rest after cooking — the difference is subtle but significant. The texture becomes more cohesive, less likely to separate, and the flavors taste more married and harmonious. Plus, it's hot enough to burn your tongue immediately after cooking, and nobody can enjoy the nuances of perfectly balanced queso with a scalded palate.
Creative Twists and Variations
This recipe is a playground. Here are some of my favorite ways to switch things up:
The Smoky Bacon Version
Start by rendering four slices of chopped bacon in your pan until crispy. Remove the bacon bits but keep that liquid gold in the pan — that's your new cooking medium for the sofrito. The bacon fat adds incredible depth and a smoky richness that complements the mozzarella beautifully. Stir the crispy bacon bits back in at the end for textural contrast. This version is perfect for game day when you want something that'll stick to your ribs and keep the crowd happy.
The Green Chile Explosion
Replace the jalapeños with roasted Hatch green chiles when they're in season (or good quality canned ones year-round). The earthy, slightly sweet flavor of green chiles creates a completely different flavor profile that's more New Mexican than Mexican. Add a teaspoon of ground cumin to the sofrito for that authentic Southwestern touch. This version pairs beautifully with blue corn chips and a cold beer.
The Truffle Luxe Edition
For a dinner party showstopper, replace the heavy cream with an equal amount of crème fraîche and finish with a drizzle of white truffle oil. The tangy crème fraîche cuts through the richness while the truffle oil adds an earthy luxury that makes this taste like it came from a Michelin-starred restaurant. Garnish with chives instead of cilantro for a French-Mexican fusion that'll have your guests talking for weeks.
The Breakfast Champion
Add a cup of sharp cheddar to the mozzarella mix and stir in some cooked chorizo. Serve this over breakfast tacos or as a dip for hash browns. The combination of cheddar's sharpness with mozzarella's creaminess, plus the spice from chorizo, creates the ultimate hangover cure. I've served this at brunch and watched people who claimed they weren't hungry suddenly discover their appetite.
The Mediterranean Mash-Up
Swap the jalapeños for roasted red peppers and add a teaspoon of smoked paprika to the sofrito. Use fresh oregano instead of cilantro, and finish with a drizzle of good olive oil. The result is a queso that tastes like it spent a summer in Spain before settling in Mexico. Serve with pita chips for a fusion that shouldn't work but absolutely does.
The Vegan Victory
Okay, I know this sounds like heresy in a mozzarella queso recipe, but hear me out. Replace the dairy with cashew cream, nutritional yeast for umami, and use a combination of tapioca starch and potato starch to recreate that stretchy texture. The flavor won't fool a cheese connoisseur, but it's surprisingly close and lets everyone enjoy the party. Plus, it's actually pretty darn good in its own right.
Storing and Bringing It Back to Life
Fridge Storage
Leftover queso (if such a thing exists in your house) stores beautifully in an airtight container in the refrigerator for up to five days. The key is letting it cool completely before refrigerating — hot queso in a cold fridge creates condensation that can make it watery. Press plastic wrap directly against the surface to prevent a skin from forming. When you're ready to reheat, transfer it to a saucepan and warm it slowly, stirring constantly. Add a splash of milk or cream if it seems too thick — it will have thickened considerably in the fridge.
Freezer Friendly
Here's something that might surprise you — this queso freezes remarkably well. Portion it into freezer-safe containers, leaving about an inch of headspace for expansion. It'll keep for up to three months in the freezer. The texture might be slightly different after thawing, but a gentle reheating with a bit of cream brings it right back to life. Pro tip: freeze it in ice cube trays for single-serving portions that you can thaw quickly for midnight queso cravings. Future you will thank present you for this level of planning.
Best Reheating Method
The microwave is your enemy here — it'll heat unevenly and can cause separation. Instead, use the stovetop method with patience as your guide. Place the queso in a heavy-bottomed pan over low heat, stirring frequently. Add a tiny splash of water before reheating — it steams back to perfection. The water creates steam that helps loosen the mixture without diluting the flavor. If it looks grainy, whisk in a teaspoon of cream cheese and watch the magic happen as everything smooths out again. Serve it hot and bubbly, just like the first time around.