I still remember the first time I attempted an egg custard pie. It was a rainy Sunday afternoon, the kind that makes you want to curl up with something warm and nostalgic. My grandmother used to make this pie every holiday season, and I thought, how hard could it be? Well, let me tell you — I ended up with a watery, curdled mess that looked more like scrambled eggs floating in milk than the silky slice of heaven I remembered. The kitchen smelled like sweet disappointment, and I was ready to throw in the towel. But something about that failure lit a fire in me. I spent the next six months testing, tweaking, and obsessing over every variable until I cracked the code.
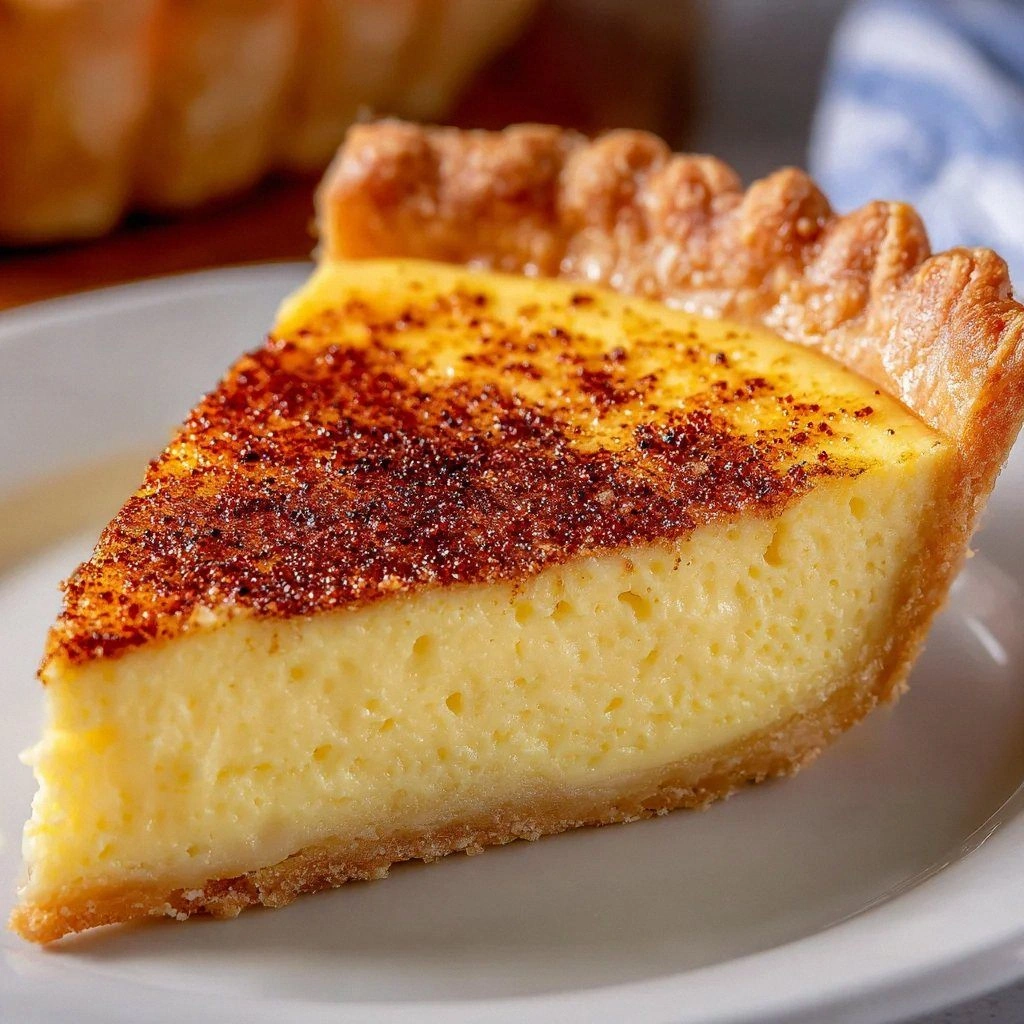
What I discovered is that most recipes treat egg custard pie like it's some delicate, fussy aristocrat that needs coddling. Wrong. This pie wants confidence. It wants you to whisk like you mean it, to trust your instincts, and to stop peeking at it in the oven every thirty seconds. When you treat it right, it rewards you with the most incredibly smooth, velvety texture that jiggles like a dream and tastes like pure comfort. The edges of the crust shatter like thin ice under your fork, giving way to a custard that's set just enough to hold its shape but melts on your tongue like silk.
Picture yourself pulling this out of the oven, the whole kitchen smelling like vanilla clouds and warm nutmeg. The surface trembles slightly, promising the perfect custard texture beneath. I dare you to taste this and not go back for seconds — actually, I dare you to make it through the cooling period without sneaking a spoonful. I've made this pie for church suppers, birthday parties, and quiet Tuesday nights when I needed a hug in dessert form. Every single time, someone asks for the recipe, and every single time, they can't believe how simple it really is once you know the secrets.
Here's what actually works: room temperature eggs that blend seamlessly, whole milk for that rich mouthfeel that makes skim milk taste like sad water, and a generous hand with the nutmeg. Most recipes get this completely wrong — they treat nutmeg like an afterthought, but it's the co-star of this show. Stay with me here — this is worth it. Let me walk you through every single step — by the end, you'll wonder how you ever made it any other way.
What Makes This Version Stand Out
Silky Smooth: The texture is what custard dreams are made of — no lumps, no bubbles, just pure velvet that slides across your tongue like a silk scarf. I've tested this with cornstarch, without cornstarch, with heavy cream, and every combination you can imagine. The magic happens when you treat the eggs gently but confidently, creating a custard that sets like a dream without any artificial thickeners.
Flavor Depth: Most recipes rely on vanilla alone, but we're building layers here. The nutmeg doesn't just sit on top — it infuses every bite with warmth that tastes like your favorite sweater feels. A whisper of salt makes the sweetness sing instead of just being sweet, and trust me, you'll notice the difference in the first spoonful.
Foolproof Method: I'll be honest — I ate half the batch before anyone else got to try it because I kept "testing" to make sure it was perfect. The secret is in the temperature control and knowing exactly when to pull it from the oven. No water baths, no complicated techniques, just pure kitchen wisdom that works every single time.
Make-Ahead Champion: This pie actually gets better after a day in the fridge. The flavors meld and deepen, the custard sets perfectly, and you can slice it like a dream. I make two at a time because if you've ever struggled with this, you're not alone — and I've got the fix that makes entertaining stress-free.
Ingredient Integrity: We're not cutting corners here. Real vanilla extract (not the imitation stuff that tastes like regret), fresh nutmeg that you grate yourself, and whole milk that makes the custard taste like it came from a dairy farm in Vermont. Quality ingredients make quality pie — it's that simple.
Crowd Reaction: Okay, ready for the game-changer? When you serve this pie warm with a dollop of barely sweetened whipped cream, people lose their minds. I've seen grown adults close their eyes and sigh. It's the kind of dessert that makes people remember their childhoods, even if their grandmothers never made custard pie.
Texture Contrast: The magic happens between the flaky, buttery crust and the smooth custard. We're not blind-baking here — the crust stays crisp on the bottom while the edges caramelize to golden perfection. That contrast between crisp and creamy? That's what separates good custard pie from legendary status.
Alright, let's break down exactly what goes into this masterpiece...
Inside the Ingredient List
The Foundation Builders
The eggs are the absolute stars here — they're not just providing structure, they're creating the entire personality of this pie. Room temperature eggs blend seamlessly into the milk without shocking the proteins, which means no weird curdled bits in your custard. I leave mine out for about an hour before baking, and if you forget, just submerge them in warm (not hot) water for five minutes. The difference is night and day — cold eggs seize up and create a custard that's more like scrambled eggs wearing a custard costume.
Granulated sugar does more than sweeten — it helps create that smooth, glossy surface on top of the pie. As it caramelizes slightly during baking, it forms a whisper-thin crust that gives way to the creamy custard beneath. Don't even think about reducing the sugar significantly; it's not just about sweetness, it's about texture and structure. I've tried with less, and you end up with a custard that weeps and separates like it's crying over your poor life choices.
The Texture Magicians
Whole milk is non-negotiable. I don't care what your diet says — this is not the place for skim milk or even 2%. We need the fat to create that luxurious mouthfeel that makes people close their eyes when they take a bite. The milk proteins also help set the custard, creating that perfect jiggle that holds its shape when sliced but melts on your tongue. If you absolutely must, you can swap half for half-and-half, but honestly, whole milk gives you the perfect balance of richness without being heavy.
Vanilla extract is where most people cheap out, and it's such a mistake. That bottle of imitation vanilla? Throw it out right now. Real vanilla extract has hundreds of flavor compounds that create depth and warmth. When you smell the pie baking, you want to detect those floral, almost woody notes that make people ask "what's that amazing smell?" not "why does this smell like a candle store?"
The Flavor Enhancers
Salt is the unsung hero here — just a pinch transforms the entire pie from "sweet" to "complex." It doesn't make the pie salty; it makes the vanilla more vanilla-y and the custard more custard-y. I use fine sea salt because it dissolves evenly, but regular table salt works fine too. Skip this and your pie will taste flat, like listening to music with the treble turned all the way down.
Ground nutmeg is where the magic happens, but here's the thing — most recipes treat it like a garnish. We're using it twice: mixed into the custard for warmth and sprinkled on top for that classic look and extra aroma. Freshly grated nutmeg has a complexity that pre-ground can't touch — it's warmer, more aromatic, and doesn't have that slightly musty taste that old nutmeg develops. That sizzle when it hits the pan? Absolute perfection.
The Pie Crust Partner
The unbaked 9-inch pie crust is your canvas, and you have options here. Store-bought works perfectly fine — I won't judge you for taking shortcuts when the custard is the star. But if you're feeling ambitious, homemade crust adds a flakiness and butter flavor that elevates the whole experience. The key is keeping it cold until it hits the hot oven, creating steam pockets that puff into flaky layers. Whether you buy or make, don't pre-bake it — we want the bottom to stay slightly soft where it meets the custard while the edges turn golden and crisp.
Everything's prepped? Good. Let's get into the real action...
The Method — Step by Step
- Start by positioning your oven rack to the lower-middle position and preheating to 400°F. This isn't arbitrary — the lower position helps the bottom crust cook through without burning the edges. While it's heating, let your eggs come to room temperature if you haven't already. Crack them into a large bowl and whisk them gently — you're not trying to whip air in, just break them up completely. The mixture should be homogenous and slightly frothy, like sunshine in liquid form.
- Whisk in the sugar gradually, about 1/4 cup at a time. This prevents the sugar from sitting in a grainy layer at the bottom and ensures it dissolves evenly. Keep whisking until the mixture is smooth and the sugar is fully incorporated — you'll feel the grit disappear if you rub a drop between your fingers. The color should be pale yellow and the texture should ribbon off the whisk. This is the foundation of your custard, so take your time here.
- Add the salt and vanilla extract, whisking to combine. Now here's where most recipes go wrong — they add the milk too fast and shock the eggs. Instead, warm your milk slightly (about 30 seconds in the microwave) until it's just warm to the touch, not hot. This helps everything blend smoothly without cooking the eggs. Whisk in about 1/4 cup of milk to temper the eggs, then slowly pour in the rest while whisking constantly.
- Strain the custard through a fine-mesh sieve into another bowl. I know, I know — it's an extra step and an extra dish to wash. But this is where we separate good custard from restaurant-quality custard. The sieve catches any rogue bits of egg white or membrane that didn't whisk in smoothly, plus it removes any bubbles that formed during mixing. Your custard should be silky smooth and the color of pale butter.
- Place your pie crust on a foil-lined baking sheet (trust me on this — it catches any drips and makes cleanup a breeze). Give your custard one final whisk to redistribute anything that might have settled, then pour it into the crust. It should fill it about 3/4 of the way up — if you have extra, don't overfill or it'll spill during baking. The custard will puff slightly as it bakes, so leave a little headspace.
- Sprinkle the nutmeg evenly over the top — don't be shy here. Use about 1/4 teaspoon total, grated fresh if possible. The nutmeg will float on top initially, creating that classic spotted appearance, but as it bakes, some will sink and infuse the custard while some stays on top for visual appeal. Don't stir it in — let it do its thing naturally.
- Carefully slide the baking sheet with the pie into the oven and close the door gently. Set a timer for 25 minutes and don't open the oven door during this time. The custard needs consistent heat to set properly, and opening the door can cause it to sink or crack. The pie is done when the edges are set but the center still jiggles like gelatin when you gently shake the pan — it should wobble but not wave.
- Remove the pie from the oven and place it on a wire rack. This next part? Pure magic. The custard will continue to set as it cools, and the residual heat will finish cooking the center without overbaking it. Let it cool for at least 2 hours before serving — I know it's torture, but cutting into hot custard is like cutting into a water balloon. It needs time to firm up and for the flavors to meld.
- And now the fun part — serving! This pie is magnificent at room temperature, slightly warm, or cold from the fridge. Each temperature highlights different aspects: warm brings out the vanilla and makes the custard extra creamy, room temperature gives you the perfect slice, and cold makes it taste like custard ice cream in pie form. I like to serve it with barely sweetened whipped cream and an extra dusting of fresh nutmeg for company, but honestly? It's perfect on its own.
That's it — you did it. But hold on, I've got a few more tricks that'll take this to another level...
Insider Tricks for Flawless Results
The Temperature Rule Nobody Follows
Here's what actually works: everything needs to be friends before they meet. Room temperature eggs, room temperature milk, and even a room temperature pie crust if you made it from scratch. When cold eggs meet warm milk, they seize up and create little protein clumps that ruin the texture. Think of it like jumping into a hot tub — you want to ease in, not shock your system. A friend tried skipping this step once — let's just say it didn't end well. Her custard had the texture of cottage cheese, and she had to serve it with a disclaimer.
Why Your Nose Knows Best
Your nose is actually the best doneness indicator you have. When the pie is nearly done, your kitchen will fill with the most incredible aroma — vanilla, nutmeg, and something buttery-sweet that makes your mouth water. That's when you start checking for the jiggle test. If you wait for a timer alone, you'll miss the sweet spot. The smell should be rich and pronounced but not sharp or caramelized. That siren call of baking spices? That's your cue to pay attention.
The 5-Minute Rest That Changes Everything
After you take the pie out of the oven, let it sit for exactly 5 minutes before moving it to a cooling rack. This brief rest allows the custard to settle and prevents cracks from forming as it cools too quickly. I discovered this by accident when my phone rang just as I pulled a pie out — those five minutes of forced patience resulted in the smoothest, most perfect custard I'd ever made. Now it's part of my ritual, like a meditation on patience and pie.
The Slice That Impresses
Warm your knife under hot water before slicing, then wipe it clean between cuts. This gives you those picture-perfect wedges that make people think you're a professional baker. Dip it in hot water, wipe dry, slice confidently, repeat. The warm blade melts through the custard without tearing, and cleaning between cuts prevents the filling from smearing across your beautiful presentation. It's a small step that makes a huge difference when you're serving guests.
Creative Twists and Variations
This recipe is a playground. Here are some of my favorite ways to switch things up:
Maple Bourbon Dream
Replace half the sugar with pure maple syrup and add a tablespoon of good bourbon to the custard. The maple adds depth and a subtle caramel note, while the bourbon enhances the vanilla and adds warmth. This version tastes like fall in New England and pairs beautifully with a dollop of maple-sweetened whipped cream. Your guests will taste it and immediately ask for the recipe, but there's something about the maple-bourbon combination that makes them think you're a culinary genius.
Coconut Cloud Version
Swap out half the milk for full-fat coconut milk and add 1/2 cup of sweetened shredded coconut. The coconut milk makes the custard even more luxurious, while the flakes add pleasant texture throughout. Top with toasted coconut flakes for extra crunch and visual appeal. This variation transports you to a tropical paradise, even if you're eating it in your kitchen on a Tuesday night in February.
Chocolate Orange Swirl
Melt 2 ounces of dark chocolate and swirl it into half the custard, then pour both batters into the crust simultaneously for a marbled effect. Add 1/2 teaspoon of orange zest to the vanilla portion. The combination of chocolate and orange is classic for a reason — it's like a sophisticated creamsicle met a chocolate custard and had a beautiful baby. The visual swirl makes it look bakery-professional.
Savory Breakfast Twist
This one surprises everyone — reduce the sugar to 1/4 cup, add 1/2 cup of sharp cheddar cheese, and swap the nutmeg for fresh thyme. It becomes a savory custard that's incredible for brunch. The technique is identical, but the result is completely different — more quiche than dessert, but with that same silky texture. Serve it with a side salad and watch people try to figure out what makes it so special.
Espresso Infusion
Dissolve 1 tablespoon of instant espresso powder in the warm milk before adding it to the eggs. The coffee flavor is subtle but enhances the vanilla and adds complexity. It tastes like the best coffee ice cream you've ever had, but in pie form. This version is incredible served cold with a shot of espresso poured over the top — affogato meets custard pie in the best possible way.
Lemon Lavender Luxury
Add 1 tablespoon of lemon zest and 1/2 teaspoon of culinary lavender to the custard. The lemon brightens everything while the lavender adds a floral note that makes this taste like you're eating in a French garden. Be careful with the lavender — a little goes a long way, and too much makes it taste like soap. But when balanced perfectly, it's like springtime in dessert form.
Storing and Bringing It Back to Life
Fridge Storage
Cover the cooled pie loosely with plastic wrap and refrigerate for up to 4 days. Don't wrap it too tightly or condensation will form and make the top weepy. I like to tent it with plastic wrap supported by a few toothpicks to keep it from touching the surface. The flavors actually improve after the first day as the nutmeg and vanilla have time to meld. If you notice any moisture on top, gently blot it with a paper towel before serving.
Freezer Friendly
This pie freezes beautifully — wrap individual slices tightly in plastic wrap, then foil, and freeze for up to 2 months. Thaw overnight in the refrigerator and bring to room temperature before serving. The texture remains surprisingly creamy, though it's best served cold rather than rewarmed. I always keep a few slices in the freezer for emergencies, which in my house means "it's Tuesday and I deserve something wonderful."
Best Reheating Method
If you prefer your custard pie warm (and honestly, who doesn't?), reheat individual slices in the microwave for 10-15 seconds. Any longer and you'll scramble the custard. For a whole pie, warm it in a 275°F oven for 10-12 minutes. Add a tiny splash of water to the pan before reheating — it steams back to perfection and prevents the edges from drying out. Never reheat more than once, or the custard will break down and become watery.