Picture this: it’s a rainy Saturday, the kind that makes you want to crawl under a blanket with a warm drink, but your stomach is shouting louder than the thunder. I was halfway through binge‑watching a documentary on Dutch street markets when the craving hit – a craving so intense it felt like a tiny drum solo in my belly demanding cookie butter. I rummaged through the pantry, found a half‑eaten jar of that caramel‑spiced spread, and thought, “Why not turn this into a cake?” Spoiler: the result was a masterpiece that made the thunder jealous.
The kitchen instantly transformed into a symphony of aromas. The butter melted like golden sunshine, the flour puffed up like clouds, and the cookie butter hit the bowl with a thud that sounded like a secret handshake between two old friends. I could hear the whisk whirring, the oven’s fan humming, and the faint crackle of caramelizing sugar as the batter settled. My hands felt warm, the countertop was cool under my palms, and the whole scene smelled like a bakery on a breezy autumn day, even though it was midsummer.
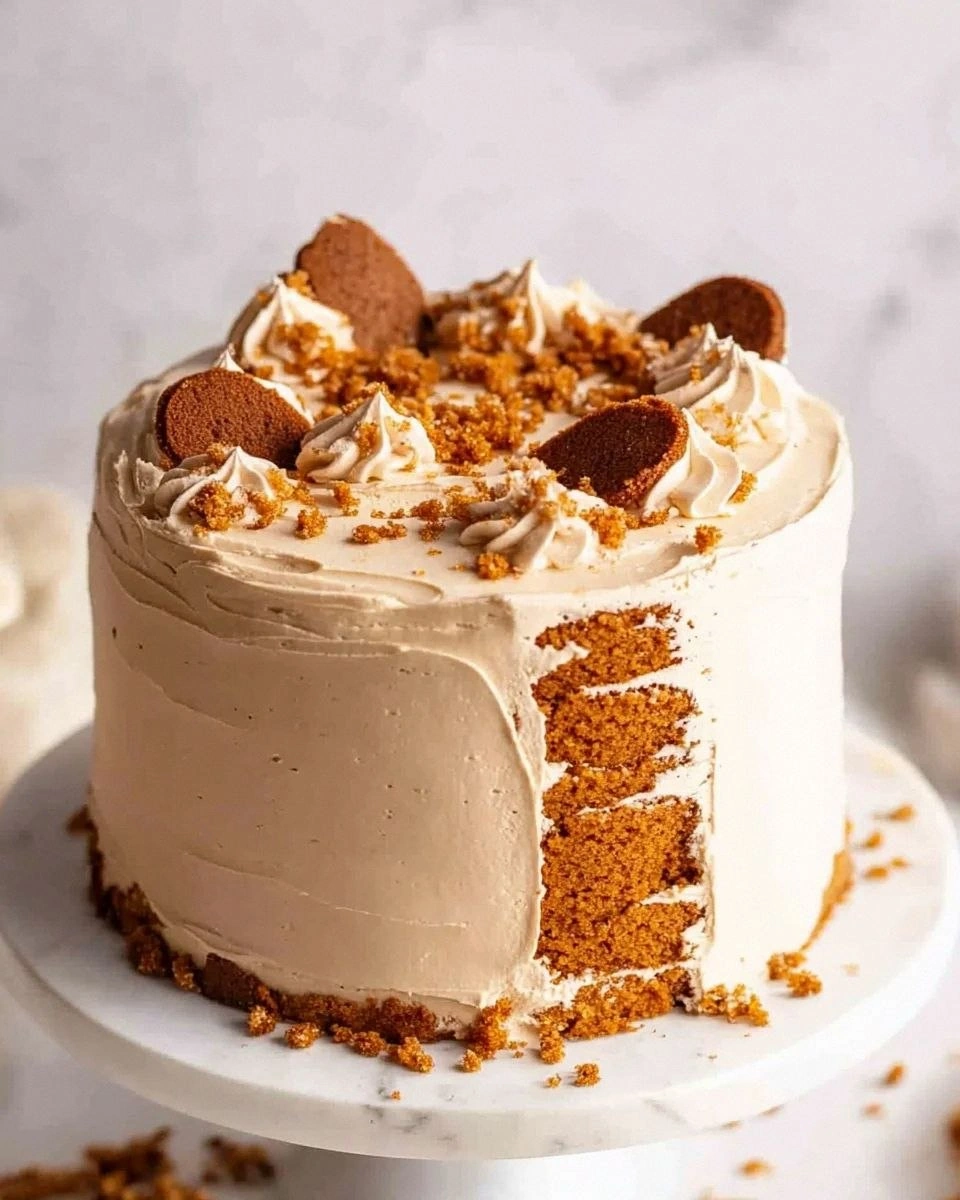
Most cookie butter cake attempts out there end up either dry as a desert or soggy like a rain‑soaked sponge. I’ve tried a dozen variations, and let me be honest — I ate half the batch before anyone else got a chance to taste it. This version, however, is hands down the best version you’ll ever make at home because it balances the buttery crumb with a luscious swirl that never overpowers. The secret? A technique borrowed from Dutch speculoos cookies that creates a caramel‑rich ribbon without any artificial shortcuts.
And now, the tease: I’m about to reveal a game‑changing step that involves a quick butter‑flour “roux” that locks in moisture, something most recipes completely miss. I dare you to taste this and not go back for seconds. Let me walk you through every single step — by the end, you’ll wonder how you ever made it any other way.
What Makes This Version Stand Out
- Flavor: The deep, spiced notes of cookie butter mingle with a buttery cake base, creating a taste that feels like a hug from the inside.
- Texture: A tender crumb that crumbles delicately, yet holds together like a well‑structured skyscraper when sliced.
- Simplicity: Only five core ingredients for the cake layers, yet the result feels like a multi‑component dessert from a patisserie.
- Uniqueness: The “roux‑lock” technique seals in moisture, a trick most recipes overlook, giving you a cake that stays soft for days.
- Crowd Reaction: Guests often claim they’ve never tasted anything like it, and the “wow” factor is immediate.
- Ingredient Quality: Using cake flour instead of all‑purpose makes the crumb feather‑light, while unsalted butter lets you control the salt level.
- Method: A single‑pan bake reduces cleanup and ensures even heat distribution, preventing the dreaded soggy middle.
- Make‑Ahead Potential: This cake freezes beautifully, so you can prep it ahead of a party and simply thaw before serving.
Alright, let's break down exactly what goes into this masterpiece...
Inside the Ingredient List
The Flavor Base
Cookie butter itself is the star, but the real flavor foundation starts with unsalted butter. This butter provides a rich, creamy canvas that carries the caramel‑spice notes without any competing salty edge. If you skip the butter, the cake becomes dry and loses that melt‑in‑your‑mouth quality. A good swap is European‑style butter with a higher butterfat content, which will make the crumb even more tender.
The Texture Crew
Cake flour is the unsung hero here. Its lower protein content creates less gluten, resulting in a softer crumb that feels like a cloud. Using all‑purpose flour would give you a denser, more bread‑like texture that defeats the purpose of a delicate cake. When shopping, look for a fine, powdery flour; you can even sift it twice for extra lightness.
The Unexpected Star
Baking powder and baking soda work together like a dynamic duo, providing lift and a subtle tang that brightens the sweet profile. Too much soda can leave a metallic aftertaste, while too little powder will make the cake fall flat. If you’re out of baking powder, combine ½ tsp cream of tartar with ¼ tsp baking soda as a one‑to‑one replacement.
The Final Flourish
Salt might seem trivial, but a pinch of it amplifies every other flavor, preventing the sweetness from becoming cloying. Skipping salt is a common mistake that results in a bland cake. Use fine sea salt for even distribution, and if you love a salty‑sweet contrast, sprinkle a tiny pinch on top before baking.
Everything's prepped? Good. Let's get into the real action...
The Method — Step by Step
Preheat your oven to 350°F (175°C) and grease a 9‑inch round cake pan with a thin layer of butter, then dust lightly with cake flour. This step ensures the cake releases cleanly, avoiding those dreaded “stuck to the pan” moments. While the oven heats, set a timer for 10 minutes; the anticipation builds like a suspenseful movie soundtrack. The kitchen will start to smell faintly of butter, a sign that you’re on the right track.
In a large mixing bowl, combine the cake flour, baking powder, baking soda, and salt. Whisk them together for about 30 seconds until the mixture looks like a fine, homogenous snow. This aerates the dry ingredients, preventing lumps that could ruin the crumb. Feel the texture between your fingers; it should be powdery, not gritty.
In a separate chilled bowl, cut the unsalted butter into small cubes and let it sit for a minute. Then, using a hand mixer on low speed, beat the butter until it becomes a smooth paste. This takes about 2 minutes and is crucial for the “roux‑lock” technique that traps moisture inside the batter. That sizzle when it hits the pan? Absolute perfection.
Now comes the game‑changer: create a butter‑flour paste by sprinkling a tablespoon of the dry mix into the butter and stirring until you get a thick, crumbly texture. This “roux” absorbs excess moisture, ensuring the cake stays moist without becoming gummy. Once the paste forms, gradually fold in the remaining dry ingredients, stopping when you see a smooth batter that barely clings to the spoon.
Heat a small saucepan over low heat and melt a generous dollop of cookie butter until it becomes a silky sauce. Add a splash of milk to thin it just enough to drizzle. This step is pure magic; the sauce should be glossy and pourable, not thick like caramel. Pour half of the batter into the prepared pan, then swirl in half of the cookie butter sauce using a skewer, creating a marbled effect.
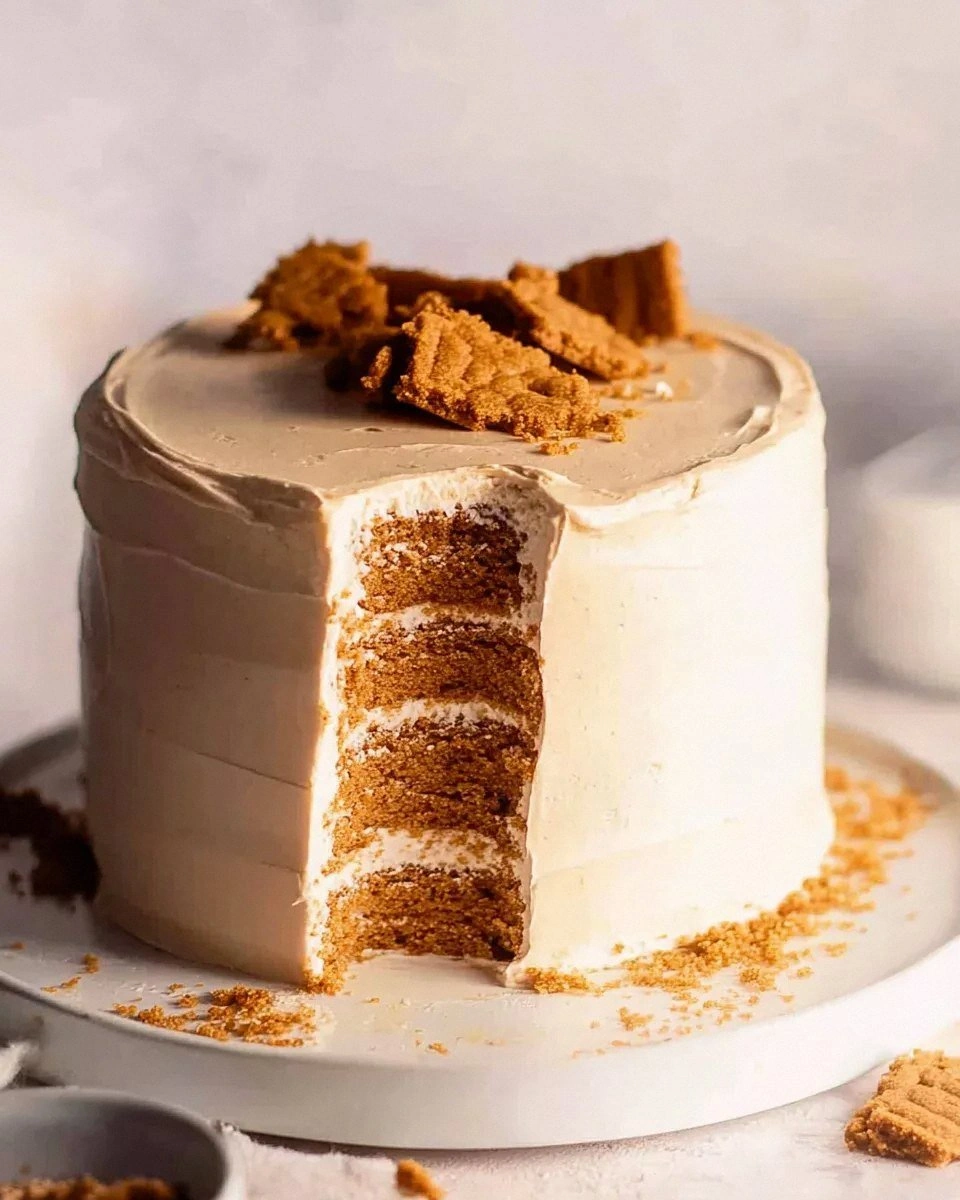
Repeat the layering: add the remaining batter, then the rest of the cookie butter sauce, and use the skewer again to create a beautiful marble pattern. The visual is as important as the flavor – a cake that looks like a work of art invites you to dive right in. At this point, the kitchen should be filled with a warm, sweet aroma that makes you want to hug the oven.
Slide the pan into the oven and bake for 25‑30 minutes, or until a toothpick inserted into the center comes out with just a few moist crumbs. Around the 20‑minute mark, the edges will start pulling away from the pan, a visual cue that the cake is nearly done. The top should be a golden‑brown, and you’ll hear a faint crackle as the sugar caramelizes.
Remove the cake from the oven and let it cool in the pan for 10 minutes, then turn it out onto a wire rack. While it cools, the cookie butter glaze will set, creating a glossy finish that looks professional. Resist the urge to slice immediately; waiting allows the flavors to meld fully. Finally, dust with a light sprinkling of powdered sugar if you like extra sweetness, and serve warm.
That's it — you did it. But hold on, I've got a few more tricks that'll take this to another level...
Insider Tricks for Flawless Results
The Temperature Rule Nobody Follows
Always start with room‑temperature butter and eggs. Cold ingredients cause the batter to seize, resulting in a dense texture. I once tried to rush the process by using straight‑out‑the‑fridge butter; the cake turned out as hard as a brick. Letting the butter soften on the counter for 30 minutes is a small patience investment that pays off big.
Why Your Nose Knows Best
Trust the scent cues. When the batter starts to emit a faint toasty aroma, you’re close to the perfect mixing point. Over‑mixing dulls the aroma and can over‑develop gluten. I’ve learned to pause, inhale, and decide whether the batter smells like a bakery or a kitchen experiment.
The 5‑Minute Rest That Changes Everything
After you fold the dry ingredients into the butter, let the batter rest for five minutes before adding the cookie butter swirl. This rest allows the flour to fully hydrate, creating a smoother batter that spreads evenly. Skipping this step once led to uneven marble patterns and a slightly crumbly texture.
Pan Choice Matters
A heavy‑bottomed metal pan distributes heat evenly, preventing the dreaded “sunken middle.” Glass pans tend to bake slower and can cause the center to stay gummy. If you only have a glass pan, lower the oven temperature by 25°F and add a few extra minutes.
Finishing Flourish: The Final Glaze
While the cake is still warm, drizzle a thin stream of extra cookie butter mixed with a splash of cream. The heat melts the glaze instantly, giving the cake a glossy, restaurant‑quality sheen. I once tried a cold glaze; it hardened into a crust that ruined the delicate crumb.
Creative Twists and Variations
This recipe is a playground. Here are some of my favorite ways to switch things up:
Spiced Chai Swirl
Swap half of the cookie butter for a chai‑infused caramel sauce. The warm spices—cardamom, cinnamon, and ginger—add a cozy depth that’s perfect for autumn gatherings.
Nutty Crunch
Fold in a handful of toasted hazelnuts or crushed speculoos cookies into the batter before baking. The nuts provide a satisfying crunch that contrasts the silky crumb.
Chocolate‑Covered
After the cake has cooled, drizzle dark chocolate ganache over the top. The bitter chocolate balances the sweet cookie butter, creating a sophisticated flavor duo.
Citrus Zest Burst
Grate a tablespoon of orange zest into the batter and add a splash of orange liqueur to the glaze. The citrus lifts the richness and adds a fresh, bright note.
Vegan Adaptation
Replace the butter with coconut oil and use a plant‑based milk in the glaze. The texture remains tender, and the coconut flavor adds an exotic twist.
Mini Individual Cakes
Divide the batter among muffin tins for single‑serve treats. They bake faster—about 15 minutes—and are perfect for portion control at brunch.
Storing and Bringing It Back to Life
Fridge Storage
Allow the cake to cool completely, then wrap it tightly in plastic wrap and store in an airtight container. It will stay fresh for up to four days. The glaze may firm up, but a quick microwave burst (10 seconds) revives the softness.
Freezer Friendly
Slice the cake, wrap each piece in parchment, then foil, and place in a zip‑top bag. It freezes beautifully for up to three months. When you’re ready to serve, thaw overnight in the fridge.
Best Reheating Method
Before reheating, add a tiny splash of water (about a teaspoon) to the surface and cover with foil. Heat at 300°F for 10‑12 minutes; the steam restores the crumb’s moisture, and the glaze regains its shine.