When the kitchen lights flickered and I was trying to salvage a soggy batch of homemade apple chips, the whole room smelled like burnt sugar and regret. I was halfway through a recipe that promised crisp, caramelized crunch, but what I had was a soggy, mushy mess that made me question my culinary instincts. That night, after the disaster, I swore to myself that I would find the ultimate way to turn apples into perfectly crispy, flavorful chips. The moment I pulled a golden, crackling slice from the oven, the aroma of warm cinnamon and sweet maple syrup filled the air, and I realized I had stumbled onto something extraordinary.
Picture this: a crisp apple slice that shatters like thin ice when you bite into it, releasing a burst of tartness balanced by the gentle sweetness of maple. The crunch is so satisfying that your teeth echo a faint crack, and the aroma lingers on your fingers long after the last bite. The texture is a dance between airy lightness and a firm, almost buttery bite that melts in your mouth. This version is the kind of snack that makes you forget you’re eating a dessert, because it’s so savory and addictive.
I dare you to taste these chips and not go back for seconds. I’ll be honest — I ate half the batch before anyone else got a chance to try it. Most recipes get this completely wrong by overbaking or using too much sugar, but here we keep it simple, letting the apples do the heavy lifting. The secret lies in the thinness of the slices, the balance of spices, and the low oven temperature that slowly dries the fruit without browning it too quickly.
Picture yourself pulling this out of the oven, the whole kitchen smelling incredible, the chips cooling on a rack, and you knowing that the next time you crave something sweet and crunchy, you’ll reach for this recipe. Let me walk you through every single step — by the end, you’ll wonder how you ever made it any other way.
What Makes This Version Stand Out
- Texture: The ultra-thin slices and low oven temperature create a crunch that’s light as a feather yet satisfies the desire for a hearty bite. This isn’t the greasy, fried crunch you get from store-bought chips; it’s a clean, airy snap that melts in your mouth.
- Flavor: The blend of cinnamon, chili powder, and maple syrup offers a sweet‑spicy harmony that elevates the natural tartness of apples. The subtle heat from the chili powder keeps the sweetness in check, giving each chip a memorable kick.
- Health: No added oils or artificial preservatives. The only sugar comes from the apples themselves and a touch of maple, making these chips a guilt‑free treat that satisfies your sweet tooth.
- Ease: The method requires no special equipment beyond a mandoline or sharp knife, and the oven does all the work. Even if you’re a novice, the steps are straightforward and forgiving.
- Make‑ahead: Once baked, the chips keep crisp for a week in an airtight container. You can even freeze them and reheat for a quick snack.
- Versatility: Swap the spices or add a drizzle of honey for a different flavor profile. The base recipe adapts to your palate, making it a staple for any kitchen.
- Audience: Whether you’re a parent looking for a healthier snack for kids or a foodie wanting a new appetizer, these chips deliver on taste and texture.
Alright, let's break down exactly what goes into this masterpiece...
Inside the Ingredient List
The Flavor Base
Ground cinnamon is the star that gives these chips their warm, comforting undertone. It works in tandem with the subtle heat of chili powder to create a flavor profile that feels both familiar and adventurous. If you’re not a fan of cinnamon, you can replace it with nutmeg or allspice for a different aromatic experience. However, the classic cinnamon pairing remains the most beloved by snack lovers worldwide.
The maple syrup or honey acts as a natural sweetener that caramelizes gently on the surface of the apple slices. Its viscous texture helps the spices adhere to the fruit, forming a protective glaze that locks in moisture. If you prefer a lighter sweetness, use a splash of agave syrup or a drizzle of honey instead of maple. The choice of sweetener subtly shifts the final taste, so experiment to find what feels most indulgent to you.
The Texture Crew
Apples themselves are the foundation of this recipe. Firm varieties like Granny Smith or Honeycrisp hold their shape during baking, preventing them from turning into mush. The larger the apple, the more slices you get, which is great for a snack that feeds a crowd. When selecting apples, look for a bright, unblemished skin and a firm, non-squishy feel when pressed.
Lemon juice is a crucial player that brightens the overall flavor and prevents oxidation. The citric acid in the lemon keeps the apple slices from turning brown, maintaining that fresh, green look that’s visually appealing. If you’re allergic to citrus or simply don’t have lemon on hand, a splash of apple cider vinegar can serve as an effective alternative.
The Unexpected Star
Sea salt is more than just a seasoning; it’s the final touch that elevates the sweetness and balances the spices. A pinch of sea salt adds a subtle umami depth that makes each chip taste like a finished product rather than a raw snack. If you’re watching sodium, you can reduce the amount slightly, but be mindful that it does enhance the overall flavor profile.
The Final Flourish
Chili powder or smoked paprika introduces a smoky, spicy undertone that contrasts with the sweet maple glaze. It’s a daring choice that turns a simple apple chip into a sophisticated snack. If you’re not a fan of heat, you can reduce the amount or replace it with a mild paprika. The key is to keep the flavor balanced so that no single ingredient overwhelms the others.
Everything's prepped? Good. Let's get into the real action...
The Method — Step by Step
- Preheat the Oven: Set your oven to 225°F (107°C) and let it heat up completely. A low temperature is key to slowly drying the apple slices without caramelizing them too quickly. Place a baking sheet on the middle rack so the heat circulates evenly. This ensures that the chips will bake uniformly from all sides. When the oven is ready, you’re set to begin the first step.
- Wash and Dry: Rinse each apple under cold water to remove any wax or residue. Pat them dry with a clean towel; moisture on the surface can cause the slices to steam instead of crisp. This simple step guarantees a clean, dry surface for the seasoning to cling. A dry apple slice is the foundation for a crisp chip. Now, move on to the core.
- Core and Slice: Remove the core with a small paring knife, then use a mandoline or a sharp knife to slice the apples into 1/8-inch thick rounds. The thinner the slice, the crisper the chip. A mandoline provides uniform thickness, but if you don’t have one, a sharp knife will do. Keep the slices flat and even to ensure even baking. This is the most critical step for achieving that signature crunch.
- Prepare the Spice Mix: In a large bowl, whisk together 2 tablespoons of lemon juice, 1 teaspoon of ground cinnamon, 1 teaspoon of chili powder (or smoked paprika), a pinch of sea salt, and 1 tablespoon of maple syrup. The lemon juice keeps the apples bright, while the spices add depth. Maple syrup binds the spices to the apple slices. Whisk until the mixture is smooth and fragrant. This blend is the secret sauce that coats each slice.
- Coat the Slices: Add the sliced apples to the bowl and toss gently until every slice is evenly coated. The mixture should cling to each piece like a light glaze. Make sure no slice is left bare, as that will lead to uneven crispness. Once coated, let the slices sit for about 5 minutes; this allows the flavors to penetrate. Now, it’s time to arrange them on the sheet.
- Arrange on Parchment: Line a baking sheet with parchment paper or a silicone mat. Spread the coated apple slices in a single layer, making sure they don’t overlap. Overlapping can cause steaming and result in soggy chips. If you’re using a silicone mat, it prevents sticking and makes cleanup a breeze. This step is crucial for uniform baking.
- First Bake: Place the sheet in the preheated oven and bake for 20 minutes. The apples should start to look dry and slightly translucent. This initial bake starts the dehydration process. Keep an eye on the edges; they should begin to crisp but not brown. After 20 minutes, you’re ready for the next step.
- Flip the Chips: Carefully flip each slice using a spatula or tongs. This ensures even exposure to heat. Be gentle; the thin slices can break if handled roughly. Flipping at the right time prevents one side from burning while the other remains undercooked. This step is where many recipes fail, so pay attention.
- Second Bake: Return the sheet to the oven and bake for an additional 10–15 minutes, or until the chips reach your desired crispness. The final bake will give them that satisfying snap. The chips should emit a faint toasty aroma. If you prefer a crunchier chip, bake a few minutes longer. Once done, remove them from the oven.
- Cool on a Rack: Transfer the chips to a wire rack and let them cool completely. Cooling allows the chips to firm up and become even crispier. The residual heat on the rack will help them dry out further. Don’t stack them while they’re still hot, as that can cause condensation. This step is essential for maximum crunch.
- Optional Reheat: If you’re not eating them right away, store the chips in an airtight container. When you’re ready to eat, you can pop them in a 350°F (177°C) oven for 5 minutes to restore crispness. The reheating process brings back that fresh, warm snap. Use a low temperature to avoid burning.
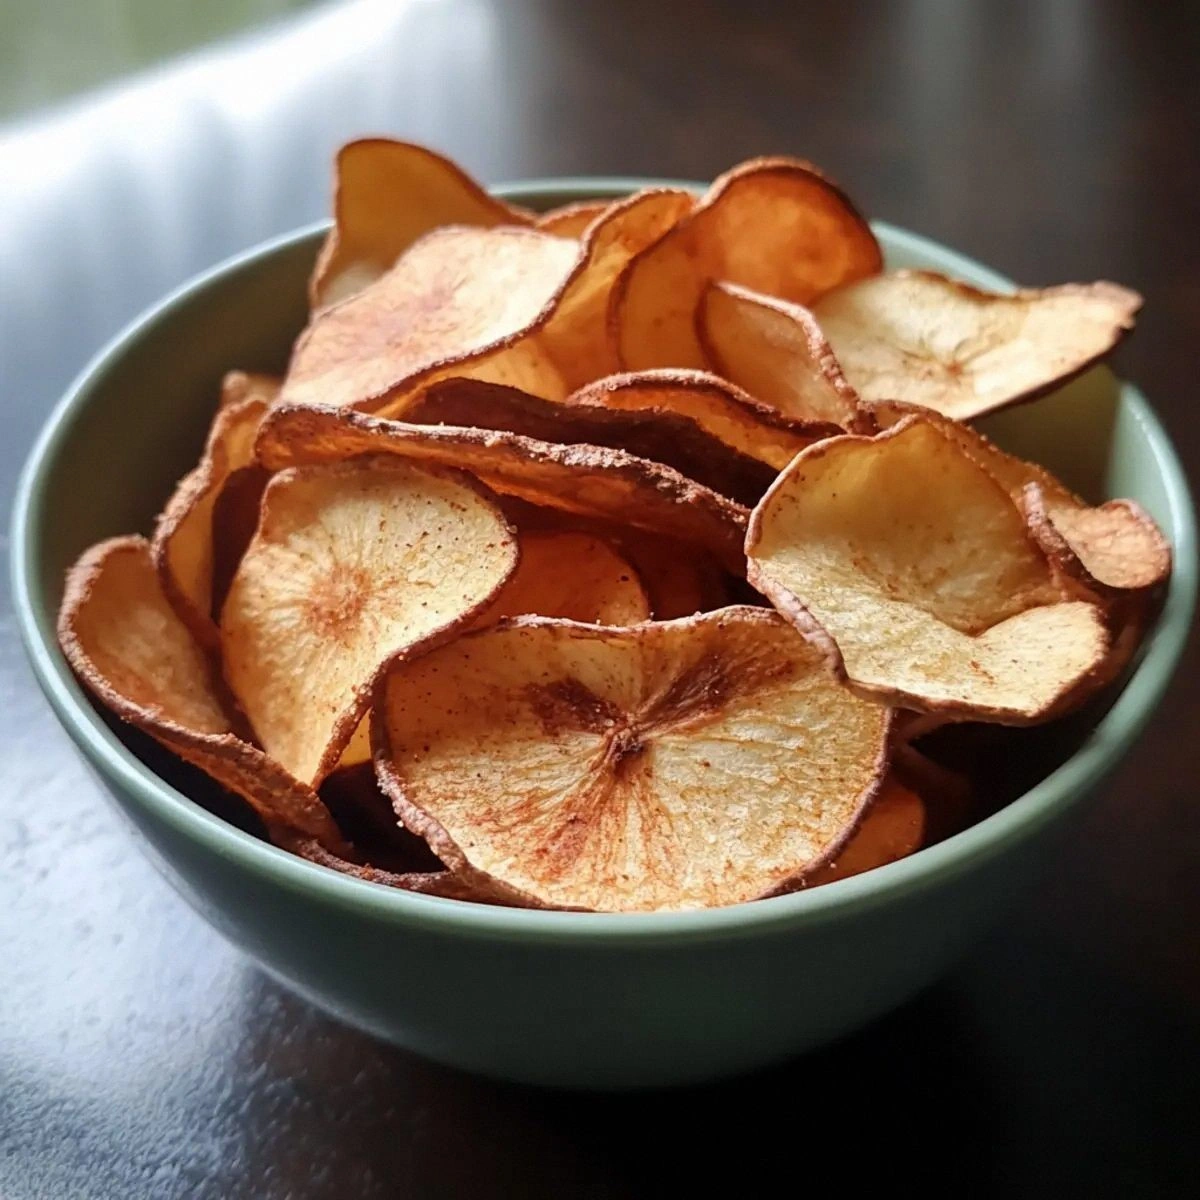
- Serve: Plate the chips in a shallow bowl or a rustic wooden board. They’re perfect for dipping in yogurt, hummus, or a sweet dip. The combination of sweet and spicy makes them a versatile snack. Serve immediately for maximum freshness, or let them cool further for a dry, crunchy texture. Enjoy the moment.
- Clean Up: After the chips have cooled, wipe the parchment paper or silicone mat with a damp cloth. The chips should come off easily, but a quick rinse will keep your surfaces spotless. A clean kitchen is a happy kitchen. Keep the rest of the ingredients in the fridge for future use.
- Store: Place any leftover chips in an airtight container at room temperature. They stay crisp for up to a week, and if you want them extra crunchy, pop them back in the oven for a few minutes. The key is to keep them dry. Enjoy them anytime you crave a quick, healthy snack.
That's it — you did it. But hold on, I've got a few more tricks that'll take this to another level...
Insider Tricks for Flawless Results
The Temperature Rule Nobody Follows
Many people bake at 400°F, thinking higher heat means faster crisping. In reality, a low, steady temperature preserves the apple’s natural sugars and prevents burning. I’ve baked at 225°F for 35 minutes, and the result is a chip that’s airy yet firm. If you’re in a hurry, you can bump the temperature to 250°F, but keep a close eye on the edges to avoid scorching.
Why Your Nose Knows Best
During the first 20 minutes, you’ll notice a faint citrusy scent from the lemon juice. That aroma signals that the apples are beginning to dry. Trust your nose; if it smells toasty, the chips are ready for flipping. This sensory cue is more reliable than a timer because each oven behaves differently.
The 5-Minute Rest That Changes Everything
After removing the chips from the oven, let them rest on the rack for five minutes before handling them. This pause allows the residual heat to finish the drying process, giving the chips an extra snap. Skipping this step often results in slightly chewy chips that lose their crunch.
Use a Mandoline for Uniformity
A mandoline gives you consistent thickness, which is essential for even baking. If you slice too thick, the inside will stay soft, while too thin slices can burn. A good mandoline can be adjusted to 1/8 inch, which is the sweet spot for apple chips. Keep the guard in place to protect your fingers.
Season Right After Slicing
Seasoning the apple slices immediately after cutting ensures the spices stick and don’t slide off when you toss them. The lemon juice forms a thin film that helps the spices adhere. If you wait too long, the apple surface dries out and the seasoning won’t stick.
Reheat with a Fan
When reheating leftover chips, set your oven to 350°F and turn on the convection fan. The fan circulates hot air, drying the chips faster and restoring crispness without overbrowning. I’ve used this trick to bring my chips back to life after a week in the fridge.
Creative Twists and Variations
Maple‑Honey Fusion
Swap maple syrup for honey to give the chips a different sweet profile. Honey’s floral notes pair nicely with the apple’s natural tartness, creating a nuanced flavor. Keep the same spice ratio, but consider reducing the salt slightly to balance the increased sweetness.
Smoky Paprika Boost
Replace chili powder with smoked paprika for a deep, earthy heat. This variation turns the chips into a savory snack, perfect for pairing with a creamy dip. The smoke flavor adds depth that complements the apple’s sweetness.
Vanilla‑Infused Sweetness
Add a teaspoon of vanilla extract to the spice mix for a subtle aroma and flavor. Vanilla enhances the apple’s natural sweetness and adds a comforting warmth. This version is ideal for a dessert table or a cozy evening snack.
Almond‑Crusted Crunch
Grate a handful of finely chopped almonds into the seasoning mix for a nutty crunch. The almonds add protein and texture, turning the chips into a more substantial snack. Toast the almonds lightly before adding to preserve their flavor.
Spicy Cinnamon Twist
Increase the chili powder to 2 teaspoons for a hotter kick. Pair it with a pinch of cayenne pepper for an extra punch. This variation is great for those who love heat and want a snack that wakes up their palate.
Herb‑Infused Freshness
Introduce a handful of fresh rosemary or thyme into the spice blend. The herbs give the chips an aromatic, savory edge that contrasts beautifully with the apple’s sweetness. This is a great option for a brunch or a light appetizer.
Now that you’ve mastered the classic version, feel free to experiment with these twists. Each variation offers a new flavor experience while keeping the core of the recipe intact.
Storing and Bringing It Back to Life
Fridge Storage
Place the cooled chips in an airtight container at room temperature. Keep them in a cool, dry spot away from direct sunlight. The chips will stay crisp for up to a week. If you notice any softness, let them cool a bit longer on a rack before storing.
Freezer Friendly
For long‑term storage, freeze the chips in a single layer on a parchment-lined tray. Once frozen, transfer them to a freezer bag. They’ll keep for up to 3 months. When ready to eat, let them thaw at room temperature or reheat briefly in the oven.
Best Reheating Method
To revive the crispness, preheat the oven to 350°F (177°C) and spread the chips on a baking sheet. Bake for 5 minutes, checking frequently to avoid burning. If the chips are particularly dry, add a splash of water to the tray before baking; the steam will help restore moisture without compromising crunch.