I burned the first batch so badly that my smoke alarm started singing opera. There I was, standing in my kitchen at midnight, waving a dish towel like a maniac while the charred remains of what-was-supposed-to-be dessert glared at me from the trash can. But here's the thing about spectacular failures — they force you to dig deeper, to question everything you thought you knew about baking. That smoky disaster sent me down a three-week rabbit hole of testing, tweaking, and tasting (so much tasting) until these peach upside-down mini cakes emerged from my oven like golden-crowned jewels. The kitchen smelled like a summer carnival, all caramelized sugar and sun-ripened fruit, and I knew I'd cracked the code. One bite and I was doing a little victory dance in my slippers, completely forgetting the previous catastrophes.
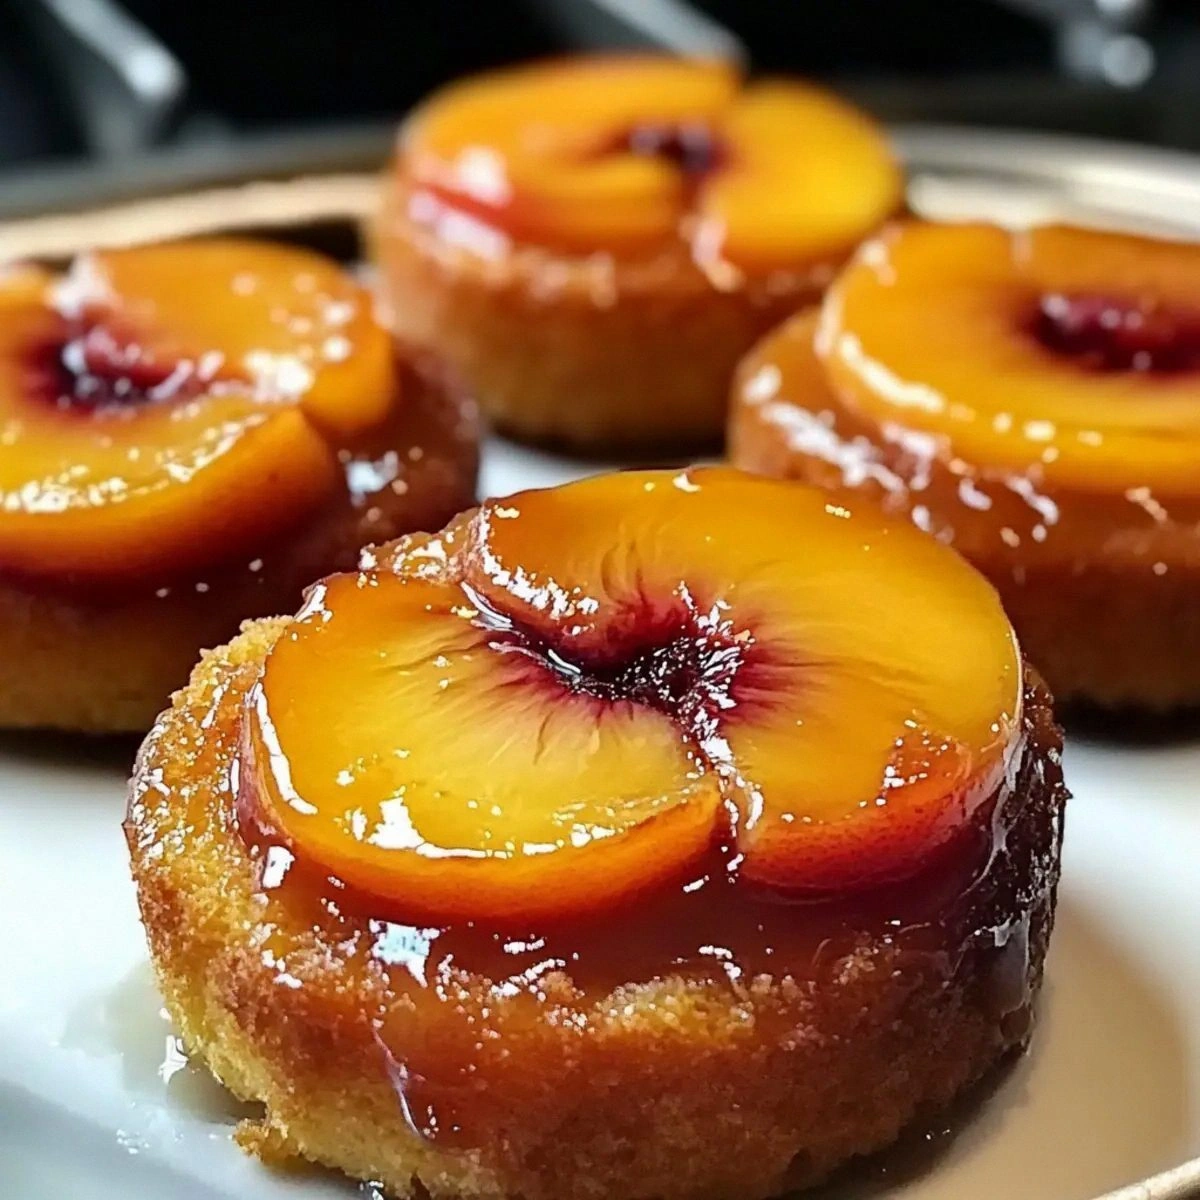
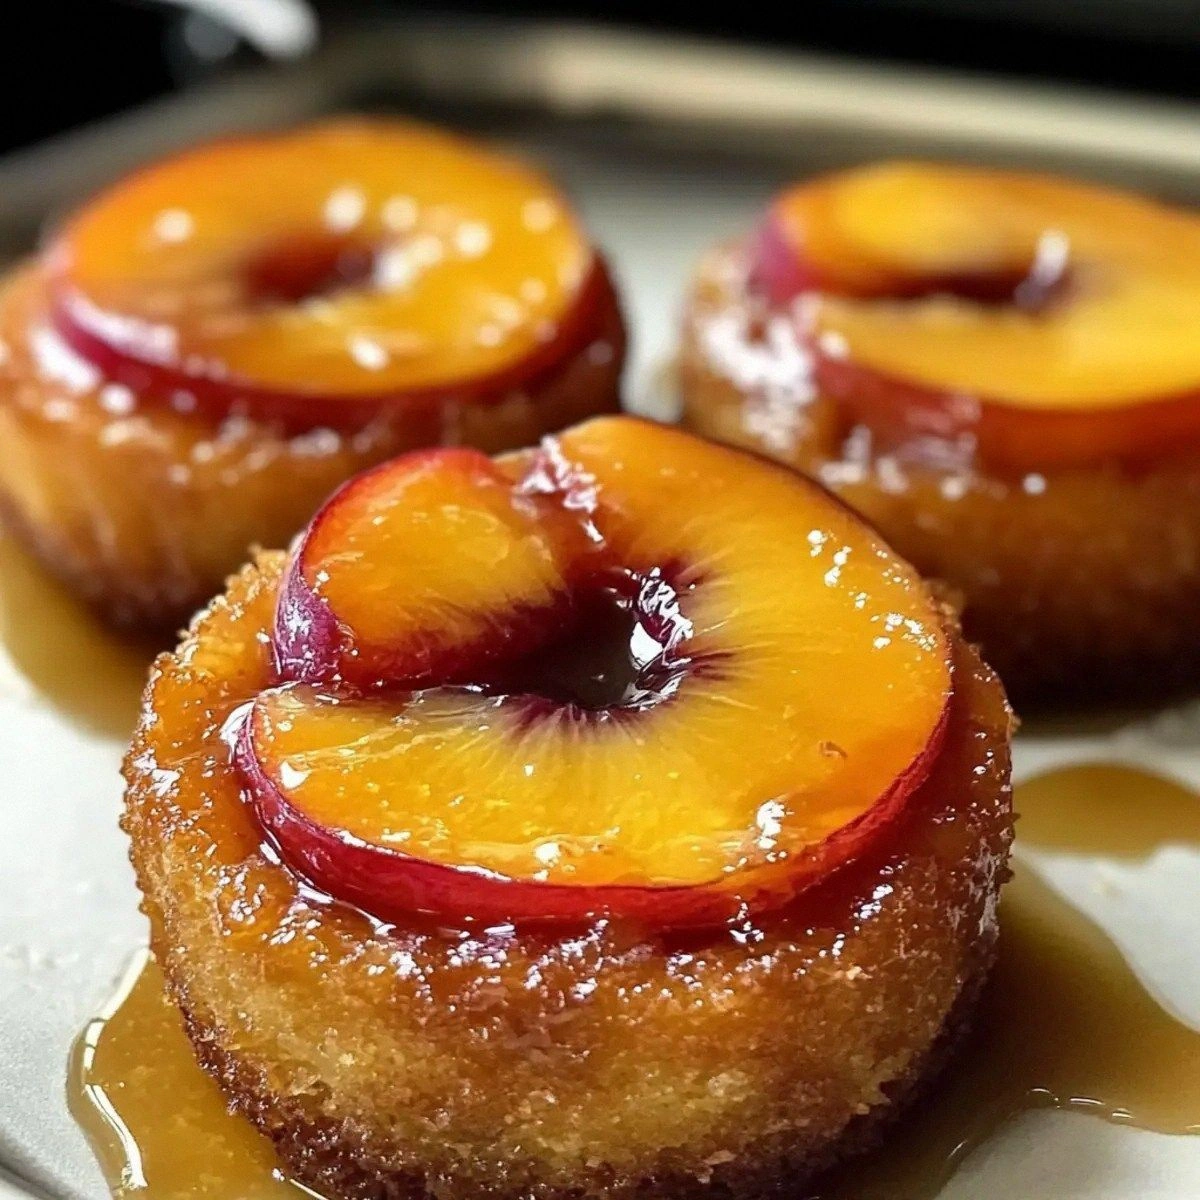
Most recipes treat the fruit topping as an afterthought, slapping some canned peaches on batter and calling it a day. That's culinary laziness, and your taste buds deserve better. The magic happens when you coax real, fresh peaches into releasing their honeyed essence, letting their juices mingle with brown sugar and butter until they create a glossy amber lake that seeps into every tender crumb. Picture this: you flip these babies out of their ramekins and the peach slices glisten like stained glass, each one perfectly positioned in a crown of buttery caramel. The edges of the cake are kissed with crispness while the interior stays cloud-soft, creating a contrast that makes your fork pause mid-air in appreciation.
I dare you to taste this and not go back for seconds. Actually, I double-dog dare you, because I ate four in one sitting and I'm not even sorry. There's something dangerously addictive about the way the warm peach syrup pools on the plate, begging to be swirled through vanilla ice cream or simply licked straight off the fork. The cakes are portion-controlled in theory, but in practice they multiply like rabbits because everyone wants "just one more sliver." I've watched grown adults argue over the last cake like it was the final slice of pizza at a frat party.
What makes this version different? We're not just dumping ingredients together and hoping for the best. We're building layers of flavor like a pastry architect, using techniques that sound fancy but are actually foolproof once you know the secrets. The peaches get a quick caramelization before meeting the batter, ensuring they don't sink or release too much liquid. The batter itself is enriched with brown butter undertones and a whisper of vanilla that amplifies the fruit without competing. Stay with me here — this is worth it. Let me walk you through every single step — by the end, you'll wonder how you ever made it any other way.
What Makes This Version Stand Out
Flavor Bomb: These cakes don't just taste like peach — they taste like the essence of August sunshine captured in dessert form. The brown sugar caramelizes into deep toffee notes that complement the fruit's natural sweetness, creating a complexity that makes your palate sit up and take notice. It's like the difference between a fresh-picked peach and one that's been sitting in storage for weeks — there's just no comparison.
Texture Heaven: We're talking crispy edges that shatter like thin ice under your fork, revealing a tender crumb so moist it practically sighs when you cut into it. The peach topping adds a jammy layer that oozes into every bite, ensuring no mouthful is dry or boring. It's the dessert equivalent of finding the perfect ratio of crunchy granola to creamy yogurt in every spoonful.
Foolproof Technique: Most recipes fail because they treat mini cakes like shrunken versions of large ones, but physics doesn't work that way. These bake up perfectly every time because we use a higher ratio of fruit to batter, preventing the dreaded dome that leaves your peaches buried. The cakes release cleanly from their molds, no awkward broken cakes stuck stubbornly to the bottom.
Make-Ahead Magic: Here's where I get really excited — these cakes actually improve after a few hours, making them perfect dinner party fodder. The flavors meld and deepen, and a quick 10-second zap in the microwave brings them back to fresh-from-the-oven glory. I've made these on Sunday and served them on Wednesday to rave reviews, which means less stress when entertaining.
Crowd Control: Individual portions mean no awkward cake-cutting moments or fights over who gets the corner piece. Everyone gets their own perfect cake with exactly the right amount of caramelized peach topping. Plus, they look incredibly elegant on dessert plates, like something you'd pay twelve dollars for at a fancy restaurant.
Ingredient Flexibility: While fresh peaches in season are unbeatable, this recipe works beautifully with frozen fruit, nectarines, or even pears in winter. I've made versions with bourbon-soaked cherries, maple-glazed apples, and even pineapple with coconut in the batter. The base recipe is your canvas — paint it however you like.
Speed Demon: From zero to hero in under an hour, including cooling time. No complicated techniques, no special equipment beyond basic ramekins, and no waiting for butter to soften because we melt it anyway. If you've got unexpected guests coming in 45 minutes, you can still serve dessert that looks like you planned for days.
Inside the Ingredient List
The Flavor Base
Let's start with the star of the show — those gorgeous peaches. You want fruit that yields slightly to gentle pressure but doesn't feel mushy, with skin that smells distinctly peachy when you sniff the stem end. If your peaches are rock hard, pop them in a paper bag with a banana for a day or two. The ethylene gas works like magic, and you'll have perfect ripeness without the mealy texture that comes from supermarket cold storage. When you slice them, the flesh should be golden with blushes of red, dripping juice that tastes like summer distilled into liquid form.
Brown sugar isn't just sweet — it's flavor in crystal form. The molasses content adds those deep caramel notes that white sugar can only dream of, creating a syrup that tastes like it came from an old-fashioned candy shop. Dark brown sugar has more molasses than light, and either works here. I've even made these with demerara sugar when feeling fancy, and the larger crystals create pockets of extra-crunchy caramel that crack like crème brûlée when you bite in.
Butter is where most recipes go wrong, calling for softened butter that takes forever to cream properly. We're melting it, which does two brilliant things: first, it creates a denser crumb that stands up to the fruit topping without getting soggy, and second, it develops nutty brown butter notes if you let it go just past melted. That nuttiness pairs with peaches like they were made for each other, adding a sophistication that makes people ask "what's that amazing flavor?"
The Texture Crew
All-purpose flour is your foundation, but don't just scoop it straight from the bag. Fluff it up first, then spoon it into your measuring cup and level it off. This prevents the dense, hockey-puck cakes that come from packed flour. The protein content in AP flour gives just enough structure to hold the fruit without making the cake tough. Cake flour would be too delicate and collapse under the peach topping, while bread flour would give you doorstops.
Baking powder is your lift, but here's what most people miss — it starts working the moment it hits liquid, so don't let your batter sit around. Mix it up and get it in the oven within 10 minutes for the best rise. If your baking powder has been sitting in the pantry since last summer, test it by dropping a teaspoon into hot water. If it fizzes vigorously, you're good. If it just sits there looking sad, treat yourself to a fresh tin.
Eggs provide structure and richness, but temperature matters. Cold eggs can cause your melted butter to seize up into little lumps, so let them sit on the counter while you prep everything else. The yolks add a gorgeous golden color that makes these cakes look like they're glowing from within, while the whites give lift and lightness that prevents them from feeling heavy despite all that fruit and caramel.
The Unexpected Star
Vanilla extract might seem basic, but please, please use the real stuff. Imitation vanilla has a harsh, chemical edge that becomes glaringly obvious in simple recipes like this. Real vanilla adds floral notes that enhance the peaches without overwhelming them. If you're feeling extra fancy, scrape a vanilla bean into the batter and add the pod to your sugar jar — instant vanilla sugar for your next baking adventure.
Whole milk provides the liquid we need, but it also adds richness that water or skim milk can't match. The fat carries flavor and keeps the cakes tender even if you accidentally overbake them by a minute or two. No whole milk? Mix 3/4 cup of 2% milk with 1/4 cup of heavy cream, or use half-and-half thinned with a splash of water. Even evaporated milk works in a pinch, adding a subtle caramel note that actually complements the brown sugar beautifully.
The Final Flourish
Salt is the invisible hero that makes everything else taste more like itself. Just a quarter teaspoon amplifies the caramel notes and prevents the cakes from tasting flat. If you accidentally forget it, your cakes will taste mysteriously bland even though all the other flavors are there. It's like listening to music with the bass turned off — technically complete, but missing something essential.
Extra butter and brown sugar for the ramekins create that gorgeous lacquered edge that makes these look professionally made. Don't skimp here — that buttery caramel layer is what separates good cakes from legendary ones. I like to tilt each ramekin after adding the caramel, letting it coat the sides slightly. This creates a thin, crisp edge that shatters between your teeth, giving way to the tender crumb within.
Everything's prepped? Good. Let's get into the real action...
The Method — Step by Step
- Preheat your oven to 350°F (175°C) and position a rack in the center. This temperature is crucial — too hot and the edges burn before the center bakes through, too cool and you get pale, dense cakes. While it's heating, generously butter four 6-ounce ramekins, making sure to coat every nook and cranny. I use a pastry brush to get into the creases where the bottom meets the sides, because nothing's sadder than a cake that won't release. Sprinkle a tablespoon of brown sugar into each ramekin and tilt them around so the sugar coats the butter in an even layer, tapping out the excess. This isn't just for flavor — it creates a non-stick barrier that ensures your cakes slide out like they're eager to show off their peach crowns.
- Now for the fun part — arranging those peach slices like you're creating edible art. Slice each peach into 6-8 wedges, depending on size, and fan them out in the bottom of each ramekin. Start from the center and work your way out, overlapping slightly like fish scales. The goal is complete coverage without too much stacking, which prevents the cake from rising evenly. If your peaches are particularly juicy, let them drain on paper towels for a few minutes first. That extra liquid can make the caramel too thin and prevent it from setting properly. One time I skipped this step and ended up with peach soup — delicious, but definitely not Instagram-worthy.
- Melt the butter in a small saucepan over medium heat until it's completely liquid and just starting to foam. Swirl it occasionally — you're looking for little brown flecks to form at the bottom, which gives you brown butter magic. This takes about 3-4 minutes, but don't walk away. Butter goes from perfect to burnt faster than you can say "dessert disaster." Once you see those nut-brown specks and smell something that reminds you of hazelnuts, pull it off the heat immediately and let it cool for 5 minutes. Hot butter will scramble your eggs, and scrambled eggs in cake batter are about as appealing as they sound.
- While the butter cools, whisk together the flour, baking powder, and salt in a medium bowl. This isn't just busy work — whisking aerates the flour and ensures the leavening is evenly distributed. Nobody wants a cake with a pocket of baking powder that tastes like soap. I like to sift everything together twice, which sounds fussy but takes 30 seconds and prevents those little flour lumps that never quite mix in. Set this aside and move on to the wet ingredients before the butter solidifies.
- In another bowl, beat the eggs and granulated sugar together until they're thick and pale. This should take about 2 minutes with an electric mixer, or 4 minutes if you're going analog with a whisk. You're not just combining — you're incorporating air that gives the cakes lift. The mixture should form a ribbon when you lift the beaters, falling back into the bowl in a thick stream that sits on the surface for a few seconds before disappearing. If it just plops in, keep going. This step separates fluffy cakes from dense doorstops.
- Okay, ready for the game-changer? Pour that slightly cooled butter into the egg mixture in a slow stream while whisking constantly. The mixture will turn glossy and smooth, like liquid gold. Add the milk and vanilla, whisking just until combined. The batter might look slightly curdled — that's totally normal and will come together when you add the flour. If it looks completely separated, your butter was too hot. Pop the bowl in the fridge for 5 minutes and whisk again, and it should emulsify beautifully.
- Add the flour mixture to the wet ingredients and fold with a spatula until just combined. This is where most people go wrong — they mix until smooth, which develops gluten and gives you tough cakes. You want to stop when there are still a few streaks of flour visible; they'll disappear as you portion the batter. The batter should be thick but pourable, like yogurt that's been left out for an hour. If it's too thick, add a tablespoon of milk. Too thin? A tablespoon more flour should fix it.
- Divide the batter among the prepared ramekins, filling each about three-quarters full. Tap them gently on the counter to release any air bubbles, then smooth the tops with a small offset spatula or the back of a spoon. Place the ramekins on a baking sheet for easy handling and slide them into the oven. Bake for 25-30 minutes, rotating the pan halfway through for even browning. They're done when they're golden brown, pulling away slightly from the sides, and a toothpick inserted into the center comes out clean. The peaches will be bubbling up around the edges like little lava pools of caramelized joy.
- Let the cakes cool for exactly 5 minutes — not a second more, not a second less. Too cool and the caramel sets, gluing the cakes to the ramekins. Too hot and they'll fall apart when you invert them. Run a thin knife around the edges to loosen, then place a small plate over each ramekin and invert in one confident motion. If you're feeling nervous, place a folded kitchen towel over the ramekin first — it gives you better grip and prevents burnt fingers. Lift the ramekin slowly, and if any peach slices stick, just nudge them back into place with a small spatula. Nobody will know but you.
That's it — you did it. But hold on, I've got a few more tricks that'll take this to another level...
Insider Tricks for Flawless Results
The Temperature Rule Nobody Follows
Room temperature ingredients aren't just a suggestion — they're the difference between cake and catastrophe. Cold eggs don't incorporate air properly, leading to dense cakes that sink in the center. Cold milk causes the butter to solidify into little pellets that create holes in your finished cake. Take everything out of the fridge 30 minutes before you start, or speed things up by placing eggs in warm (not hot) water for 5 minutes and microwaving milk for 15 seconds. Your future self doing the happy dessert dance will thank you.
Why Your Nose Knows Best
Trust your sense of smell more than your timer. When the cakes are nearly done, your kitchen will fill with the scent of caramel and toasted butter — that's your cue to start checking. If you wait for the timer, you might miss that perfect window where the edges are crisp but the centers still jiggle slightly. A friend tried skipping this step once and served hockey pucks at her dinner party. We still talk about it, though not in the way she hoped.
The 5-Minute Rest That Changes Everything
After inverting, resist the urge to serve immediately. Let the cakes rest for 5 minutes so the caramel can set slightly and the peaches have a moment to absorb some of that buttery syrup. This brief pause transforms them from good to unforgettable — the difference between a rushed weeknight dessert and something that makes people close their eyes and sigh. Plus, it gives you time to whip some cream or scoop ice cream, creating the perfect temperature contrast of warm cake and cold accompaniment.
The Flip Technique That Never Fails
Confidence is key when inverting these beauties. Place your plate directly over the ramekin, hold them together with both hands (thumbs on top, fingers underneath), and flip in one smooth motion. Don't hesitate or try to peek — that's when disasters happen. If you're nervous, practice with an empty ramekin first. The motion should feel like turning a page in a book, not like you're performing surgery. And remember, even if it breaks, it still tastes incredible. Just call it "rustant" and pretend you planned it that way.
The Serving Temperature Sweet Spot
These cakes are best served warm but not piping hot — about 10 minutes after inverting. Too hot and the caramel runs off the plate, taking all those gorgeous peach slices with it. Too cool and the caramel thickens, becoming chewy instead of saucy. If you need to reheat them, 10 seconds in the microwave per cake is plenty. Any more and you'll recreate my midnight smoke alarm situation, and nobody wants that kind of excitement during dessert.
Creative Twists and Variations
This recipe is a playground. Here are some of my favorite ways to switch things up:
The Bourbon Peach Party
Replace 2 tablespoons of the milk with your favorite bourbon and add a pinch of cinnamon to the caramel. The alcohol cooks off, leaving behind complex notes that make people ask if you've been taking baking classes. Top with bourbon whipped cream (just add a splash to your cream before whipping) for the full experience. This version is particularly popular at adult dinner parties where the conversation might drift to politics and everyone needs something delicious to keep things civil.
The Tropical Escape
Swap peaches for pineapple chunks and add 2 tablespoons of shredded coconut to the batter. Use coconut milk instead of regular milk and a teaspoon of rum extract. The result tastes like a pina colada met a cake and had a beautiful baby. Serve with coconut ice cream and a sprinkle of toasted coconut for texture. If you close your eyes while eating, you can almost hear steel drums and feel ocean breezes.
The Spiced Autumn Version
Use firm pears instead of peaches, add a pinch of cardamom and nutmeg to the batter, and replace half the brown sugar with maple syrup. The pears hold their shape beautifully and the maple adds a New England autumn vibe that's perfect when peaches are out of season. A dollop of cinnamon whipped cream and a drizzle of maple syrup turns these into fall on a plate.
The Chocolate Cherry Bomb
Replace peaches with pitted cherries and add 2 tablespoons of cocoa powder to the flour. The chocolate-cherry combination is classic for a reason, and the cocoa adds depth without making the cakes heavy. Use kirsch (cherry brandy) instead of vanilla for an extra punch. The cakes emerge with a mahogany hue and taste like Black Forest cake's sophisticated cousin.
The Savory-Sweet Adventure
Add a pinch of black pepper and a teaspoon of fresh thyme leaves to the caramel. The pepper enhances the fruit's sweetness while the thyme adds an herby note that keeps things interesting. This version pairs beautifully with rosemary ice cream or a dollop of crème fraîche. It's the kind of dessert that makes food bloggers weep with joy and dinner guests ask for the recipe before they've finished chewing.
The Breakfast-Approved Version
Use whole wheat pastry flour instead of all-purpose, reduce the sugar by 1/4 cup, and serve warm with Greek yogurt. Call them "peach upside-down breakfast cakes" and feel virtuous about eating dessert first thing in the morning. The whole wheat adds nuttiness that complements the peaches beautifully, and the protein from the yogurt makes it feel like a complete meal. I've served these at brunch and watched people who normally nibble at fruit plates devour two each.
Storing and Bringing It Back to Life
Fridge Storage
These cakes keep beautifully in the fridge for up to 3 days, though honestly they've never lasted more than 24 hours in my house. Store them in an airtight container with wax paper between layers to prevent sticking. The caramel will firm up in the cold, so bring them to room temperature for 20 minutes before serving or give them that quick microwave zap. The peaches might darken slightly, but they'll taste just as good. If you notice any condensation in the container, pop the cakes onto a paper towel for a few minutes to absorb excess moisture.
Freezer Friendly
Wrap each cooled cake tightly in plastic wrap, then aluminum foil, and freeze for up to 2 months. Thaw overnight in the fridge, then warm in a 300°F oven for 10 minutes or microwave for 20 seconds. They won't be quite as perfect as fresh, but they're still miles better than most desserts. The caramel might crystallize slightly, but a quick brush with warm simple syrup restores its glossy shine. I always make a double batch and freeze half for emergencies — like Tuesday nights when I need something sweet but don't want to bake.
Best Reheating Method
The oven is your friend here. 300°F for 8-10 minutes restores the crisp edges and warm center without drying them out. If you're in a hurry, microwave on 50% power for 15-20 seconds, then let stand for 30 seconds (they keep cooking). Add a tiny splash of water before reheating — it steams back to perfection and prevents the dreaded rubbery texture. For the ultimate experience, reheat in a skillet with a tiny pat of butter, letting the bottoms get crispy again while the tops warm through. It's like having fresh-baked cakes all over again.