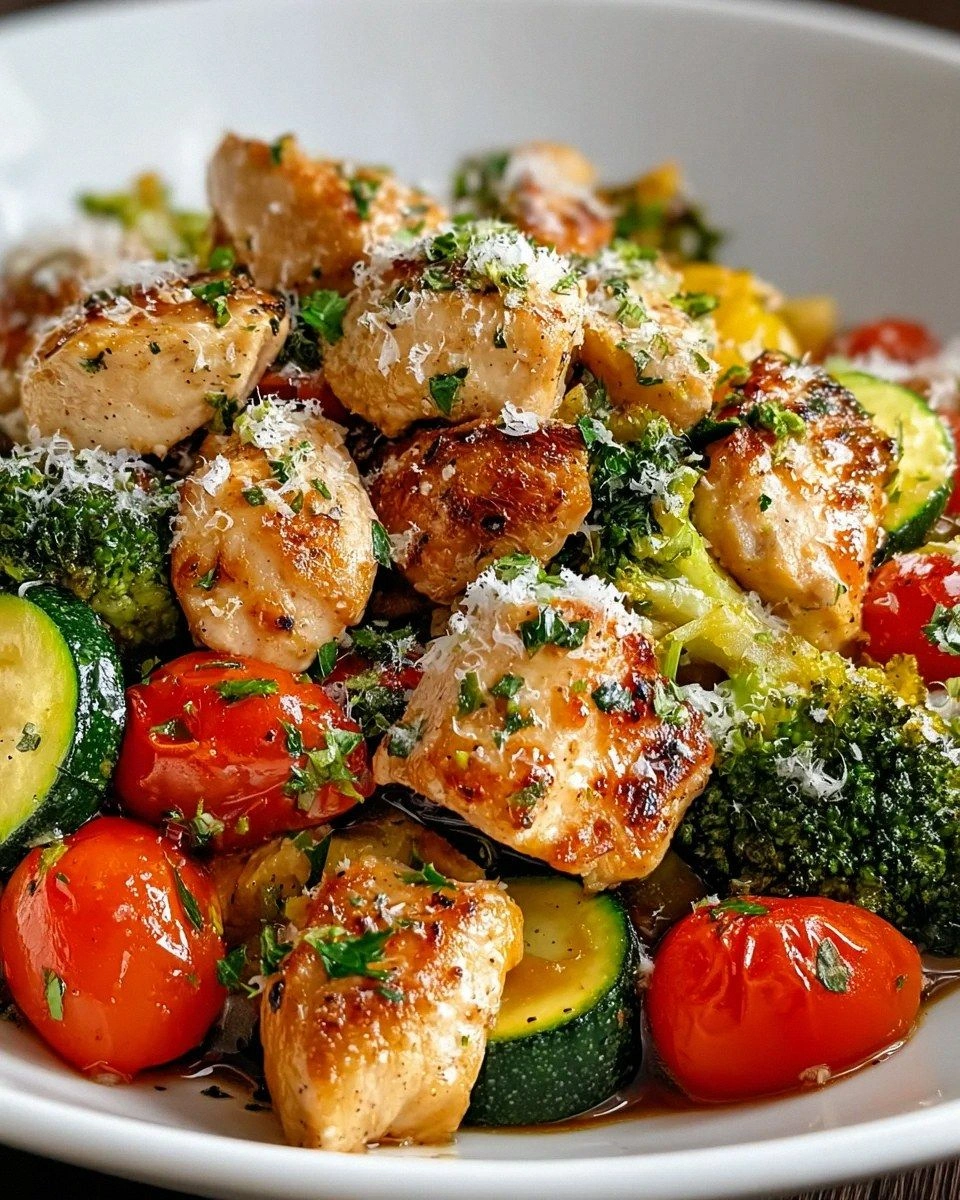
I was halfway through a night of binge‑watching cooking shows when my roommate dared me to make something that would actually make her forget about the pizza delivery she’d ordered earlier. I laughed, grabbed the first thing I could find in the fridge, and tossed together a chaotic mix of chicken, veggies, and whatever spices were within arm’s reach. The result? A skillet that smelled like a backyard barbecue collided with a Mediterranean market, and a taste that shouted, “I dare you to taste this and not go back for seconds.” That moment of accidental brilliance turned into a full‑blown obsession, and I’ve refined it into what I now call the ultimate Loaded Chicken and Veggie Skillet.
Picture this: the sizzle of olive oil hitting a hot pan, the crackle of garlic and onion caramelizing into sweet gold, the bright pop of bell peppers and zucchini as they hit the heat, and the deep, earthy aroma of smoked paprika rising like a promise. The skillet is a kaleidoscope of colors—ruby red tomatoes, sunny yellow peppers, forest‑green broccoli—all dancing together while the chicken pieces turn a perfect, juicy amber. When you finally lift the lid, a thin veil of steam carries a hint of lemon, making your kitchen feel like a sun‑kissed patio in the middle of a busy city.
Most recipes get this completely wrong. They either drown the chicken in sauce, leaving it soggy, or they over‑cook the veggies until they’re mushy. I’ve cracked the code by using a high heat sear first, then a brief, covered simmer that locks in moisture without sacrificing that coveted caramelized edge. The secret ingredient? A splash of low‑sodium chicken broth combined with soy sauce that creates a glossy coating, almost like a satin dress for each bite. And the finish? A quick drizzle of lemon juice and a shower of fresh parsley that lifts the whole dish into a bright, fresh realm.
Okay, ready for the game‑changer? I’m about to walk you through every single step — by the end, you’ll wonder how you ever made this any other way. Stay with me here — this is worth it. Let’s dive in and turn that ordinary skillet into a masterpiece that will have everyone asking for the recipe, and you’ll be the hero of your own kitchen.
What Makes This Version Stand Out
- Flavor Explosion: The combination of smoked paprika, soy sauce, and a splash of lemon creates layers that unfold with every bite, delivering a savory‑bright profile that’s hard to beat.
- Texture Symphony: You get crisp‑tender veggies, juicy chicken, and a light glaze that clings without being gummy — a true contrast that keeps the palate engaged.
- Simplicity Meets Sophistication: Only a handful of pantry staples are needed, yet the result feels restaurant‑grade, proving you don’t need fancy gadgets to impress.
- Unique Ingredient Pairing: The subtle heat from cumin paired with the smoky depth of paprika creates a flavor bridge you won’t find in most skillet recipes.
- Crowd‑Pleaser Factor: I’ve served this at family gatherings, potlucks, and even a last‑minute date night, and it consistently earns rave reviews and seconds.
- Ingredient Quality: Using fresh, seasonal veggies and high‑quality chicken makes a noticeable difference; the dish shines when each component is at its peak.
- Cooking Method Mastery: The two‑stage cooking—sear then simmer—locks in juices while allowing the glaze to develop, a technique many overlook.
- Make‑Ahead Magic: This skillet stores beautifully, and the flavors meld even more after a night in the fridge, making it perfect for meal prep.
Inside the Ingredient List
The Flavor Base
The backbone of this skillet is the trio of olive oil, garlic, and onion. Olive oil provides a buttery mouthfeel that carries the aromatics, while the garlic and onion create a fragrant foundation that’s impossible to ignore. If you skip the onion, you’ll lose that subtle sweetness that balances the smoky paprika. For a twist, try swapping half the olive oil for butter for an even richer mouthfeel.
The Texture Crew
Bell peppers, zucchini, broccoli, carrots, and cherry tomatoes are the colorful cast that brings crunch and juiciness. Each vegetable is cut to a uniform size so they cook evenly; too large and you’ll end up with soggy bites, too small and they’ll burn. If you’re missing broccoli, cauliflower works just as well, though it won’t provide the same bright green pop.
The Unexpected Star
A splash of low‑sodium chicken broth mixed with soy sauce is the secret sauce that binds everything together. The broth adds depth without overwhelming salt, while soy sauce contributes umami and a glossy sheen. Skip the broth and you’ll end up with a dry skillet; skip the soy and the dish loses its savory backbone. For a gluten‑free version, substitute tamari for soy sauce.
The Final Flourish
A pinch of smoked paprika and a whisper of cumin create a warm, smoky undertone that elevates the whole dish. Fresh parsley and a squeeze of lemon added at the end brighten the flavors, preventing the skillet from feeling heavy. If you prefer a herbaceous note, swap parsley for cilantro and add a dash of lime juice instead of lemon.
Everything's prepped? Good. Let’s get into the real action…
The Method — Step by Step
Heat a large cast‑iron skillet over medium‑high heat until it’s hot enough that a drop of water sizzles and evaporates instantly. Add 2 tablespoons of olive oil, swirling to coat the surface. Once the oil shimmers, lay the chicken pieces in a single layer, making sure they’re not crowded; this ensures a golden sear. Let them cook undisturbed for about 3‑4 minutes, then flip to achieve an even caramelization on all sides. The aroma at this point is pure anticipation — that sizzle when it hits the pan? Absolute perfection.
Remove the chicken and set aside, but keep the pan’s flavorful bits. Add the diced onion to the same skillet, stirring with a wooden spoon to deglaze any stuck bits. After a minute, toss in the minced garlic and let it bloom for 30 seconds, being careful not to let it burn. Power transition: Okay, ready for the game‑changer? This is where the vegetables get their stage.
Kitchen Hack: If the onions start to stick, splash a tablespoon of broth to loosen them; this adds flavor while preventing a burn.Now cascade in the sliced bell peppers, zucchini, broccoli, and carrots. Stir vigorously to coat each piece with the aromatic oil, and let them cook for about 4‑5 minutes, stirring occasionally. You’re looking for a slight char on the edges while the interiors stay crisp‑tender. If you prefer softer veggies, cover the skillet for the last two minutes to trap steam.
Return the seared chicken to the pan, nestling it among the vegetables. Sprinkle the smoked paprika, cumin, and a pinch of salt and pepper over everything. Toss everything together so the spices cling to each morsel, creating a fragrant cloud that fills the kitchen.
Pour in the ½ cup of chicken broth and the 2 tablespoons of soy sauce, then give the mixture a good stir. Reduce the heat to medium‑low, cover the skillet, and let it simmer for 8‑10 minutes. This gentle steam‑simmer allows the chicken to finish cooking through while the vegetables absorb the savory broth. This next part? Pure magic. When the timer dings, lift the lid — you should see a glossy, slightly reduced sauce clinging to every ingredient.
Watch Out: If you stir too aggressively at this stage, the sauce can become watery; a gentle fold is all you need.After the simmer, uncover the skillet and increase the heat to high for a quick 2‑minute reduction. This step is crucial: it concentrates the flavors and gives the dish that restaurant‑style sheen. You’ll notice the edges of the chicken pulling away slightly, a visual cue that the glaze has thickened just right. Don’t walk away from the stove here — a minute too long and you risk a burnt bottom.
Finish with a generous drizzle of fresh lemon juice and a handful of chopped parsley. The acidity cuts through the richness, while the parsley adds a pop of green that makes the dish look as good as it tastes. Give everything one last gentle toss to distribute the bright finish evenly.
Serve the skillet straight from the pan, allowing the sizzling sound to linger as you bring the first spoonful to the table. Pair it with crusty bread or a simple side of rice if you need extra carbs. That moment when you see the steam rise, the colors gleam, and the aroma hits you — pure kitchen triumph.
That’s it — you did it. But hold on, I’ve got a few more tricks that’ll take this to another level, from a quick garnish to a make‑ahead tip that keeps the flavors bright for days.
Insider Tricks for Flawless Results
The Temperature Rule Nobody Follows
Most home cooks start with a low heat, assuming it’s safer for chicken. In reality, a hot pan creates a Maillard reaction that locks in juices and builds flavor. I always pre‑heat the skillet until a drop of water dances on the surface, then drop the oil. If the oil smokes too quickly, lower the heat by a notch; if it just shimmers, you’re golden.
Why Your Nose Knows Best
Your sense of smell is the ultimate timer. When the onions turn translucent and start to caramelize, you’ll catch a sweet, slightly nutty scent. That’s your cue to add garlic; waiting too long will make it bitter. Trust that nose — it’s more reliable than any kitchen timer.
The 5‑Minute Rest That Changes Everything
After the skillet is done, let it sit off the heat for five minutes. This rest allows the juices to redistribute throughout the chicken and veggies, preventing a dry bite. I’ve seen people dive straight in and end up with a soggy bottom; the rest keeps the glaze glossy and the texture perfect.
Deglaze Like a Pro
When you deglaze with broth, scrape the fond (the browned bits) with a wooden spoon. Those bits are flavor gold. Skipping this step leaves the sauce flat and missing that depth. A quick swirl of the pan while adding the broth ensures every caramelized fragment dissolves into the sauce.
The One‑Minute Finish
A final high‑heat minute after the simmer is the secret to that restaurant‑style glaze. It reduces the liquid just enough to coat each piece without turning it into a sticky mess. Keep a close eye — you want a sheen, not a crust.
Creative Twists and Variations
This recipe is a playground. Here are some of my favorite ways to switch things up:
Spicy Sriracha Kick
Add 1‑2 teaspoons of sriracha to the broth‑soy mixture for a subtle heat that tingles the palate. Great for those who love a little fire without overwhelming the veggies.
Mediterranean Magic
Swap the smoked paprika for 1 tsp of dried oregano and add a handful of Kalamata olives. The briny olives complement the lemon finish and give the dish a Greek island vibe.
Creamy Coconut Curry
Replace the chicken broth with coconut milk, add 1 tsp of curry powder, and finish with a sprinkle of toasted coconut flakes. This turns the skillet into a fragrant, creamy curry that pairs beautifully with jasmine rice.
Tex‑Mex Fiesta
Introduce a can of black beans, a cup of corn kernels, and a dash of cumin‑chili blend. Top with shredded cheddar and a dollop of sour cream for a southwestern spin.
Herbaceous Green
Add a generous handful of fresh spinach at the end of the cooking process; it wilts quickly and adds a boost of iron. Finish with a drizzle of pesto for an herb‑laden finish.
Protein‑Packed Swap
Replace the chicken with firm tofu cubes or shrimp for a different protein profile. Adjust cooking times accordingly — shrimp need only 2‑3 minutes, tofu benefits from an extra crisp sear.
Storing and Bringing It Back to Life
Fridge Storage
Allow the skillet to cool to room temperature, then transfer to an airtight container. It keeps beautifully for up to 4 days. When reheating, add a splash of water or broth to restore moisture, then warm gently over medium heat, stirring occasionally.
Freezer Friendly
Portion the cooled skillet into freezer‑safe bags or containers, removing as much air as possible. It freezes solid for up to 3 months. Thaw overnight in the fridge, then reheat in a skillet with a tablespoon of broth, letting the sauce revive.
Best Reheating Method
The stovetop is king. Heat a non‑stick skillet over medium heat, add a teaspoon of oil, then toss the frozen or refrigerated portion in. Cover for 2‑3 minutes, uncover, and let the glaze re‑emerge. The result is as close to fresh as you’ll get.