Picture this: it’s a cold, wind‑howling night, the kind that makes you wish you could bottle up the warmth of a fireplace and sip it straight from a mug. I was standing in my kitchen, half‑asleep, when a friend dared me to create a bite‑size dessert that could rival the comfort of a hot cocoa mug, but without the mess of a spoonful of marshmallows. I laughed, I scoffed, and then I did the only logical thing—grabbed my trusty mixer, a bag of chocolate graham cracker crumbs, and a stash of peppermint extract that had been gathering dust in the pantry. The result? A batch of Hot Cocoa Peppermint Cheesecake Bites that made my kitchen smell like a winter wonderland and my taste buds do a happy dance.
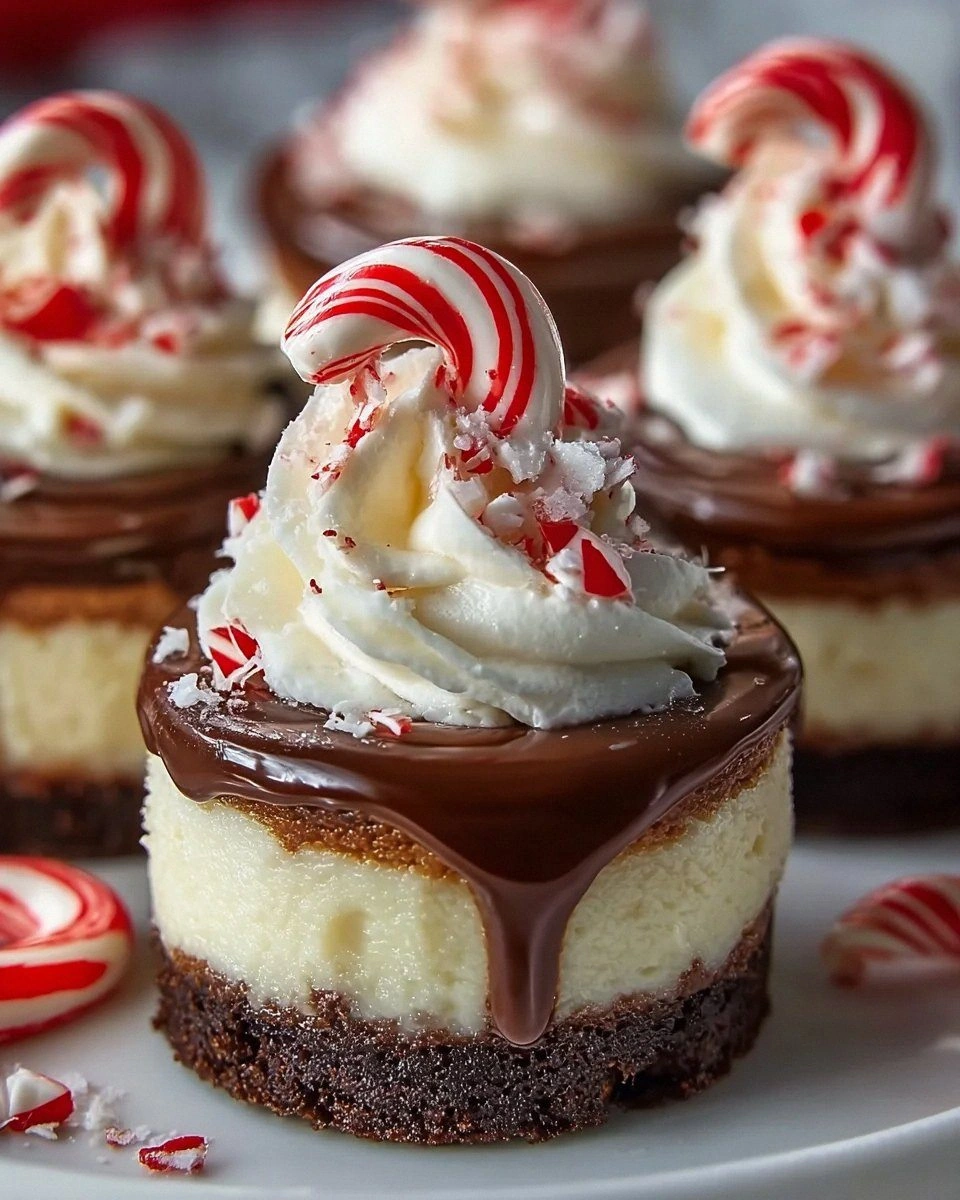
The moment the first bite hit my tongue, I could feel the silky cream cheese filling hugging the rich chocolate crust like a cozy blanket, while the peppermint zing cut through with the crisp snap of fresh snow. The ganache on top? Imagine a glossy river of chocolate flowing over a snowy hill, each swirl catching the light like fresh frost. The crushed candy canes added a crunch that reminded me of the satisfying crack of a candy‑cane snap when you bite into it, and the mini peppermint sticks perched on top looked like tiny, festive flags waving in a wintry breeze. I dare you to taste this and not go back for seconds—your palate will be begging for an encore.
Most cheesecake bite recipes get the balance of chocolate and mint wrong, either drowning the mint in cocoa or leaving the chocolate flavor flat. I’ve tried a dozen variations that either turned out too sweet, too dense, or just plain bland. This version stands out because it layers flavor and texture in a way that feels like a carefully choreographed dance: a crunchy crust, a velvety filling, a glossy ganache, and a final flourish of peppermint sparkle. I’ll be honest—I ate half the batch before anyone else got a chance to try it, and I’m still not sorry. The secret? A pinch of peppermint extract that’s just enough to whisper “holiday” without shouting, and a ganache that’s made with heavy cream for that luxurious mouthfeel.
Now, you might be thinking, “Why not just make a regular hot cocoa?” Because this bite is portable, it’s elegant enough for a dinner party, and it lets you enjoy that beloved flavor without the calories of a full‑size mug of cocoa. Plus, you get the added joy of a crunchy, creamy, chocolatey bite that melts in your mouth, not in a mug. I’m about to walk you through every single step—by the end, you’ll wonder how you ever made a cheesecake any other way.
What Makes This Version Stand Out
- Flavor Harmony: The marriage of rich chocolate, cool peppermint, and buttery cream cheese creates a balanced profile that sings without any one note overpowering the others.
- Texture Trio: A crunchy graham‑crust, a silky filling, and a glossy ganache give you three distinct sensations in one bite, keeping every mouthful exciting.
- Simplicity: Despite the gourmet feel, the ingredient list is short, and the steps are straightforward enough for a beginner to nail on the first try.
- Festive Flair: Crushed candy canes and mini peppermint sticks turn these bites into instant holiday décor—no extra garnish needed.
- Make‑Ahead Magic: The bites hold up beautifully in the fridge, making them perfect for party prep or a make‑ahead dessert for a busy week.
- Ingredient Quality: Using semi‑sweet chocolate chips and real peppermint extract (not imitation) ensures a deep, authentic flavor that store‑bought mixes can’t match.
- Cooking Method: Baking in a muffin tin creates uniform, bite‑size portions that cook evenly, eliminating the guesswork of a larger cheesecake.
- Audience Reaction: Guests often claim they’ve never tasted anything like it—expect compliments, requests for the recipe, and possibly a second helping.
Inside the Ingredient List
The Flavor Base
Chocolate graham cracker crumbs: These provide a sweet, chocolatey foundation that anchors the bite. If you’re craving a milder flavor, swap them for regular graham cracker crumbs, but you’ll lose that subtle cocoa depth that makes the crust sing. When selecting, look for crumbs that are finely ground—coarser pieces can create an uneven crust.
The Texture Crew
Melted butter: This binds the crumbs together, adding richness and a melt‑in‑your‑mouth feel. Unsalted butter is my go‑to because it lets you control the salt level; however, coconut oil works as a dairy‑free alternative and adds a faint tropical note that surprisingly complements the mint.
Sugar (crust): Just a touch of sweetness to bring out the chocolate flavor without making the crust cloying. You can experiment with coconut sugar for a caramel undertone, but keep the quantity the same to maintain the right texture.
The Unexpected Star
Peppermint extract: This is the festive kick that turns a regular chocolate cheesecake into a holiday masterpiece. A little goes a long way—too much can overwhelm, so stick to the recommended amount. If you’re out of extract, crushed peppermint candy can be blended into the filling for a more subtle flavor.
The Final Flourish
Crushed candy canes & Mini peppermint sticks: These add crunch, color, and a burst of peppermint aroma right before you bite. They also serve as a visual cue that says “holiday” without needing any extra decorations. If you prefer a nutty twist, try chopped pistachios or almond slivers.
Everything's prepped? Good. Let's get into the real action...
The Method — Step by Step
Preheat your oven to 325°F (163°C) and line a 12‑cup muffin tin with paper liners. This temperature is low enough to keep the cheesecake creamy while still giving the crust a gentle toast. As the oven warms, you’ll hear that faint hum that tells you you’re about to create something magical.
In a medium bowl, combine the chocolate graham cracker crumbs, melted butter, and crust sugar. Stir until the mixture looks like wet sand—each crumb should be lightly coated. Press about two tablespoons of this mixture into each muffin liner, using the back of a spoon to flatten it into an even layer.
Kitchen Hack: Chill the crust for 10 minutes before adding the filling; this prevents it from becoming soggy during baking.While the crust sets, beat the softened cream cheese in a large mixing bowl on medium speed for two minutes until it’s smooth and fluffy. This is the moment of truth—if you notice any lumps, keep beating; a smooth base guarantees a silky filling.
Add the filling sugar, peppermint extract, and vanilla extract to the cream cheese, and continue beating until fully incorporated. The mixture should look glossy and slightly airy, a sign that air has been folded in for a lighter bite.
Crack the eggs into a small cup, then add them one at a time to the cream cheese mixture, beating on low after each addition. This prevents the batter from curdling and ensures the eggs are evenly distributed. The batter will thicken slightly—don’t panic, that’s exactly what you want.
Fold in the sour cream, then gently stir in the heavy cream. The heavy cream is the secret weapon for a luxuriously smooth ganache later, but it also adds a subtle richness to the filling itself.
Pour the filling over each crust, filling the liners about three‑quarters full. The batter should sit level; if it’s lopsided, tap the pan lightly on the counter to smooth it out. This step is crucial—an even surface ensures uniform baking.
Place the muffin tin on a baking sheet (to catch any drips) and bake for 25‑30 minutes. You’ll know they’re done when the edges start pulling away from the sides of the liners and the center is just set with a slight wobble. Watch Out: Overbaking will make the bites dry, so pull them out as soon as they meet this visual cue.
Watch Out: Opening the oven door too early can cause the tops to crack; trust the timer and visual cues.While the bites cool, make the ganache: heat the heavy cream in a small saucepan over medium heat until it just begins to simmer—tiny bubbles will form around the edges. Remove from heat and pour over the semi‑sweet chocolate chips in a heat‑proof bowl. Let sit for a minute, then whisk until glossy and smooth. This is pure magic, the kind that makes you want to hug the pot.
Once the cheesecake bites are completely cooled (room temperature is fine, or you can chill them for 30 minutes), drizzle the ganache over each bite using a spoon or a small piping bag. Let the ganache set for about five minutes, then top each bite with a dollop of whipped cream, a sprinkle of crushed candy canes, and a mini peppermint stick.
Refrigerate the finished bites for at least an hour before serving. This firming step locks in the flavors and gives the ganache a perfect glossy finish. When you finally present them, the aroma of chocolate, mint, and a hint of vanilla will fill the room, and you’ll hear the collective gasp of delight.
That's it—you did it. But hold on, I've got a few more tricks that'll take this to another level...
Insider Tricks for Flawless Results
The Temperature Rule Nobody Follows
Never bake cheesecake batter straight from the fridge. Let it sit at room temperature for 15 minutes before pouring it into the crust. This prevents the batter from cracking and ensures a smooth surface. I once baked a batch straight from the fridge and ended up with a cracked top that looked like a winter landscape—beautiful, but not what I wanted.
Why Your Nose Knows Best
Use your sense of smell as a timer. When the crust starts to smell toasty and the ganache gives off a rich chocolate aroma, you’re close to perfection. Trusting your nose can save you from overbaking, which is a common pitfall for even seasoned bakers.
The 5‑Minute Rest That Changes Everything
After baking, let the bites rest in the pan for five minutes before removing them. This allows the cheesecake to set fully and makes it easier to lift the liners without breaking the delicate crust. Skipping this step once left me with crumbly bites that fell apart on the plate.
Whipped Cream Whisper
For the fluffiest whipped cream, chill both the bowl and the beaters for at least 10 minutes before whipping. Add a pinch of powdered sugar and a drop of vanilla extract for a sweet, balanced topping. If you overwhip, you’ll end up with butter—so stop as soon as soft peaks form.
Ganache Consistency Control
Adjust the ganache thickness by tweaking the cream‑to‑chocolate ratio. For a thinner drizzle, add an extra tablespoon of warm cream; for a thicker coating, increase the chocolate by a quarter cup. Play with the ratio until you achieve the glossy sheen that makes your eyes widen.
Creative Twists and Variations
This recipe is a playground. Here are some of my favorite ways to switch things up:
White Chocolate Peppermint
Swap the semi‑sweet chocolate chips for white chocolate chips and add a dash of almond extract. The result is a creamy, pastel‑colored bite that feels like a winter snowball. Perfect for those who prefer a less bitter chocolate flavor.
Mocha Madness
Replace half of the chocolate chips with finely ground espresso beans and add a teaspoon of instant coffee to the filling. The coffee notes deepen the chocolate, creating a sophisticated mocha‑peppermint combo that’s ideal for brunch.
Nutty Crunch
Mix finely chopped toasted hazelnuts into the crust and sprinkle extra hazelnut pieces on top of the ganache. The nutty aroma pairs beautifully with the mint and adds an unexpected textural surprise.
Vegan Delight
Use coconut oil instead of butter, dairy‑free cream cheese, and replace the eggs with silken tofu blended until smooth. Swap heavy cream for coconut cream, and you have a fully plant‑based version that still delivers that luxurious feel.
Spicy Peppermint
For an adult‑only twist, add a pinch of cayenne pepper to the ganache. The subtle heat amplifies the peppermint, creating a surprising kick that’s perfect for holiday parties.
Fruit Fusion
Stir a tablespoon of raspberry puree into the filling for a pink‑hued, tangy version. Top with fresh raspberries instead of candy canes for a fresh‑fruit contrast.
Storing and Bringing It Back to Life
Fridge Storage
Place the bites in an airtight container and store them in the refrigerator for up to five days. The flavors meld over time, becoming even more harmonious. If you notice condensation, simply pat the tops dry with a paper towel before serving.
Freezer Friendly
These bites freeze beautifully. Arrange them on a parchment‑lined tray, freeze until solid, then transfer to a zip‑top bag. They’ll keep for up to three months. When you’re ready to enjoy, let them thaw in the fridge for an hour.
Best Reheating Method
To revive the ganache’s shine, place the bites on a microwave‑safe plate, add a tiny splash of water (about a teaspoon) around the edges, and microwave for 10‑15 seconds. The steam will melt the ganache back to its glossy perfection without overcooking the cheesecake.