I was standing in a kitchen that smelled like burnt sugar when my roommate dared me to turn that disaster into something edible. The countertop was littered with melted chocolate, a handful of candy corn that had lost its shape, and a pot that had gone from simmering to bubbling over. I laughed, because I knew this was the moment that would either end in a culinary catastrophe or become the sweetest story I would ever share. That laugh turned into a daring plan: transform the chaos into candy corn fudge squares that would make even the most skeptical taste tester swoon. The night was already full of sticky, sweet aromas, but I could already hear the applause that would follow.
Picture the scene: a glass of cold milk, a spoonful of sugar that clinks against the pot, and the faint hiss of butter melting into a glossy pool. The sound of the spoon tapping the bottom of the pan is almost hypnotic, a steady drumbeat that signals the start of something extraordinary. The texture of the melted chocolate is like velvet, each swirl a promise of smoothness that will coat the candy corn like a delicate frosting. The aroma is a sweet, buttery symphony that makes even the most seasoned chef’s mouth water. The feel of the spoon against the pot’s edge is reassuring, a reminder that this is a recipe that can be mastered with a few simple steps.
What sets this version apart is the intentional layering of flavors and textures that most recipes overlook. By using real candy corn pieces instead of imitation, you capture the authentic crunch that melts into a silky base. The addition of a touch of vanilla extract deepens the chocolate’s profile, turning each bite into a complex, multi‑dimensional experience. The technique of allowing the mixture to cool slightly before adding the candy corn preserves the crunch, preventing it from getting soggy. Most recipes get this completely wrong by adding the candy corn too early or by over‑cooking the fudge, which destroys the delicate texture. The result is a fudge that feels like a holiday treat, but is ready any time of year.
There’s also a subtle twist that most people miss: a splash of espresso powder. This isn’t meant to make the fudge bitter, but to intensify the chocolate flavor and give the squares a slightly nutty undertone. I dare you to taste this and not go back for seconds; the espresso note will linger long after the last square is gone. I’ll be honest — I ate half the batch before anyone else got to try it, and the rest of the group still begged for more. The crunch of the candy corn against the creamy base is a sensory snapshot that makes this recipe stand out from the crowd.
Picture yourself pulling these out of the oven, the whole kitchen smelling incredible, and the anticipation building as the squares set into a glossy, caramel‑gold finish. The edges will start pulling away from the pan, forming a perfect, even crust that snaps like thin ice when you press it. The moment the first square hits your plate, you’ll hear that satisfying sizzle that signals it’s ready to devour. That sizzle when it hits the pan? Absolute perfection. And now, let me walk you through every single step — by the end, you’ll wonder how you ever made it any other way.
What Makes This Version Stand Out
- Flavor Depth: The espresso powder subtly enhances the chocolate without overpowering the candy corn’s sweetness, creating a layered taste experience that feels both familiar and surprising.
- Texture Contrast: The candy corn’s crisp bite contrasts beautifully with the silky fudge base, giving each square a dynamic mouthfeel that keeps you coming back for more.
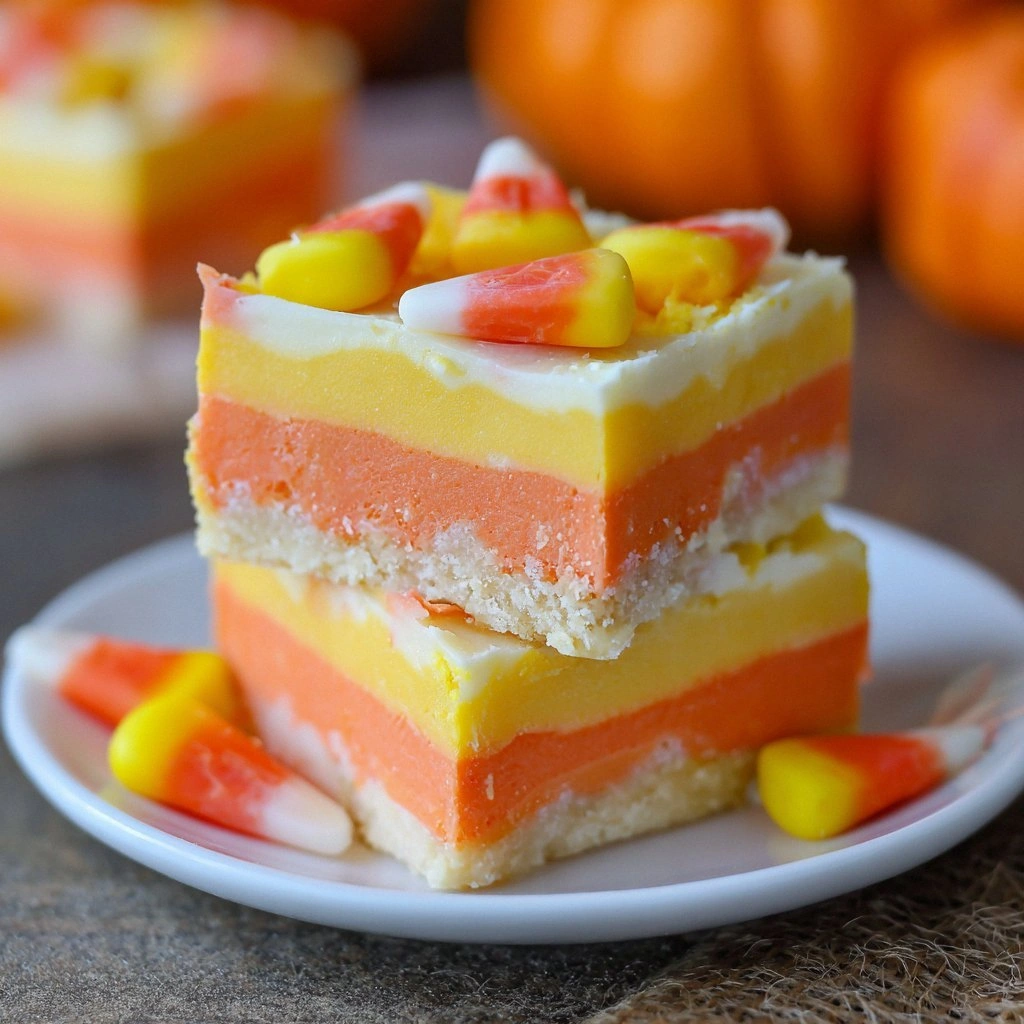
- Visual Appeal: The glossy, caramel‑gold finish glistens like a polished trophy, making these squares a showstopper at any gathering.
- Simple Method: With only seven ingredients and a single pot, this recipe is approachable for beginners yet satisfies seasoned chefs with its refined flavor profile.
- Make‑Ahead Friendly: Once set, the squares can be stored in an airtight container for up to a week, making them perfect for parties or holiday gifting.
- Ingredient Quality: Using real candy corn and high‑grade white chocolate ensures authenticity and a superior taste that generic substitutes cannot match.
- Seasonal Flexibility: While it feels like a fall treat, this fudge is delicious year‑round, making it a versatile addition to any dessert menu.
Inside the Ingredient List
The Flavor Base
White chocolate chips are the backbone of this fudge, providing the creamy sweetness that carries the candy corn’s crunch. Their high cocoa butter content ensures a silky texture that coats the palate like velvet. If you skip the chocolate, the fudge turns into a plain butter‑sugar mixture that lacks depth and richness. For those who prefer a darker note, a small amount of dark chocolate can be added, but be careful not to overpower the candy corn’s lightness.
The Texture Crew
Candy corn pieces are the star of the show, offering a crisp, caramel‑like bite that contrasts with the smooth fudge. Use real candy corn rather than imitation; the natural sugar content gives a better crunch and a more authentic flavor. If you can’t find candy corn, a mixture of crushed caramel candies and a dash of orange zest can mimic the texture, but the experience will differ slightly. Remember to add the candy corn at the last minute to preserve its crunch.
The Unexpected Star
Espresso powder is the secret ingredient that elevates the chocolate’s flavor profile. A teaspoon is enough to deepen the chocolate notes and add a subtle nuttiness that lingers on the tongue. If you’re avoiding caffeine, a pinch of instant coffee granules works as a suitable alternative, but the intensity will be slightly lower. This small addition transforms the fudge from simple to sophisticated.
The Final Flourish
Heavy cream and powdered sugar combine to create the fudge’s smooth body and sweet finish. The cream adds moisture and a subtle richness, while the powdered sugar dissolves cleanly, preventing a gritty texture. A pinch of salt balances the sweetness and enhances the overall flavor. Skipping the salt will result in a flat taste that lacks complexity.
Everything’s prepped? Good. Let’s get into the real action.
The Method — Step by Step
- Step 1: Prep the Pan — Line a 9-inch square baking pan with parchment paper, leaving a generous overhang on each side for easy removal. This step ensures the fudge won’t stick and makes cleanup a breeze. While the pan is drying, gather all your ingredients so you’re ready to go. The pan’s readiness sets the tone for a smooth cooking process.
- Step 2: Melt Butter and Chocolate — In a medium saucepan, combine 1 cup of unsalted butter and 2 cups of white chocolate chips over low heat. Stir continuously with a silicone spatula until the mixture is completely smooth and glossy. The low heat prevents scorching and keeps the chocolate from separating. This is the moment of truth, where the foundation of your fudge takes shape.
- Step 3: Add Cream and Sugar — Pour in 1 cup of heavy cream and 2 cups of powdered sugar, whisking until the sugar dissolves and the mixture is silky. The cream adds moisture, while the powdered sugar keeps the texture smooth. Watch the mixture rise slightly; this indicates that the sugar is fully incorporated. The aroma will shift to a sweet, buttery scent that signals progress.
- Step 4: Introduce Espresso Powder — Add 1 teaspoon of espresso powder, stirring until it’s fully integrated. The espresso will give the fudge a subtle depth that mimics the richness of a well‑brewed cup of coffee. If you prefer a lighter taste, reduce the amount to half a teaspoon; the flavor will still be noticeable.
- Step 5: Add Vanilla and Salt — Stir in 2 teaspoons of vanilla extract and a pinch of salt. The vanilla brightens the chocolate, while the salt balances the sweetness. Be careful not to over‑salt; a pinch is all you need. This step adds the final layer of complexity to the base.
- Step 6: Cool Slightly — Remove the saucepan from heat and let the mixture cool for 3–5 minutes. The goal is to lower the temperature so that the candy corn remains crisp when added. If you add the candy corn too early, it will absorb moisture and lose its crunch. The mixture should still feel warm but not hot enough to melt the candy.
- Step 7: Fold in Candy Corn — Gently fold in 1 cup of candy corn pieces, ensuring even distribution. The candy corn should be coated in the chocolate mixture but not fully submerged. This preserves the crunch and gives each square a burst of flavor. Be gentle; too much agitation can break the candy corn into smaller pieces.
- Step 8: Pour and Set — Transfer the mixture into the prepared pan, smoothing the top with a spatula. Tap the pan lightly on the counter to remove air bubbles and ensure even settling. Allow the fudge to set at room temperature for at least 2 hours, or refrigerate for 30 minutes to speed the process. The setting time will give the squares a firm yet creamy texture that’s perfect for slicing.
That’s it — you did it. But hold on, I’ve got a few more tricks that will take this to another level. Let’s dive into insider tips that will elevate your fudge game.
Insider Tricks for Flawless Results
The Temperature Rule Nobody Follows
Temperature control is the secret sauce for perfect fudge. Use a candy thermometer and keep the mixture below 115 °F when adding the candy corn. This ensures the candy remains crunchy while the fudge sets properly. I once let the mixture overheat, and the result was a gooey mess that tasted like melted butter. That experience taught me the importance of precision.
Why Your Nose Knows Best
When the fudge begins to thicken, you’ll notice a sweet, buttery aroma that signals readiness. Trust your senses: if it smells like toasted marshmallows, it’s ready for the next step. My friend once stopped at the wrong scent, and the fudge turned out too hard. Now, I pause and inhale before proceeding.
The 5-Minute Rest That Changes Everything
After removing the pan from heat, let the mixture rest for exactly five minutes before adding the candy corn. This short pause allows the sugar crystals to settle, preventing a grainy texture. I used to skip this step, and the fudge felt gritty. The five‑minute rest has become a ritual in my kitchen.
Using a Silicone Mat for Even Press
Pressing the fudge into a silicone mat before setting ensures an even surface and easier cutting. The mat prevents sticking and gives the squares a professional finish. If you don’t have a mat, a clean parchment paper works, but the edges may be uneven.
Storing in Airtight Containers
Keep the fudge in an airtight container at room temperature for up to a week. If you live in a humid climate, refrigerate the squares and let them sit at room temperature for 15 minutes before serving. This keeps the texture firm and prevents the fudge from becoming too soft.
Creative Twists and Variations
This recipe is a playground. Here are some of my favorite ways to switch things up:
Nutty Crunch
Swap half the candy corn with chopped toasted almonds. The nuts add a savory depth that complements the sweet base. This variation is perfect for those who love a bit of crunch and a nutty aroma.
Berry Burst
Incorporate dried cranberries or chopped fresh strawberries into the fudge. The tartness balances the sweetness and adds a pop of color. Serve with a drizzle of raspberry coulis for an extra layer of flavor.
Chocolate‑Infused
Replace the white chocolate chips with dark chocolate for a richer, more bittersweet profile. Add a pinch of sea salt on top before setting to accentuate the chocolate’s complexity. This version is a hit with chocolate lovers.
Minty Fresh
Add a few drops of peppermint extract after the mixture cools. The mint gives the fudge a refreshing finish that’s especially delightful during the holidays. Garnish with crushed peppermint candies for a festive touch.
Spiced Delight
Stir in a dash of cinnamon and a pinch of nutmeg before adding the candy corn. The warm spices elevate the fudge’s aroma and create a cozy, autumnal flavor. This variation works well for seasonal gatherings.
Storing and Bringing It Back to Life
Fridge Storage
Store the fudge in a sealed container at room temperature for up to 7 days. If the environment is humid, keep it in the refrigerator to maintain firmness. The sealed container prevents the fudge from absorbing odors from other foods.
Freezer Friendly
Wrap each square tightly in plastic wrap before placing them in a freezer bag. The fudge can be frozen for up to 3 months. When ready to eat, let the squares thaw at room temperature for 20 minutes to regain their creamy texture.
Best Reheating Method
To revive a frozen or stale square, place it in a microwave‑safe dish and heat on low power for 10–15 seconds. Add a splash of water before reheating to create steam, which restores the fudge’s silky consistency. Let it cool for a minute before cutting and serving.