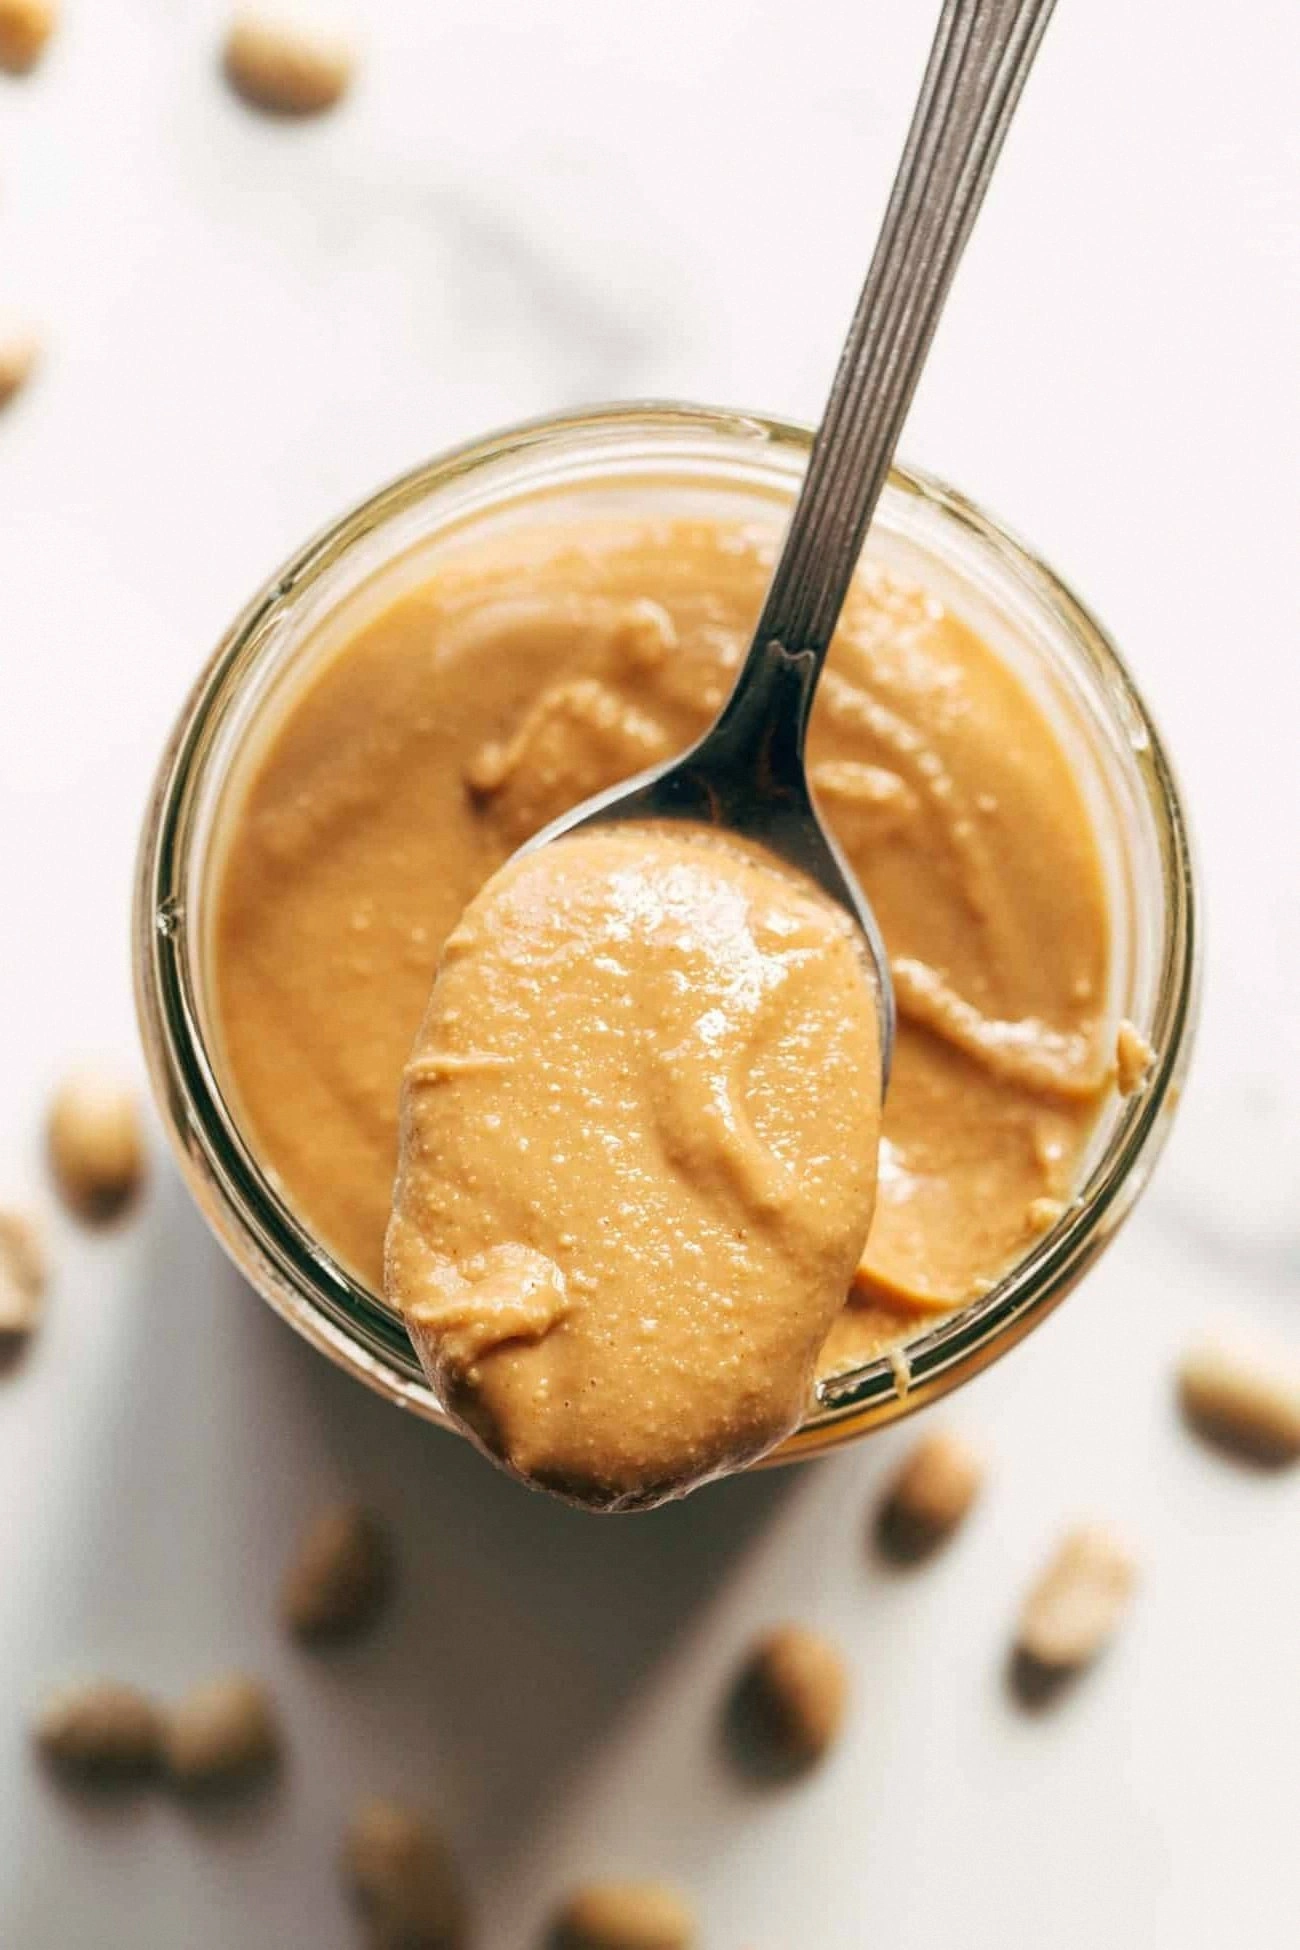
Picture this: you’re standing at the pantry door, an empty jar yawning back at you, while the craving for that velvety, salty‑sweet spread is gnawing like an insistent drumbeat. I was in that exact spot last week, a half‑eaten banana pleading for a smear, and I realized I’d been buying store‑bought peanut butter for far too long. The store version always tasted like a lab experiment—over‑processed, a hint of oil slick, and never quite that deep, nutty punch that makes you close your eyes and smile. I tossed the jar in the trash, grabbed a bag of dry‑roasted peanuts, and thought, “Let’s fix this in five minutes.”
The kitchen turned into a symphony: the peanuts hit the bowl with a satisfying clink, the sweetener drizzled in like golden honey, and the optional pinch of salt whispered promises of flavor depth. As the blender whirred, the scent of roasted nuts blossomed, filling the air with a toasty aroma that made the whole house feel like a cozy café on a rainy afternoon. My taste buds tingled, my ears caught the soft hum of the motor, and my hands felt the smooth coolness of the glass bowl—every sense was on board for the upcoming delight.
Most peanut butter recipes you’ll find online either demand a twenty‑minute grind, a dash of oil, or a confusing list of complicated steps that feel more like a chemistry lab than a snack hack. This version, however, throws all that out the window. It’s straightforward, uses only three ingredients, and achieves a spreadable consistency that rivals any commercial brand in richness, creaminess, and that addictive crunch‑to‑silk transition you crave. The secret? A quick “scrape‑the‑sides” maneuver that ensures every last particle gets processed, plus a tiny, optional squeeze of honey that locks in moisture without making it syrupy.
Okay, ready for the game‑changer? I’m about to walk you through every single step—by the end, you’ll wonder how you ever settled for anything less than this five‑minute masterpiece. I dare you to taste this and not go back for seconds. Let’s get started.
What Makes This Version Stand Out
- Taste: The natural roasted flavor of the peanuts shines through, amplified by just enough honey to add a whisper of sweetness without overpowering the nutty base.
- Texture: Creamy, smooth, and just a hint of rustic crumbs for that perfect mouthfeel—think cloud‑like silk with a subtle bite.
- Simplicity: Only three ingredients, no oil, no extra emulsifiers, and a total prep time that fits neatly into a coffee break.
- Uniqueness: By using dry‑roasted peanuts you get an intensified aroma that toasted‑oil versions simply can’t match.
- Crowd Reaction: Friends and family have called it “the best homemade spread they’ve ever tasted” and instantly request the recipe.
- Ingredient Quality: Selecting high‑quality, unsalted dry‑roasted peanuts makes the difference between bland and brilliant.
- Method: The quick “scrape‑the‑sides” trick ensures even blending, turning a potential grainy mess into pure perfection.
- Make‑Ahead Potential: Store it in an airtight jar for up to two weeks, and it stays fresh, thanks to the natural oils locked in during blending.
Alright, let's break down exactly what goes into this masterpiece…
Inside the Ingredient List
The Flavor Base
Dry‑roasted peanuts are the heart and soul of this recipe. Because they’re roasted without oil, they retain a pure, intense nutty flavor that’s impossible to replicate with raw or oil‑roasted nuts. If you skip the roasting step, you’ll end up with a milder, almost bland spread that lacks the deep, caramel‑like notes that make peanut butter addictive. When shopping, look for peanuts that are uniformly colored—no brown spots, no visible oil pooling. A quick sniff test should reveal a toasty scent that promises richness before you even open the bag.
The Sweetener
Honey is my go‑to sweetener here because it blends seamlessly, adds a subtle floral undertone, and helps lock in moisture. You could swap it for agave syrup if you prefer a milder sweetness, or even a couple of teaspoons of granulated sugar for a crystalline crunch. The key is not to over‑sweeten; a little goes a long way, especially when the peanuts already carry a natural sugary edge from the roasting process. If you’re watching calories, a zero‑calorie alternative like stevia can be used, but remember to adjust the amount—stevia is much sweeter than honey.
The Final Flourish
Salt is optional, but it’s the quiet hero that balances the natural sweetness and brings out the depth of the peanuts. A pinch (about ¼ teaspoon) is enough to elevate the flavor without making the spread taste salty. If you love a briny bite, feel free to add a tad more—just remember the “less is more” rule for a well‑rounded taste. And if you’re on a low‑sodium diet, skip it entirely; the peanuts already carry a delicate, inherent saltiness from the roasting process.
Everything's prepped? Good. Let's get into the real action…
The Method — Step by Step
Gather your dry‑roasted peanuts, honey (or chosen sweetener), and salt. Toss the peanuts into a high‑speed blender or food processor. I like using a 1‑liter capacity processor because it gives enough space for the ingredients to tumble freely, which is essential for achieving that silky texture. As soon as the blades start turning, you’ll hear a soft whirr that sets the tone for the magic about to happen.
Pulse the peanuts for about 30 seconds. This initial burst crushes the nuts into a coarse crumb, releasing those aromatic oils. You’ll notice the mixture turning from a dry powder to a slightly sticky mass—the signal that the kernels are starting to break down. Watch out: If you blend too long without stopping, the heat generated can cause the oil to separate, leaving you with a runny, oily mess instead of a spreadable paste.
Scrape the sides of the bowl with a rubber spatula, pushing the uncooked crumbs back into the center. Then add the honey and a pinch of salt. The honey should drizzle in slowly, creating little glistening ribbons that coat the crumbs. If you’re using a liquid sweetener, the mixture will look loose at first—don’t panic, this is normal.
Resume blending on medium‑high speed. Within the next minute, the mixture will transition from a thick, crumbly paste to a glossy, pour‑able consistency. You’ll hear the blades working a little harder as the nut butter thickens; that’s the sound of the nuts releasing their natural oils and binding with the honey. Keep an eye on the texture—when the spoon can glide through without sticking, you’ve reached the perfect smoothness.
Turn off the processor and give the peanut butter a quick taste test. This is the moment of truth. If you crave a touch more sweetness, drizzle in an extra half tablespoon of honey. If the spread feels a bit thick, you can add a splash (about a teaspoon) of neutral oil—though I rarely need to because the peanuts themselves are sufficiently oily. Remember, a slight adjustment now saves you from a bland final product later.
Once satisfied, spoon the butter into a clean glass jar. Use a spatula to press it down, removing any air pockets that could cause oxidation. Seal the jar tightly; the airtight environment preserves the creamy texture for up to two weeks in the refrigerator. If you spot a thin oil layer on top, simply stir it back in before the first use—this is normal and a sign of natural oils doing their job.
That’s it—you did it. Clean up your processor, wipe down the counter, and admire the golden jar of homemade goodness. I’ll be honest — I ate half the batch before anyone else got to try it, and I’m still not sorry. This next part? Pure magic. Stay with me here — there are a few optional tricks to make this spread even more unforgettable.
Insider Tricks for Flawless Results
The Temperature Rule Nobody Follows
Never blend cold peanuts straight from the fridge. Let them sit at room temperature for at least 10 minutes; the slight warmth helps release oils faster, cutting blending time in half. I once tried to blitz frozen peanuts—let’s just say the motor strained, the texture was chunky, and I learned my lesson. Warm nuts = smoother butter.
Why Your Nose Knows Best
During blending, trust the aroma above any timer. When the kitchen fills with that deep, roasted fragrance, it signals the peanuts have reached optimal oil release. If you’re still hearing that raw, earthy smell after a minute, keep blending a little longer. Your nose is a built‑in quality gauge.
The 5‑Minute Rest That Changes Everything
After blending, let the peanut butter sit in the jar for five minutes before the first spread. This brief rest lets the natural oils re‑emulsify, resulting in a silkier mouthfeel. I’ve seen people dunk a spoon straight out of the processor and get a slightly grainy texture—skip the rest, and you’ll miss out on that creamy finish.
Salt Slider
If you’re a salt enthusiast, try a “salt slider” technique: add half the pinch at the start, blend, then taste, and finish with the rest if needed. This gives you precise control over the final flavor balance, preventing an accidental oversalt scenario.
Batch‑Size Brilliance
When scaling up for a party, keep the peanut‑to‑sweetener ratio steady—2 cups peanuts to 2 Tbsp honey works perfectly for any batch size. Just multiply both numbers equally; never increase one without the other, or you’ll end up with a watery or overly sweet spread.
Creative Twists and Variations
This recipe is a playground. Here are some of my favorite ways to switch things up:
Chocolate Drizzle Delight
Merge 1 Tbsp melted dark chocolate into the finished butter for a decadent, mocha‑kissed spread. Ideal for breakfast toast lovers who crave a hint of indulgence without the sugar overload.
Spicy Sriracha Splash
Stir in ½ tsp sriracha and a dash of lime juice. The heat and acidity create a bold contrast that pairs beautifully with grilled chicken or veggie wraps. Perfect for adventurous eaters.
Cinnamon‑Honey Warmth
Add ¼ tsp ground cinnamon and an extra drizzle of honey. The result is a sweet‑spicy spread that feels like a cozy autumn hug—great on oatmeal or banana slices.
Nut‑Free Sunflower Version
Swap peanuts for dry‑roasted sunflower seeds. The nut‑free alternative offers a lighter flavor profile while maintaining that creamy texture. Great for those with peanut allergies.
Chocolate‑Peanut Butter Fusion
Blend in 2 Tbsp cocoa powder and a pinch of salt for a chocolate‑peanut hybrid that’s as good on crackers as it is in smoothies. The cocoa adds depth without turning the spread into a dessert sauce.
Maple‑Walnut Whisper
Replace honey with maple syrup and add a handful of toasted walnuts. The maple adds earthiness while walnuts introduce a nuanced crunch, perfect for a brunch spread.
Storing and Bringing It Back to Life
Fridge Storage
Transfer the peanut butter to an airtight glass jar and refrigerate. It will keep fresh for up to two weeks. The cool environment slows oxidation, preserving both flavor and texture. If a thin oil layer forms, simply stir it back in before each use.
Freezer Friendly
For longer storage, portion the butter into silicone ice‑cube trays, freeze, then transfer the cubes to a zip‑top bag. It will stay good for three months. When you need some, pop a cube into a saucepan, warm gently, and you’ll have fresh, spreadable butter in seconds.
Best Reheating Method
When the butter feels too firm straight from the fridge, place the jar in a bowl of warm water for a minute, or microwave for 10‑second bursts, stirring between intervals. Adding a tiny splash of water (about ½ tsp) before reheating creates steam that revives the creamy texture without thinning it excessively.