I was standing in my kitchen, staring at a half‑baked loaf that looked more like a sad brick than the golden masterpiece I’d promised my friends. The timer buzzed, the smoke alarm wailed, and I could swear the garlic had given up on life. That disaster sparked a dare: “Make a garlic‑herb bread that actually looks as good as it smells.” I accepted, and after a few frantic YouTube rewinds and a lot of taste‑testing (yes, I ate half the batch before anyone else got a bite), I finally nailed a version that makes the whole house feel like a five‑star bakery. This is hands down the best version you’ll ever make at home, and I’m about to spill every secret.
Picture this: a loaf pulled from the oven, its crust crackling like fresh autumn leaves, the aroma of garlic and herbs swirling in the air, and that buttery sheen catching the light like a polished marble table. You hear the faint pop of the crust as it releases from the pan, the faint hiss of steam escaping, and you can almost taste the herb‑infused butter melting on your tongue before the first bite. The texture is a paradox – airy, pillow‑soft interior that pulls apart with the ease of a well‑tuned violin string, while the edges are crisped to a perfect, caramelized snap that shatters like thin ice. Your mouth will be flooded with a savory, aromatic punch that makes you wonder why you ever settled for bland store‑bought rolls.
Most recipes get this completely wrong: they either drown the dough in oil and lose that delicate crumb, or they skimp on the herbs and end up with a bland sidekick. The secret here is a simple swirl technique that locks the garlic‑herb butter into ribbons, ensuring every slice bursts with flavor. I’m also throwing in a gluten‑free flour blend that gives the crumb a tender, almost cake‑like quality without sacrificing that rustic chew. And the best part? You only need six ingredients, and the method is so straightforward that even a kitchen rookie can pull it off without a disaster.
Okay, ready for the game‑changer? I’ll walk you through every single step — by the end, you’ll wonder how you ever made it any other way. I dare you to taste this and not go back for seconds. Let’s get started.
What Makes This Version Stand Out
- Taste: The garlic‑herb butter is infused with a balanced blend of dried herbs that coat each swirl like velvet, delivering a punchy, aromatic burst that lingers long after the last bite.
- Texture: A tender, airy crumb meets a crisp, caramelized crust that cracks open with a satisfying snap, creating a textural duet you’ll crave every time.
- Simplicity: Only six pantry staples are required, meaning you can whip up this masterpiece on a weeknight without a grocery run.
- Uniqueness: The swirl technique creates gorgeous marbled patterns that look as impressive as they taste, turning a simple side into a centerpiece.
- Crowd Reaction: Friends will gasp, “Is that store‑bought?” and then immediately ask for the recipe – a perfect conversation starter at any dinner.
- Ingredient Quality: Using gluten‑free flour adds a lightness that traditional wheat can’t match, while the olive oil adds a subtle fruitiness that elevates the flavor profile.
- Cooking Method: Baking at a high initial temperature creates steam that expands the dough, then a lower finish locks in the golden crust without burning.
- Make‑Ahead Potential: This loaf freezes beautifully; just reheat with a splash of water for that fresh‑out‑of‑the‑oven feel.
Inside the Ingredient List
The Flavor Base
Garlic is the undisputed hero here. Its pungent, slightly sweet notes become mellow and buttery when slow‑roasted in olive oil, creating a spread that seeps into every swirl. If you skip the garlic, you lose the aromatic backbone that makes the bread unforgettable. For a milder profile, use roasted garlic cloves; for a punchier bite, keep them raw and finely minced.
The Texture Crew
Gluten‑free flour is the secret weapon that gives the crumb a light, almost airy texture without the dense heaviness of regular all‑purpose flour. It’s a blend of rice, tapioca, and potato starch that mimics the elasticity of gluten. If you can’t find a pre‑mixed blend, combine 1 cup rice flour, ½ cup tapioca starch, and ½ cup potato starch. Skipping this for wheat flour will produce a heavier loaf that won’t rise as gracefully.
The Unexpected Star
Olive oil adds a subtle fruitiness and keeps the dough supple, preventing it from drying out during the long bake. It also helps the garlic‑herb butter coat the dough evenly, ensuring each bite gets a burst of flavor. If you’re watching calories, you can substitute half the oil with unsweetened applesauce, but expect a slightly different mouthfeel.
The Final Flourish
Dried herbs – a mix of oregano, thyme, and rosemary – bring an earthy, piney depth that balances the richness of the butter. If you love a smoky note, add a pinch of smoked paprika. Fresh herbs can be used for a brighter flavor, but they wilt quickly in the dough, so dried herbs are the reliable choice.
Everything’s prepped? Good. Let’s get into the real action…
The Method — Step by Step
Preheat your oven to 425°F (220°C) and place a heavy cast‑iron skillet or a thick baking sheet inside to heat up. The scorching heat creates a burst of steam when the dough hits the pan, giving the loaf its dramatic rise and a glossy crust. I love the way the metal hums – that sizzle when it hits the pan? Absolute perfection.
Kitchen Hack: Place a small pan of water on the lower rack while preheating; the added steam will help the crust stay moist and glossy.In a medium bowl, whisk together the gluten‑free flour and salt until evenly combined. This dry mix ensures the salt is distributed, preventing any salty pockets. If you notice clumps, sift the flour once – it makes a smoother dough.
In a small saucepan, melt the olive oil over low heat, then add the minced garlic and sauté for 30 seconds until fragrant but not browned. Add the dried herbs and stir for another 10 seconds, letting their oils release. Remove from heat and let the mixture cool slightly – you don’t want to kill the yeast later, but you do want the butter to stay liquid.
Combine the milk with the cooled garlic‑herb oil, then pour the liquid into the dry flour mixture. Stir with a wooden spoon until a shaggy dough forms. It will look a bit sticky – that’s exactly what we want. If it feels too dry, add a splash more milk; if it’s overly wet, sprinkle a tablespoon of extra flour.
Turn the dough onto a lightly floured surface (gluten‑free flour works fine) and knead gently for about 30 seconds, just until it comes together in a smooth ball. Over‑kneading will make the crumb dense, so keep it brief. This is the moment of truth – the dough should feel supple, not tough.
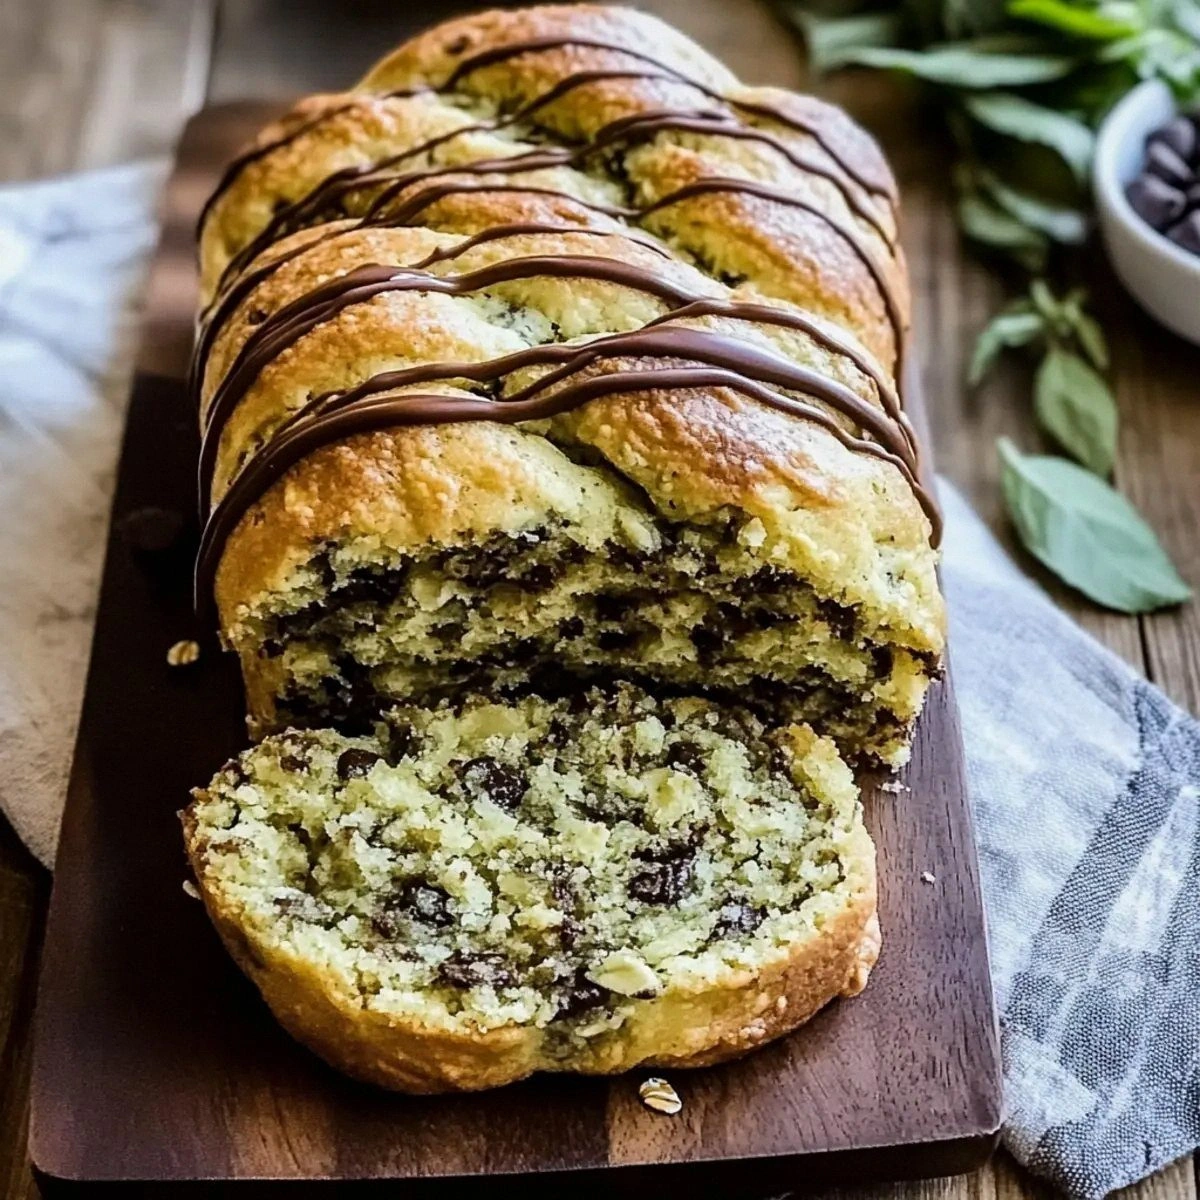
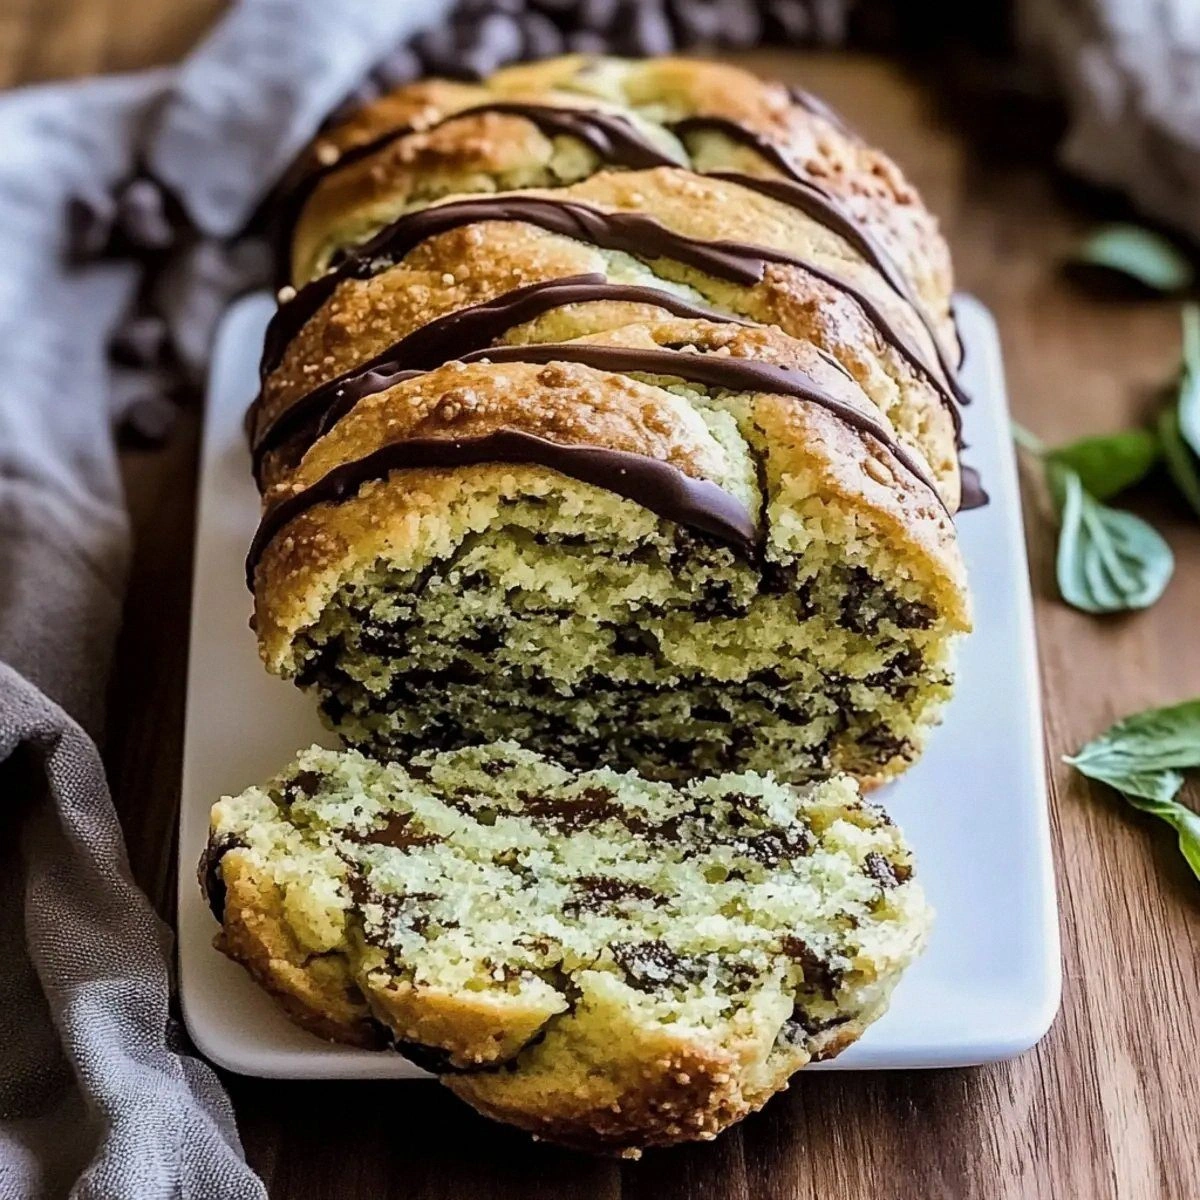
Pat the dough into a rectangle about ½‑inch thick. Spread a thin layer of the remaining garlic‑herb butter over the surface, then, using a knife, create long, diagonal swirls that run the length of the dough. The visual swirl is not just for show; it creates pockets of flavor that burst when you bite.
Fold the dough in thirds like a letter, then roll it gently to seal the swirls inside. This folding technique traps steam and creates those beautiful marble veins. If you’re feeling adventurous, you can do a second fold for an even more intricate pattern.
Watch Out: Don’t over‑fill the skillet with the dough; give it room to expand or the edges will stick and tear.Carefully transfer the shaped loaf onto the preheated skillet, using parchment paper to lift it if needed. Drizzle a tiny bit of olive oil around the edges to encourage a golden crust. Slide the skillet into the oven and bake for 12 minutes at 425°F, then reduce the temperature to 375°F (190°C) and continue baking for another 15‑18 minutes until the top is deep golden and a toothpick inserted in the center comes out clean.
When the loaf is done, remove it from the oven and let it rest on a wire rack for at least 10 minutes. This rest period lets the steam settle, making the crumb tender and the crust crisp. Slice with a serrated knife, pulling apart the swirls to reveal the beautiful herb‑infused ribbons inside.
Kitchen Hack: For an extra glossy finish, brush the top with a little melted butter right after it comes out of the oven.
That's it — you did it. But hold on, I've got a few more tricks that'll take this to another level…
Insider Tricks for Flawless Results
The Temperature Rule Nobody Follows
Start the bake hot, then drop the heat. The initial blast creates steam that lifts the dough, while the lower finish prevents the crust from burning. I once tried a steady 400°F and ended up with a pale loaf that never rose properly. Trust the two‑stage method – it’s pure magic.
Why Your Nose Knows Best
Instead of watching the timer obsessively, rely on scent. When the butter starts to caramelize and you catch a nutty, slightly sweet aroma, you’re near the perfect doneness. If you smell a faint burnt edge, pull the loaf out early and finish it on the counter.
The 5‑Minute Rest That Changes Everything
Letting the bread rest for five extra minutes after it leaves the oven allows the interior moisture to redistribute, resulting in a softer crumb. Skipping this step is the reason many home bakers end up with a dry, crumbly slice.
Butter Brush Blitz
A quick brush of melted butter mixed with a pinch of garlic right after baking adds a glossy sheen and a burst of flavor that makes the crust sing. I swear this is the secret that turns a good loaf into a legendary one.
The “Steam Splash” Revival
If you’ve ever reheated bread and found it rubbery, add a teaspoon of water to the pan and cover for 2‑3 minutes. The steam revives the crust, making it crisp again. I’ve used this trick on frozen leftovers and it works every single time.
Creative Twists and Variations
This recipe is a playground. Here are some of my favorite ways to switch things up:
Cheesy Garlic Twist
Add ½ cup shredded mozzarella to the dough before the first fold. The cheese melts into gooey pockets that complement the herb butter, making it perfect for a movie night.
Spicy Chili Kick
Stir in 1 teaspoon crushed red pepper flakes with the dried herbs. The heat balances the richness of the butter and gives the loaf a bold, lingering zing.
Lemon‑Herb Bright
Add zest of one lemon to the butter mixture and swap half the dried herbs for fresh basil. The citrus lifts the flavor, making it a great accompaniment to fish or grilled chicken.
Savory Sun‑Dried Tomato
Fold in chopped sun‑dried tomatoes after the first roll. Their tangy sweetness adds depth and a pop of color that looks stunning when sliced.
Sweet Cinnamon Swirl
For a breakfast twist, replace the garlic with 2 tablespoons brown sugar and add 1 teaspoon cinnamon to the butter. The result is a sweet‑savory loaf that pairs beautifully with coffee.
Storing and Bringing It Back to Life
Fridge Storage
Wrap the cooled loaf tightly in plastic wrap or place it in an airtight container. It will stay fresh for up to 4 days. For extra softness, add a damp paper towel inside the container.
Freezer Friendly
Slice the bread first, then layer the slices between parchment sheets and seal them in a freezer bag. It freezes for up to 3 months. When you’re ready to enjoy, pop a slice in the toaster or oven.
Best Reheating Method
Preheat the oven to 350°F (175°C), place the slice on a baking sheet, and drizzle a tiny splash of water over the top. Cover loosely with foil and heat for 8‑10 minutes. The steam revives the crust, making it taste as if it just left the oven.