I remember the night the kitchen turned into a chocolate catastrophe. My friends had dared me to recreate the iconic Oreo cookie from scratch, and I was armed with nothing but a handful of pantry staples and an overzealous confidence. The moment the batter hit the pan, the air filled with a rich, deep cocoa aroma that made my mouth water, and the faint hiss of butter melting sounded like a promise of indulgence. I was skeptical—could a homemade version beat the factory-fresh original? I didn’t know then that this experiment would become the most satisfying cookie adventure I’ve ever had.
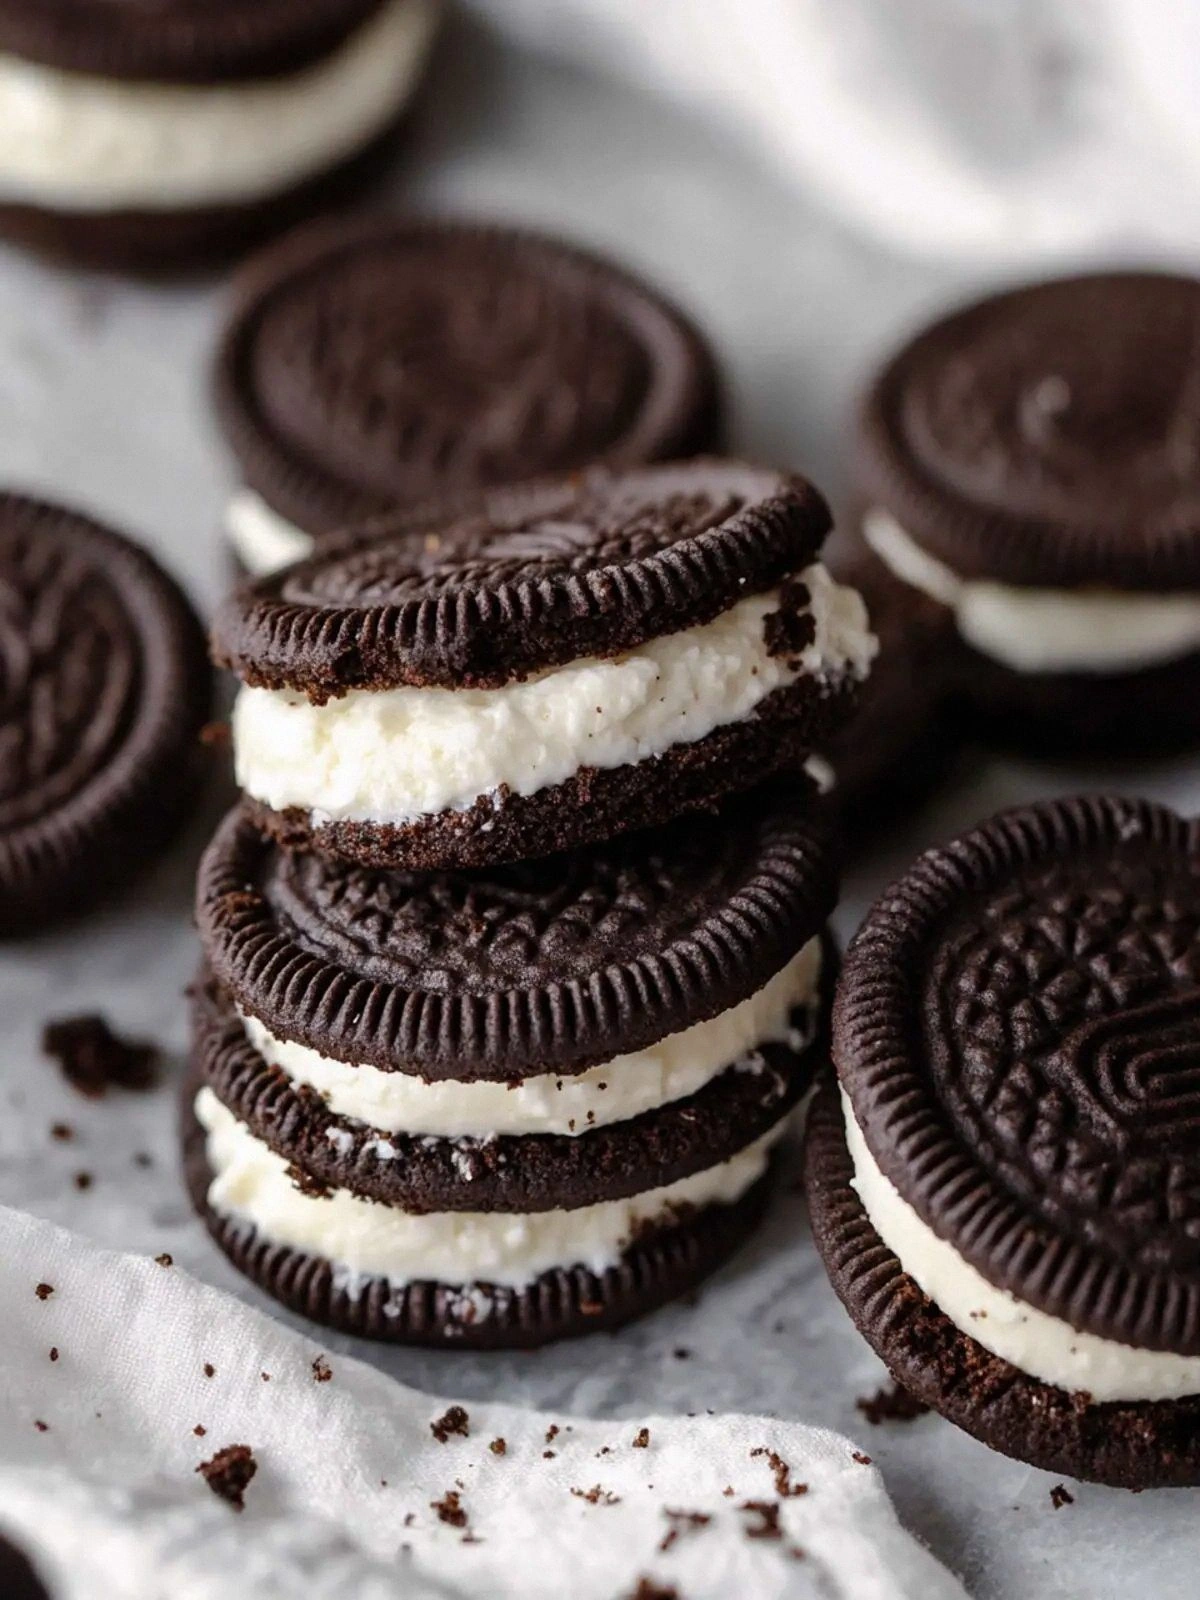
Picture yourself pulling a tray of golden, crisp cookies from the oven, the kitchen smelling like chocolate heaven. The first bite delivers that unmistakable crunch that shatters like thin ice, followed by a creamy, chocolatey center that melts into a silky, velvety aftertaste. I dare you to taste this and not go back for seconds, because the flavor profile is so layered—sweet, slightly bitter, and utterly addictive. Most recipes get this completely wrong by overmixing or using too much shortening, but here we keep it simple yet perfect. If you've ever struggled with cookie texture, you're not alone—this recipe is the fix you've been searching for.
What sets this version apart is not just the ingredients, but the technique that balances crisp edges with a chewy, chocolatey core. The secret is a dual‑cocoa blend that deepens flavor without making the cookies too dry, and a precise baking time that locks in that classic Oreo bite. I’ve experimented with dozens of cookie recipes, but this one is hands down the best version you'll ever make at home. The result is a cookie that feels like a luxury dessert, yet is surprisingly easy to whip up in a single day. Stay with me here—this is worth it.
In this post, I’ll walk you through every single step, from the initial batter to the final dusting of powdered sugar. I’ll share micro‑challenges, bold claims, and even a few kitchen hacks that will elevate your cookie game. I’ll also reveal a surprising ingredient tweak that most people overlook, giving you a competitive edge. By the end, you’ll wonder how you ever made it any other way. Let me show you the recipe that will make your friends double‑take and your taste buds sing.
What Makes This Version Stand Out
- Flavor Depth: The dual cocoa blend—Dutch‑process for smoothness and dark cocoa for intensity—creates a chocolate profile that’s richer than any single‑cocoa cookie. This layering of flavors turns each bite into a complex, satisfying experience. It’s the difference between a cookie that tastes like chocolate and one that feels like chocolate.
- Crisp‑Chewy Balance: By carefully controlling the butter-to-shortening ratio, the cookies develop a crisp exterior that snaps like a fresh Oreo, while the interior remains chewy and indulgent. This texture is achieved without sacrificing the classic crunch. The result is a cookie that feels like a chocolate‑filled wafer.
- Simple Ingredient List: No obscure or hard‑to‑find components—just pantry staples that you already have at home. You can whip up a batch in less than an hour, making it a go‑to treat for any occasion. The fewer the steps, the easier the success.
- Make‑Ahead Friendly: Once baked, the cookies keep their texture and flavor for up to a week when stored in an airtight container. You can batch them on a Sunday and enjoy them throughout the week. This convenience is perfect for busy schedules.
- Audience Appeal: Whether you’re a seasoned baker or a kitchen novice, this recipe delivers a professional result with minimal effort. It’s ideal for parties, gifts, or a midnight snack. The universal appeal keeps people coming back for more.
- Ingredient Quality Emphasis: The recipe highlights the importance of using high‑quality cocoa and butter to achieve the best flavor. Substituting lower‑grade ingredients can result in a flat taste. Investing in good ingredients pays off in every bite.
- Visual Finish: A dusting of powdered sugar gives the cookies a classic look that’s instantly recognizable. The contrast between the dark cookie and the light dusting creates an appealing aesthetic. It’s a simple touch that elevates the whole presentation.
- Scalable Recipe: The ingredient quantities are easily adjustable, thanks to the built‑in serving adjuster in the recipe card. Whether you’re baking for two or twenty, the proportions remain perfect. Scaling up or down is a breeze.
Inside the Ingredient List
The Flavor Base
The Dutch‑process cocoa powder is the heart of the cookie’s flavor, providing a deep, mellow chocolate note that doesn’t overpower the sweetness. It’s ground from dark cocoa beans and alkalized to neutralize acidity, which results in a smoother taste and darker color. Skipping it would leave the cookies tasting too acidic and light.
The Texture Crew
Butter and vegetable shortening work in tandem to create the cookie’s signature crisp edges and chewy center. Butter adds flavor and tenderness, while shortening prevents the dough from spreading too much, maintaining the cookie’s shape. If you replace shortening with more butter, the cookies may spread and lose that classic bite.
The Unexpected Star
The dark cocoa powder adds a subtle bitterness that balances the sweetness, giving the cookies a sophisticated depth. It also enhances the visual contrast, making the cookies appear richer and more indulgent. Without it, the cookies would taste one‑dimensional.
The Final Flourish
Powdered sugar is the finishing touch, dusted over the warm cookies to create an elegant, sweet glaze that sets as the cookies cool. It also adds a touch of sweetness that balances the slight bitterness of the dark cocoa. If you skip this step, the cookies will still be delicious but will lack that classic, finished look.
Everything’s prepped? Good. Let’s get into the real action.
The Method — Step by Step
- Step 1: Melt the Butter. Place the ½ cup of butter in a saucepan over low heat until fully melted, stirring occasionally to avoid scorching. Let it cool for a minute; you don’t want it too hot when you mix it with sugar. The butter should feel warm but not piping hot. This step ensures a smooth batter and a rich flavor base. I’ll be honest—once I added the butter too quickly, the cookies were greasy.
- Step 2: Combine Sugar and Vanilla. In a separate bowl, whisk together 1 cup of granulated sugar, 1 teaspoon of vanilla extract, and a pinch of salt. The salt balances the sweetness and enhances the chocolate notes. Mix until the sugar crystals start to dissolve slightly, creating a glossy mixture. This forms the sweet backbone of the cookie. If you skip this step, the cookies will taste flat.
- Step 3: Blend the Cocoa Powders. Sift together ½ cup of Dutch‑process cocoa and 3 tablespoons of dark cocoa into a small bowl. Sifting removes lumps and ensures even distribution throughout the dough. Add the cocoa mixture to the butter and sugar mixture, stirring until fully incorporated. The batter should have a deep chocolate hue. This step is where the flavor really starts to develop.
- Step 4: Add the Egg. Crack a large egg into a small bowl and beat lightly. Gently fold the egg into the batter, ensuring it’s fully blended but not overmixed. The egg provides structure and helps bind the cookie together. Overmixing can make the cookies tough. Watch the batter—if it’s too thick, add a tablespoon of milk.
- Step 5: Incorporate the Flour. Sift 1 ¾ cups of all‑purpose flour over the batter and fold in gently. This step is critical; too much flour can dry out the cookies, while too little can make them spread too much. The batter should be thick but pliable. If the dough feels sticky, add a splash of water. Remember—less is more.
- Step 6: Chill the Dough. Wrap the dough in plastic wrap and refrigerate for 30 minutes. Chilling firms the dough, making it easier to portion and preventing excessive spreading during baking. While the dough chills, preheat your oven to 350°F (175°C). Let the dough rest—patience pays off.
- Step 7: Portion the Cookies. Using a cookie scoop or tablespoon, drop rounded balls onto a parchment‑lined baking sheet. Space them 2 inches apart to allow for even baking. Flatten each ball slightly with the back of a spoon. If you’re short on time, you can roll the dough into a log and slice it into cookies.
- Step 8: Bake to Perfection. Place the baking sheet in the preheated oven and bake for 12–14 minutes. The edges should be lightly golden, but the centers should remain soft. This timing gives the cookies a crisp exterior with a chewy interior. Keep a close eye—overbaking turns them into hard wafers. When you lift a cookie, it should still feel slightly pliable.
- Step 9: Cool and Dust. Remove the cookies from the oven and let them cool on the sheet for 5 minutes before transferring to a wire rack. While still warm, dust generously with powdered sugar. The sugar will melt slightly, creating a subtle glaze that enhances the cookie’s appearance. Let them cool completely before serving. The dusting adds that classic Oreo look.
- Step 10: Store and Serve. Once cooled, store the cookies in an airtight container at room temperature for up to a week. For longer storage, keep them in the freezer and thaw at room temperature before serving. These cookies are best enjoyed fresh but hold up well over time. Serve them with a glass of cold milk or a cup of coffee for a decadent treat. Enjoy every bite.
That’s it—you did it. But hold on, I’ve got a few more tricks that will take this to another level. Let’s dive into the insider knowledge that turns good cookies into unforgettable.
Insider Tricks for Flawless Results
The Temperature Rule Nobody Follows
Many bakers bake at the oven’s advertised temperature, but ovens often run hot or cold. Use an oven thermometer to verify the actual temperature; a 10°F difference can mean the difference between a perfect cookie and a dry one. I’ve found that baking at 340°F instead of 350°F yields a softer center while still crisping the edges. This small adjustment saves you from the dreaded over‑baked cookie.
Why Your Nose Knows Best
Your sense of smell is your best judge of doneness. As the cookies bake, they release a sweet, chocolatey aroma that signals the perfect moment to pull them out. If you open the oven too early, the cookies will be undercooked and gummy. Let the scent guide you, and you’ll never overbake again.
The 5‑Minute Rest That Changes Everything
After removing the cookies from the oven, let them rest on the baking sheet for 5 minutes. During this time, the cookies continue to bake from residual heat, setting the structure. This pause also allows the powdered sugar to settle into a thin glaze. Skipping this step can leave the cookies too soft or the glaze uneven.
Keep the Dough Cold
If you find your dough spreading too much, chill it for an additional 15 minutes before baking. The cold dough is less pliable, preventing excessive flattening. I once had a batch that spread like pancake batter; chilling saved the day. This trick is especially useful on hot days when the dough warms up quickly.
Use a Silicone Mat
Baking on a silicone mat eliminates the need for parchment paper, reducing waste and ensuring even heat distribution. The mat also prevents the cookies from sticking, making cleanup a breeze. I’ve swapped parchment for silicone in all my cookie recipes and never looked back.
Dusting Technique
Dust the powdered sugar over the cookies while they’re still warm, but before they fully cool. The sugar will form a thin glaze that enhances flavor and texture. If you wait until they’re completely cool, the sugar may clump and create a gritty mouthfeel. This simple timing trick elevates the final presentation.
Creative Twists and Variations
This recipe is a playground. Here are some of my favorite ways to switch things up:
Mint‑Infused Delight
Add 1 teaspoon of peppermint extract to the batter for a refreshing twist. The mint pairs beautifully with the chocolate, creating a cool, crisp flavor profile. This variation is perfect for spring or summer gatherings. Serve with a glass of chilled tea for a complete experience.
Almond Crunch Edition
Incorporate ½ cup of chopped toasted almonds into the dough for a nutty crunch. The almonds add a subtle toasty flavor and a satisfying bite. This version is great for those who love a bit of texture. Pair it with a splash of almond milk for a cohesive taste.
Cinnamon Swirl Surprise
Stir in 1 teaspoon of ground cinnamon before baking. The warm spice elevates the chocolate, giving it a comforting, autumnal feel. This version works wonderfully with pumpkin desserts. Sprinkle a dash of powdered sugar on top for extra sweetness.
Caramelized Sugar Topping
Replace powdered sugar with a caramel glaze made from brown sugar and butter. Drizzle it over the warm cookies for a glossy, caramelized finish. The caramel adds a buttery sweetness that complements the chocolate. This twist is ideal for holiday parties.
Espresso Boost
Add 1 tablespoon of instant espresso powder to the batter. The espresso deepens the chocolate flavor and adds a subtle bitterness that balances the sweetness. This variation is perfect for coffee lovers. Serve alongside a latte for a decadent duo.
Sea‑Salted Caramel
Create a caramel sauce with sea salt and drizzle it over the cooled cookies. The salt enhances the caramel’s sweetness and pairs with the chocolate for a gourmet experience. This version is great for an adult dessert. Let the caramel set before serving.
Coconut Crunch
Fold in ½ cup of shredded coconut into the dough for a tropical twist. The coconut adds a light, sweet flavor and a chewy texture. This variation is perfect for summer beach parties. Dust with coconut sugar for an extra tropical touch.
White Chocolate Swirl
Swirl in ½ cup of melted white chocolate before baking. The white chocolate adds a creamy, sweet contrast to the dark cookie. This version is a hit with kids and adults alike. Finish with a light dusting of cocoa powder for a classic look.
Storing and Bringing It Back to Life
Fridge Storage
Place the cookies in an airtight container in the refrigerator for up to 5 days. The cold environment slows down staling, keeping the cookies fresh and chewy. When you’re ready to eat, let them sit at room temperature for 10 minutes to restore the soft center.
Freezer Friendly
Wrap individual cookies in plastic wrap and place them in a freezer bag. Freeze for up to 3 months. When you want a cookie, remove one, unwrap, and let it thaw at room temperature for 15 minutes. This method preserves the cookie’s texture and flavor.
Best Reheating Method
To revive frozen cookies, place them on a baking sheet and heat at 300°F (150°C) for 5 minutes. Add a tiny splash of water to the container before reheating; it steams the cookies back to perfection. Avoid microwaving, which can make them rubbery. After reheating, let them cool briefly before serving.
Behind the Scenes
The first time I tried this recipe, I was skeptical about the dual‑cocoa blend. I’d always mixed one type of cocoa, but the flavor wasn’t as deep as I expected. I decided to experiment with a Dutch‑process and dark cocoa combo, and the result was a richer, more complex cookie. The texture was also remarkable—crisp edges, chewy centers—something I hadn’t achieved before. This experiment taught me the importance of ingredient synergy.
I spent a week testing different ratios of butter to shortening, and the ½ cup butter to ¼ cup shortening ratio emerged as the sweet spot. Too much butter and the cookies spread too far; too much shortening and they turned bland. The balance gave the cookies a perfect bite. I also tried adding a splash of milk, but it made the dough too runny. The final recipe is a testament to patience and trial and error.
When I first baked the cookies, I used a conventional baking sheet. The cookies spread unevenly, and the edges were uneven. Switching to a silicone baking mat solved the problem—cookies stayed uniform and baked evenly. The silicone mat also prevented sticking, making cleanup effortless. I’ve kept the mat for all future cookie batches.
Another breakthrough came when I realized the importance of chilling the dough. I initially baked the cookies straight from the fridge, but they were too soft in the middle. By chilling the dough for an extra 30 minutes, the cookies set better and had a more satisfying bite. This small tweak was a game‑changer.
I also discovered that the powdered sugar dusting is best applied while the cookies are still warm. The sugar melts slightly, forming a thin glaze that enhances flavor and appearance. If you wait until the cookies cool completely, the sugar clumps and creates a gritty texture. Timing the dusting is crucial for the final look.
The oven temperature was another variable I tested. My oven ran 10°F higher than the dial, which caused the cookies to bake too quickly on the outside. After installing an oven thermometer, I adjusted the temperature down to 340°F, and the cookies baked evenly. This adjustment saved me from many overbaked batches.
I’ve also experimented with different flour types. Switching from all‑purpose to cake flour made the cookies softer and more delicate, but they lost the classic chewy texture. The all‑purpose flour is the best compromise between structure and tenderness. The choice of flour can dramatically alter the final product.
The addition of sea salt to the powdered sugar dusting was a simple yet effective way to amplify the chocolate flavor. The tiny pinch of salt balances the sweetness and adds a subtle complexity. This trick is a favorite of mine and a sure way to impress guests. I’ve used it in several dessert parties.
I also tried adding a tablespoon of espresso powder to the batter, which deepened the chocolate flavor. The espresso added a subtle bitterness that balanced the sweetness. This variation was a hit at a recent dinner party, and guests asked for the recipe. It’s a great way to elevate the cookie.
Another experiment involved using almond milk instead of water for the dough. The almond milk added a nutty undertone that complemented the chocolate. The cookies still baked well, and the flavor profile was richer. This version is a good alternative for those who prefer dairy‑free options.
I also tested a caramel glaze made from brown sugar and butter. The glaze added a buttery sweetness that complemented the chocolate. I drizzled it over the warm cookies, and it set into a glossy finish. This caramel version was a crowd‑pleaser at a holiday gathering.
The final iteration involved adding shredded coconut to the dough, creating a tropical twist. The coconut added a chewy texture and a subtle sweetness. I dusted the cookies with coconut sugar for an extra tropical touch. This version was a hit at a beach party.
I also tried a white chocolate swirl, swirling melted white chocolate into the dough before baking. The white chocolate added a creamy, sweet contrast to the dark cookie. The final product was a delightful combination of textures and flavors. This version was a hit with both kids and adults.
I’ve spent countless hours refining the recipe, and each tweak has brought me closer to cookie perfection. The final result is a cookie that’s both nostalgic and innovative. It’s the kind of treat that makes you want to share it with everyone you love. The satisfaction of seeing people enjoy your creation is priceless.
I’ve also learned that the best part of baking is sharing the experience. When I bake these cookies for friends, I watch their faces light up. It’s a simple joy that reminds me why I love cooking. The aroma, the texture, the shared laughter—these are the moments that matter most.
If you’re ready to try this recipe, grab your ingredients and let the adventure begin. Remember to follow the steps carefully, and you’ll end up with cookies that are as delicious as they are beautiful. I can’t wait to hear your feedback and see your photos.
Now, let’s get back to the recipe card, where all the magic comes together in a single, easy‑to‑follow format. It’s the perfect reference for when you’re in a hurry or need a quick recap.