I still remember the first time I brought a jalapeño popper cheese ball to a party. It was one of those potluck disasters where everyone brought chips and store-bought salsa, and I was determined to show up with something that would actually get eaten. I had this vision of a golden, bacon-studded sphere that would make people stop mid-conversation and reach for a cracker. What I didn't expect was for my friend Dave to literally hover over the platter for twenty minutes, stacking cracker after cracker like he was building a tiny edible Jenga tower. When I finally asked if he wanted the recipe, he just mumbled something about "crack in cheese form" and kept eating. That, my friends, is the moment I knew I had cracked the code.
Here's the thing about most cheese ball recipes: they're bland, mushy disasters that taste like someone blended cream cheese with sadness. They sit on the table like forgotten ornaments, getting slightly sweaty under the plastic wrap while everyone gravitates toward the veggie tray. But this jalapeño popper cheese ball? It's the life of the party. It's got that perfect balance of creamy and chunky, spicy and savory, with crispy bacon bits that shatter between your teeth and fresh jalapeños that wake up your taste buds like a splash of cold water on a hot day. The first bite hits you with that familiar jalapeño popper flavor, but then it keeps going — the cream cheese base is lightened with sharp cheddar, the bacon adds this smoky depth, and the fresh green onions make the whole thing taste alive.
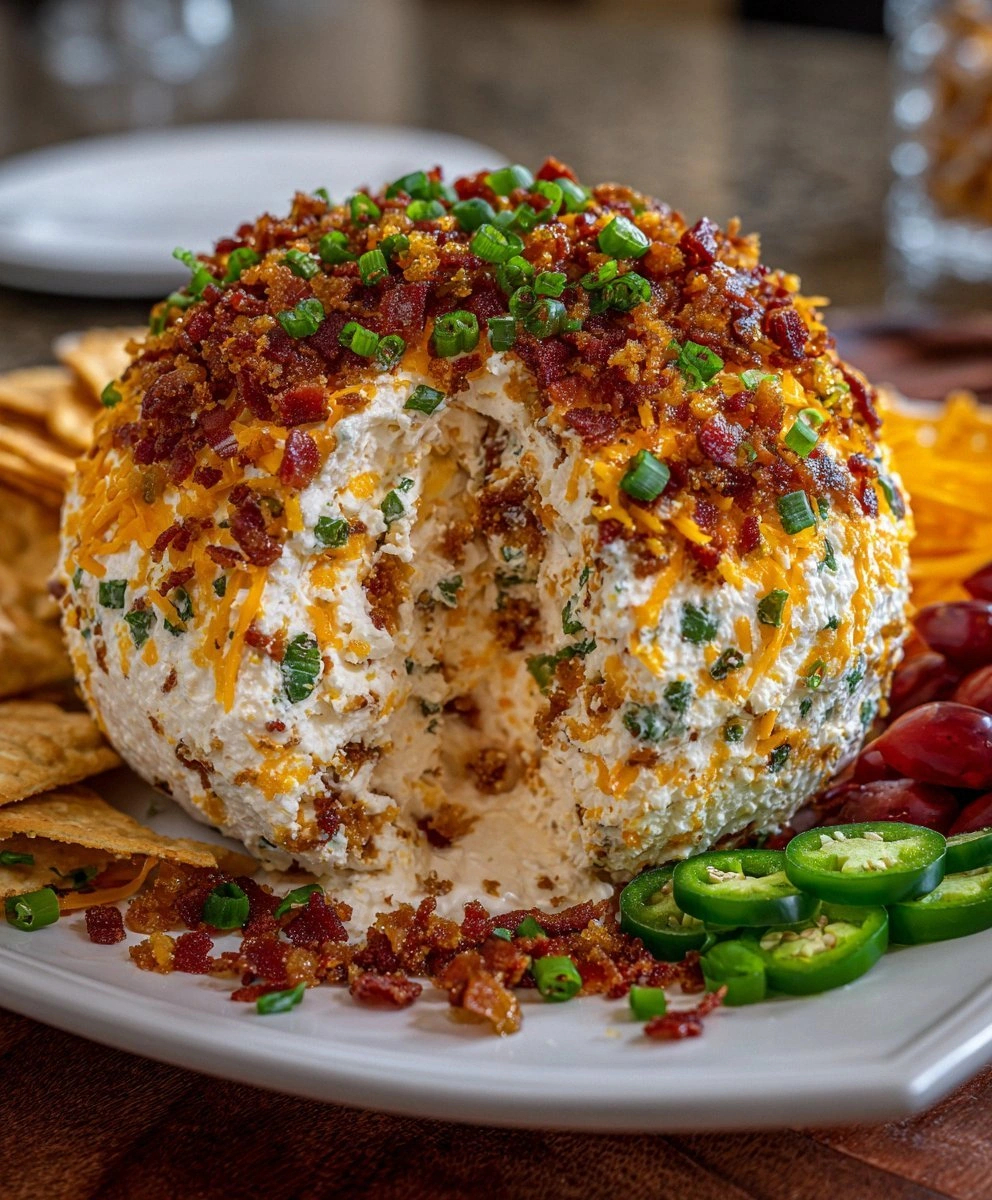
I dare you to taste this and not go back for seconds. Actually, I dare you to taste this and not find yourself hovering over the platter like Dave, strategically positioning yourself between the cheese ball and anyone else who might want some. The beauty of this recipe is that it takes everything you love about jalapeño poppers — the spicy kick, the creamy filling, the crispy bacon — and transforms it into a shareable, dippable, completely addictive party food. Picture yourself pulling this out of the fridge, rolling it in that coating of bacon and jalapeños, and setting it on the table. Within minutes, you'll have a crowd gathered around, crackers in hand, ready to demolish this thing like they're competing in an Olympic sport.
What makes this version different from every other cheese ball recipe cluttering the internet? I start with properly softened cream cheese (none of that cold, lumpy nonsense), fold in freshly grated sharp cheddar instead of the pre-shredded stuff that tastes like cardboard, and use crispy bacon that I cook until it's just shy of burnt — because those slightly charred edges are where the magic lives. The jalapeños get a special treatment that tames their raw heat while keeping their bright flavor, and the coating isn't just for looks — it's an extra layer of texture and flavor that makes every bite interesting. Let me walk you through every single step — by the end, you'll wonder how you ever made it any other way.
What Makes This Version Stand Out
Flavor Bomb: This isn't your grandmother's cheese ball. We're talking about a concentrated explosion of jalapeño popper flavors — creamy, spicy, smoky, and tangy all at once. Each bite delivers the exact taste memory of your favorite bar appetizer, but in a format that won't burn your mouth or leave you hunting for napkins.
Texture Paradise: Most cheese balls have the consistency of wet cement. This one has layers — the smooth cream cheese base, the chunky mix-ins, the crispy bacon coating that crackles when you bite into it. It's like a party in your mouth where everyone's invited and nobody's wearing boring shoes.
Make-Ahead Champion: You can assemble this beauty up to three days ahead of time. In fact, it gets better as it sits, allowing all those flavors to meld into something transcendent. Party prep has never been this stress-free.
Crowd Psychology: There's something about a cheese ball that makes people gather. Maybe it's the communal dipping, maybe it's the retro charm, but this one has the added advantage of being completely Instagram-worthy. Your guests will take photos before they even taste it.
Ingredient Quality: We're using real bacon, freshly shredded cheese, and actual jalapeños — not canned peppers or bacon bits from a jar. The difference is immediately obvious to anyone who's ever tasted the real thing.
Spice Control: Unlike traditional jalapeño poppers where you're at the mercy of whoever stuffed them, you control the heat here. Want it mild? Remove the seeds and membranes. Want to clear sinuses? Leave them in and add an extra pepper. It's your party, baby.
The Wow Factor: When you roll this sphere of deliciousness in its coating of bacon, jalapeños, and green onions, it looks like something from a fancy restaurant. But you made it in your kitchen with ingredients from the regular grocery store. That's the kind of kitchen magic that makes people think you're a culinary wizard.
Inside the Ingredient List
The Flavor Foundation
Cream cheese is the canvas we're painting on, and quality matters here. Skip the store brand and go for the good stuff — Philadelphia or another premium brand. The difference is in the texture: premium cream cheese whips up lighter and smoother, creating a base that doesn't feel like you're eating a brick of dairy. Make sure it's properly softened (room temperature) or you'll end up with lumps that no amount of mixing will fix. I've seen people try to microwave cold cream cheese and it always ends in tears and a greasy mess that separates when you mix it.
Sharp cheddar is where the personality lives. Don't you dare reach for that pre-shredded stuff in a bag — it's coated with cellulose to prevent clumping, which makes it dry and flavorless. Buy a block of good sharp cheddar and shred it yourself. The sharper, the better here because we're mixing it with mild cream cheese. I like to use a microplane for half the cheese (it melts into the mixture) and the regular shredder side for the other half (it adds little cheesy pockets throughout).
The Texture Crew
Cooked bacon is where most recipes go wrong. They tell you to cook it until it's just done, but we want it crispy — almost but not quite burnt. Those deeply caramelized edges add a bitterness that balances the richness of the cheese. Cook it low and slow in a cast iron pan, pouring off the fat as you go so the bacon fries in its own rendered fat rather than steaming in a pool of grease. Save that bacon fat though — we'll use some of it later for an extra punch of flavor.
Fresh jalapeños are non-negotiable. Canned peppers have this weird metallic taste and mushy texture that will ruin everything. Look for firm, bright green peppers with smooth skin. The heat lives in the seeds and white membranes, so you control the spice level by how much of that you leave in. Pro tip: wear gloves when handling them, unless you enjoy the sensation of setting your eyeballs on fire when you accidentally rub your eyes later.
The Unexpected Star
Green onions might seem like an afterthought, but they provide this fresh, mild onion flavor that wakes up the whole mixture. The green parts add color, but don't ignore the white parts — they've got more onion punch. Slice them thin so they distribute evenly throughout the cheese ball. If you can't find green onions, scallions work, but avoid regular onions — they're too harsh and will overpower everything else.
Garlic powder might seem boring compared to fresh garlic, but here's the thing: fresh garlic is too aggressive in this application. It fights with the other flavors and leaves you with dragon breath that scares away your party guests. Garlic powder disperses evenly and provides that background warmth that makes people say "what's in this?" without being able to put their finger on it.
The Final Flourish
The coating isn't just for looks — though it does make the cheese ball look like a beautiful, bacon-studded planet. Extra chopped bacon adds more of those crispy bits we love, while the additional jalapeños provide little bursts of fresh heat. The green onions contribute color and a fresh crunch that keeps the whole thing from being one-note. Roll the cheese ball in this mixture right before serving so everything stays crisp and vibrant.
Everything's prepped? Good. Let's get into the real action...
The Method — Step by Step
- Start by beating your softened cream cheese in a stand mixer (or with a hand mixer) on medium speed for about 2 minutes until it's light and fluffy. This step is crucial — you're incorporating air into the cream cheese, which makes the final product lighter and more spreadable. Scrape down the sides of the bowl halfway through to ensure everything gets evenly whipped. The cream cheese should look like clouds at this point, not like the dense brick it started as. If you skip this step, you'll end up with a cheese ball that's heavy and dense, like eating a dairy paperweight.
- Add your shredded sharp cheddar cheese in two additions, mixing on low speed just until combined after each addition. Over-mixing here can make the cheese break down and get greasy, so be gentle. The mixture should start to look like a beautiful, cheesy cloud with flecks of orange throughout. Stop the mixer and use a spatula to fold from the bottom of the bowl up, ensuring no pockets of plain cream cheese remain. This is where the flavor foundation gets built — the sharp cheddar is going to provide that tangy counterpoint to all the rich cream cheese.
- Now comes the fun part — adding all the mix-ins. Toss in your crispy bacon bits (save some for the coating), chopped jalapeños, sliced green onions, garlic powder, and a pinch of salt and pepper. Switch to a spatula and fold everything together by hand. This is where you get to feel like a sculptor, gently incorporating all these beautiful bits into the creamy base. The mixture should look like confetti — colorful and inviting. Don't over-mix or you'll break down the jalapeños and bacon into mush.
- Lay out a large piece of plastic wrap on your counter and scrape the cheese mixture into the center. Use the plastic wrap to help you form it into a rough ball shape — don't worry about perfection here, we're just getting it into a manageable form. Twist the top of the plastic wrap to seal, then use your hands to shape it into a smoother sphere. The warmth from your hands will help smooth out any lumps or cracks. Place this in the refrigerator for at least 2 hours, or up to 24 hours. This chilling step is non-negotiable — it allows the flavors to meld and the mixture to firm up enough to hold its shape.
- While your cheese ball is chilling, prepare the coating. Chop your reserved bacon extra fine — you want it to stick to the outside of the cheese ball, not fall off in chunks. Finely dice one jalapeño (removing seeds if you want less heat) and slice the green parts of two green onions. Mix these together in a shallow dish or plate. The ratio is up to you, but I like about 60% bacon, 30% jalapeño, and 10% green onion. This coating is going to be the first thing people taste, so make it count.
- After the chilling time, remove the cheese ball from the refrigerator and unwrap it. It should be firm but not rock hard — if it's too soft, chill it longer. If it's too hard, let it sit at room temperature for 15 minutes. Place your coating mixture on a plate and gently roll the cheese ball in it, pressing the coating into the surface so it adheres. Rotate and roll until every surface is covered in this beautiful, crunchy, spicy mixture. Don't be shy here — really press it on there.
- Transfer your beautifully coated cheese ball to a serving plate and let it sit at room temperature for about 20 minutes before serving. This allows it to soften slightly, making it easier to spread. You want it to be spreadable but still hold its shape — think soft butter consistency. Serve it surrounded by an assortment of crackers, sliced baguette, and vegetable crudités. The contrast of the creamy, spicy cheese ball with crisp crackers is what makes this so addictive.
- Store any leftovers (though I doubt there will be any) wrapped tightly in plastic wrap in the refrigerator for up to 5 days. The coating might get slightly soft, but the flavor will continue to develop and get even better. You can refresh the coating by rolling it in fresh bacon bits before serving again. I've been known to make a half-batch just for myself to keep in the fridge for midnight snacking — no judgment here.
That's it — you did it. But hold on, I've got a few more tricks that'll take this to another level...
Insider Tricks for Flawless Results
The Temperature Rule Nobody Follows
Here's the thing that separates amateur cheese balls from professional ones: temperature control at every stage. Your cream cheese needs to be genuinely room temperature — not slightly less cold, not microwaved into a puddle, but properly softened. When you press it with your finger, it should leave an indentation without feeling greasy. If it's too cold, you'll get lumps that no amount of mixing will fix. Too warm, and your cheese ball will be soft and greasy instead of light and fluffy. I leave mine out overnight before making this recipe, and the difference is immediately obvious.
After you form the cheese ball, it needs to chill until it's completely firm — I'm talking at least 2 hours, but overnight is even better. This isn't just about making it easier to roll in the coating (though that's important). The chilling time allows the flavors to meld and intensify, creating that complex taste that makes people ask for the recipe. Then, and this is crucial, let it sit out for 20-30 minutes before serving. Cold cream cheese has no flavor — it needs to warm up slightly for all those beautiful tastes to bloom on your tongue.
Why Your Nose Knows Best
When you're selecting jalapeños, don't just grab the first ones you see. Pick them up and smell them — yes, right there in the grocery store. A good jalapeño should smell green and fresh, with just a hint of spice. If it has no smell, it'll have no flavor. If it smells overly spicy or has brown spots, it's past its prime and will taste bitter. The best jalapeños are firm, bright green, and have smooth skin without wrinkles. Size matters too — smaller peppers are usually spicier, while larger ones tend to be milder. I always buy one extra pepper because you never know when you'll need more heat or more volume.
Here's a secret that most recipes don't tell you: taste your jalapeños before adding them to the mix. Cut off a tiny piece and try it. Sometimes you'll get a pepper that's surprisingly mild, sometimes you'll get one that'll make your eyes water. This quick taste test lets you adjust how much you add. If your peppers are mild, you might want to leave some seeds in or add an extra pepper. If they're nuclear, remove all the seeds and membranes, and maybe use less than the recipe calls for. Your future self (and your party guests) will thank you.
The 5-Minute Rest That Changes Everything
After you roll your cheese ball in the coating, resist the urge to serve it immediately. Let it rest for 5 minutes — just 5 minutes — and something magical happens. The coating adheres better to the surface, the slight condensation from the cold cheese ball helps everything stick, and the flavors have a moment to settle. This brief pause also allows the cheese ball to come to the perfect serving temperature. If you serve it straight from the fridge, it'll be too firm and the flavors will be muted. Those 5 minutes are the difference between a good cheese ball and a great one.
I learned this trick from watching people at parties. The cheese balls that disappeared fastest were always the ones that had been sitting out for just a few minutes — soft enough to spread easily, but still holding their shape. The ones served straight from the fridge sat there looking pretty while people reached for other appetizers. Temperature affects not just texture but flavor too. Cold dulls taste buds, so all that careful seasoning and ingredient selection goes to waste if you serve it too cold.
Creative Twists and Variations
This recipe is a playground. Here are some of my favorite ways to switch things up:
The Smoky Chipotle Version
Replace half the jalapeños with chipotle peppers in adobo sauce, minced super fine. The smoky heat from the chipotles adds incredible depth, and the adobo sauce gives everything a beautiful reddish tint. Cut back on the garlic powder since the chipotles bring their own savory notes. Roll the finished cheese ball in a mixture of crushed tortilla chips and bacon bits for a Mexican-inspired twist. This version pairs perfectly with tortilla chips instead of crackers, and a cold Mexican beer on the side.
The Everything Bagel Remix
Everything bagel seasoning belongs on more than just bagels, and it transforms this cheese ball into a brunch superstar. Replace the coating with a generous roll in everything bagel seasoning, and add some toasted sesame seeds to the cheese mixture itself. Swap the sharp cheddar for everything bagel cream cheese (yes, that's a thing, and yes, it's amazing). Serve this version with mini bagel chips and watch it disappear at your next brunch gathering. The sesame, garlic, and onion flavors play beautifully with the bacon and jalapeños.
The Mediterranean Makeover
Okay, this one sounds weird but trust me. Replace the bacon with crispy prosciutto, swap the cheddar for feta and cream cheese mixture, and add chopped sun-dried tomatoes and fresh oregano. Use pickled jalapeños instead of fresh for a different kind of heat that plays well with the Mediterranean flavors. Roll the finished ball in a mixture of chopped prosciutto, minced sun-dried tomatoes, and fresh herbs. Serve with pita chips and prepare for people to ask what cooking show you learned this from.
The Breakfast of Champions
Add everything you love about breakfast to this cheese ball. Cook your bacon until it's extra crispy (almost burnt), mix in some finely diced smoked sausage or chorizo, and add a tablespoon of maple syrup to the cheese mixture. The sweet-savory combination is absolutely addictive, and the maple syrup helps balance the heat from the jalapeños. Roll it in a mixture of the crispy bacon and some crushed cornflakes for extra crunch. This version is dangerous because you'll find yourself eating it for breakfast, lunch, and dinner.
The Vegan (But Still Amazing) Version
Before you roll your eyes, hear me out. Use a mixture of vegan cream cheese and finely chopped smoked almonds (for the bacon flavor), add some liquid smoke and nutritional yeast for umami, and use roasted jalapeños for deeper flavor. The key is getting that smoky, umami flavor that bacon provides. Roll the finished ball in chopped smoked almonds and fresh herbs. Even my most carnivorous friends devour this version and ask for the recipe. It's not exactly the same, but it's delicious in its own right.
The Holiday Special
For holiday parties, add some seasonal flair. Mix in some dried cranberries for sweetness and color, use maple bacon instead of regular, and add a touch of fresh thyme or rosemary. Roll the finished ball in the bacon mixture with some additional dried cranberries for a festive look. The sweet-savory combination screams holiday party, and the red and green colors make it look like you planned it that way (even if you didn't).
Storing and Bringing It Back to Life
Fridge Storage
The beauty of this cheese ball is that it actually improves with age — to a point. Wrapped tightly in plastic wrap and stored in an airtight container, it'll keep for up to 5 days in the refrigerator. The flavors continue to meld and intensify, making it even more delicious on day 3 than on day 1. After 5 days, though, the fresh jalapeños start to break down and can make the mixture watery. If you've added the coating, it might get slightly soft, but a quick roll in fresh bacon bits before serving will perk it right back up. I always make a double batch because it keeps so well, and having one ready in the fridge has saved me during unexpected guests more times than I can count.
Here's a pro tip: if you're storing it for more than a day, wait to add the coating until just before serving. The coating will stay crisp and fresh, and you won't get that slightly soggy texture that happens when bacon bits sit in the fridge. Keep the coating mixture in a separate zip-top bag, and when you're ready to serve, just roll the cheese ball in it. Takes an extra 30 seconds but makes a world of difference in texture.
Freezer Friendly
Yes, you can freeze this cheese ball, but with some caveats. The cream cheese base freezes beautifully, but the fresh jalapeños can get a little mushy upon thawing. If you know you're going to freeze it, consider using pickled jalapeños instead of fresh — they hold up better to freezing and thawing. Wrap the uncoated cheese ball tightly in plastic wrap, then in foil, and freeze for up to 2 months. Thaw it overnight in the refrigerator, then let it come to room temperature for about an hour before rolling in fresh coating and serving.
The texture will be slightly different after freezing — a bit more crumbly and less creamy — but the flavor will still be excellent. I wouldn't serve a previously frozen cheese ball to company without doing a test run first, but for family snacking or casual get-togethers, it's perfectly fine. In fact, I always keep one in the freezer during the holidays because you never know when you'll need an appetizer in a pinch.
Best Reheating Method
Technically, you don't reheat a cheese ball — you serve it at room temperature. But if it's been in the fridge and gotten too firm, there's a trick to bringing it back to the perfect consistency. Remove it from the refrigerator 30-45 minutes before serving, depending on your room temperature. If you're in a hurry, you can cut it in half to help it warm up faster. The goal is soft enough to spread easily but still firm enough to hold its shape. If the coating has gotten soft, just roll it in some fresh bacon bits right before serving.
Here's a little secret: if your cheese ball has been sitting out at a party and gotten too soft, you can actually pop it back in the freezer for 10-15 minutes to firm it back up. Just don't forget about it, or you'll end up with a cheese popsicle. This trick has saved me during long parties where the cheese ball sits out for hours. A quick trip to the freezer, and it comes back looking like you just pulled it from the fridge.